Hi all,
A few of you may remember my story of how our King George pool collapsed:
http://www.troublefreepool.com/threads/72842-New-member-wondering-about-AGP-warranties
So the new pool is moving along. I've come to the conclusion (after reading here and in some AGP installation instruction manuals) - not necessarily right, but it's my belief that the old pool failed due to poor installation. The company that put in the old pool (now out of business) never dug down to the lowest spot, so at the low end, they used gravel to support concrete blocks. Over the 5 years, the pool definitely settled to that side (I could see the water line off level at the top) ... that's a red flag from now on ! If it happens again, I'll drain the pool and fix it !
Our excavator talked with Chuck from Radiant Pools in person (nice people out at Radiant). They still highly recommended that the pool be set on undisturbed soil, but we're doing things a little differently. When we dug down to the lowest point, we were actually about 8" below the old pool (partly because the circle is bigger - we went out to 28-29' diameter for a 24' diameter pool). That would have caused three problems:
1. Deck would need to be lowered.
2. Pool would be sitting lower in a yard that gets wet
3. Would need fencing on top of pool to be 48" above ground level from the high side
So then we backfilled with gravel, compacted down several times. I'm pretty comfortable with it - it's nice seeing 2' of compacted surface out beyond the pool. But I'll keep an eye on it to make sure it doesn't settle off level.
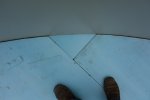
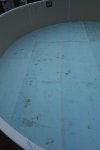
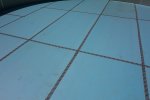
A good friend (they guy who built the deck) helped me put the cement blocks in, tamp some dead sand in over the gravel to get the surface even flatter in preparation for the foam, and get the walls up. Later this week, I'll cut the foam to fit and finish up the plumbing. Then on Saturday morning, we'll put the liner in and wait for the water delivery.
And because threads like this are useless without pictures (or so I've heard) :
Starting in the rain


The equipment was on the lawn, so I had that area dug & filled with a few inches of gravel. We'll cover it with stone.

Geotextile fabric. I'm told they lay this stuff over soft ground, cover it with 6" of gravel, and get a surface that construction vehicles can drive over.


Crop circles:

Getting the blocks in was a tedious job. Digging, measuring, digging, measuring, leveling, filling, tamping ... It rained the night after we finished, and when we started up again two days later (to put the walls up) we double checked the blocks and they were all within 1/16" of each other (at least in the centers).


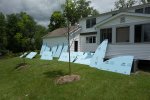
The wall panels are pretty neat. Strong, aluminum on two sides with styrofoam in between. The only problem I see is that they're prone to denting. If a lawnmower kicks up a stone or a baseball hits it, it's going to dent. The panels came 5 to a box, and the bottom panel in each box had a small dent (like a car door ding) - I suspect I did that flopping the boxes onto our gravel driveway (one of them had to get moved around a couple times). Those panels got placed next to the deck where nobody will see them, but I anticipate a few dents over the years to come).


The splines that hold the panels together.

The deck was previously shaped to go around a pool with straight panel sides, so has to be reshaped around a rounded pool. The old pool was also not quite centered (the deck is centered off the patio doors leading from the back of the house) so the deck was 16" longer on one side than the other. That should be corrected now as well.


This is the "premium" 4" coping. I'm not real impressed. It's plastic (the King George had a steel deck you could walk on - not that I made a habit of that !) I probably won't attach the solar cover reel to this coping, as I think it would likely break it at some point. There are a pair of steel clips that go over the coping to attach a ladder or other accessory if need be, but I don't think those would help much, so I'll probably mount the solar reel ends to a pair of posts on either side of the pool. Also, the coping doesn't seem to really fit well. I called Radiant to get advice before screwing it in place and I'm sure it will be fine, but I was expecting a higher quality product (the premium coping cost an extra $500 !) I need to use a piece of coping as a guide for cutting the foam for the bottom before I screw it in place anyway.

This extra return fitting is a housing for an LED light.

More to come ...
- Dennis
A few of you may remember my story of how our King George pool collapsed:
http://www.troublefreepool.com/threads/72842-New-member-wondering-about-AGP-warranties
So the new pool is moving along. I've come to the conclusion (after reading here and in some AGP installation instruction manuals) - not necessarily right, but it's my belief that the old pool failed due to poor installation. The company that put in the old pool (now out of business) never dug down to the lowest spot, so at the low end, they used gravel to support concrete blocks. Over the 5 years, the pool definitely settled to that side (I could see the water line off level at the top) ... that's a red flag from now on ! If it happens again, I'll drain the pool and fix it !
Our excavator talked with Chuck from Radiant Pools in person (nice people out at Radiant). They still highly recommended that the pool be set on undisturbed soil, but we're doing things a little differently. When we dug down to the lowest point, we were actually about 8" below the old pool (partly because the circle is bigger - we went out to 28-29' diameter for a 24' diameter pool). That would have caused three problems:
1. Deck would need to be lowered.
2. Pool would be sitting lower in a yard that gets wet
3. Would need fencing on top of pool to be 48" above ground level from the high side
So then we backfilled with gravel, compacted down several times. I'm pretty comfortable with it - it's nice seeing 2' of compacted surface out beyond the pool. But I'll keep an eye on it to make sure it doesn't settle off level.
A good friend (they guy who built the deck) helped me put the cement blocks in, tamp some dead sand in over the gravel to get the surface even flatter in preparation for the foam, and get the walls up. Later this week, I'll cut the foam to fit and finish up the plumbing. Then on Saturday morning, we'll put the liner in and wait for the water delivery.
And because threads like this are useless without pictures (or so I've heard) :
Starting in the rain


The equipment was on the lawn, so I had that area dug & filled with a few inches of gravel. We'll cover it with stone.

Geotextile fabric. I'm told they lay this stuff over soft ground, cover it with 6" of gravel, and get a surface that construction vehicles can drive over.


Crop circles:

Getting the blocks in was a tedious job. Digging, measuring, digging, measuring, leveling, filling, tamping ... It rained the night after we finished, and when we started up again two days later (to put the walls up) we double checked the blocks and they were all within 1/16" of each other (at least in the centers).


The wall panels are pretty neat. Strong, aluminum on two sides with styrofoam in between. The only problem I see is that they're prone to denting. If a lawnmower kicks up a stone or a baseball hits it, it's going to dent. The panels came 5 to a box, and the bottom panel in each box had a small dent (like a car door ding) - I suspect I did that flopping the boxes onto our gravel driveway (one of them had to get moved around a couple times). Those panels got placed next to the deck where nobody will see them, but I anticipate a few dents over the years to come).


The splines that hold the panels together.

The deck was previously shaped to go around a pool with straight panel sides, so has to be reshaped around a rounded pool. The old pool was also not quite centered (the deck is centered off the patio doors leading from the back of the house) so the deck was 16" longer on one side than the other. That should be corrected now as well.


This is the "premium" 4" coping. I'm not real impressed. It's plastic (the King George had a steel deck you could walk on - not that I made a habit of that !) I probably won't attach the solar cover reel to this coping, as I think it would likely break it at some point. There are a pair of steel clips that go over the coping to attach a ladder or other accessory if need be, but I don't think those would help much, so I'll probably mount the solar reel ends to a pair of posts on either side of the pool. Also, the coping doesn't seem to really fit well. I called Radiant to get advice before screwing it in place and I'm sure it will be fine, but I was expecting a higher quality product (the premium coping cost an extra $500 !) I need to use a piece of coping as a guide for cutting the foam for the bottom before I screw it in place anyway.

This extra return fitting is a housing for an LED light.

More to come ...
- Dennis


