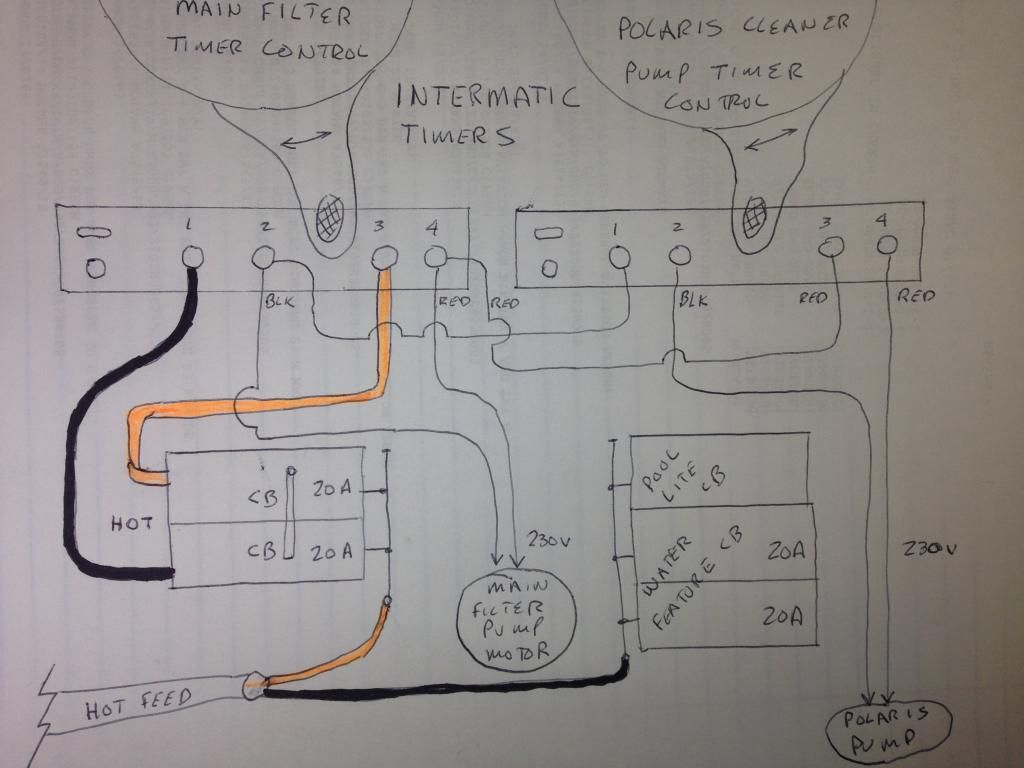
What size breaker feeds that box from the main panel?
I will have to check when I get home tomorrow.
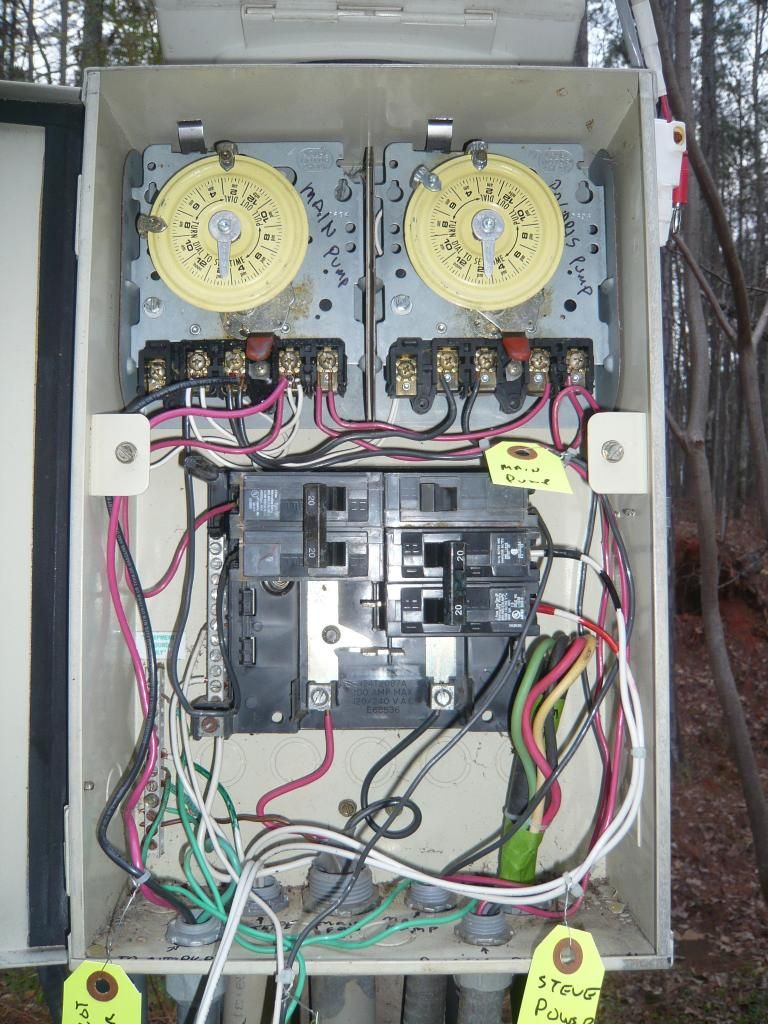
I am a bit curious about the abandoned cable in the lower right hand side.
I did this temporarily just to work on the system and ID the wires and clean it up. It is a freeze guard.
That looks like it may have been the original feed based on the wire size. The wire feeding it now looks to be a bit small.
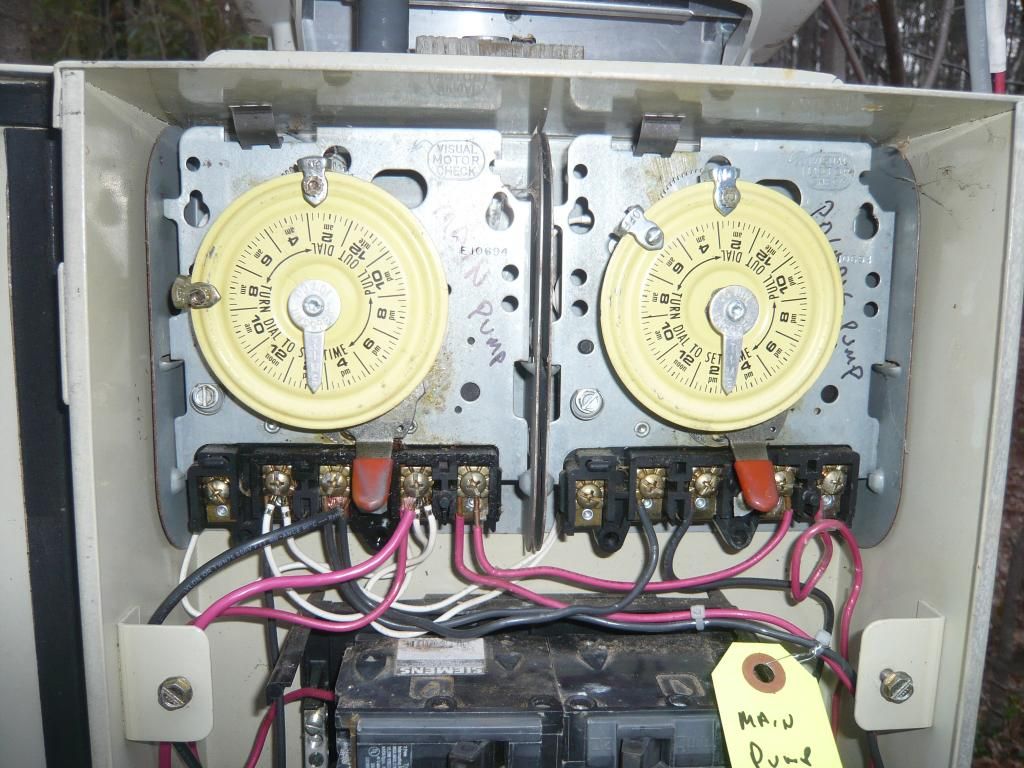
Not real sure what the smaller white wires are doing on the terminals of the left hand timer. Kind of hard to trace them. It may be they are the power feeds to the timer motors.
I am a bit concerned about what type of wire was used coming in and out of the box. My concern comes from the fact that two white wires were repurposed as hot leads. The way they are used is to code as they are marked. I am more concerned that they most likely come from romex type cable. If this is the case it must be rated for direct burial (uf-b)even if it is in pipe as NM is not rated for wet locations.
not sure here... prob is not up to code...I know the white wires are in conduit.
What do the wires go to that hang out of the front of the box?...To a water feature
As far as everything else, It looks pretty good. A little sloppier than I would like, but still functional.