Hello - I've received a lot of great help from this forum so I thought I would try and pay some of that back. Firstly my story: We just bought our second (replacement) Intex Ultraframe pool. First one lasted 3 years.
While I was cutting open the bags of Salt to empty into the full pool - I swung the knife out a little wide at the end of a cut and slashed a 1 1/2" tear in the side wall of our brand new pool. I was devastated.
I tried to quickly patch underwater (I have done this before successfully on a leak in the floor of our last Intex pool). I also applied a patch to the outside wall. All looked OK for about 12 hours and then it started to leak . . . .
If you haven't tried it before, forget about removing old patches. Heat, plastic scrappers, nothing will budge welded plastic without destroying the underlying vinyl.
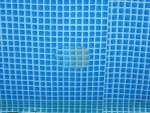
All I could do now was apply even larger patches over the existing failed patches and hope for the best. Luckily I had cut some squares out of the old Intex liner before we disposed of it. So I used these as the new patches, cut into oval shapes.
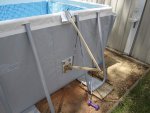
I needed to hold the patches in place while the plastic bonding cured, so I made a simple mechanism. Hope the pictures help if you want to make one of your own.
I applied the external patch today so I will post back tomorrow and let you know how it all holds together when I refill the pool.
Wish me luck!
While I was cutting open the bags of Salt to empty into the full pool - I swung the knife out a little wide at the end of a cut and slashed a 1 1/2" tear in the side wall of our brand new pool. I was devastated.
I tried to quickly patch underwater (I have done this before successfully on a leak in the floor of our last Intex pool). I also applied a patch to the outside wall. All looked OK for about 12 hours and then it started to leak . . . .
If you haven't tried it before, forget about removing old patches. Heat, plastic scrappers, nothing will budge welded plastic without destroying the underlying vinyl.
All I could do now was apply even larger patches over the existing failed patches and hope for the best. Luckily I had cut some squares out of the old Intex liner before we disposed of it. So I used these as the new patches, cut into oval shapes.
I needed to hold the patches in place while the plastic bonding cured, so I made a simple mechanism. Hope the pictures help if you want to make one of your own.
I applied the external patch today so I will post back tomorrow and let you know how it all holds together when I refill the pool.
Wish me luck!