
I have been lurking here for about the last 2 months after I accidentally found the site when searching for pool ideas.
I must say the level of info shared here is outstanding and I really wish I had found this before I started building my island.
We spend a lot of time outdoors and we plan on adding a new pool within the next 12 months. We've been in this house for three years and wanted to extend the patio area to entertain. So after about two years of looking and planning, we decided it was time to tackle our next project. As the talk of the outside island/BBQ started, the project has evolved. We went from an L-Shaped design to a U-Shaped design with a sink and L.E.D. lighting. I have included pictures from the beginning of our island/BBQ project through it's completion.
We developed and submitted the building plans to the city to add an extension of five feet to the patio cover, run water, gas and electrical from the front yard to the back patio area.
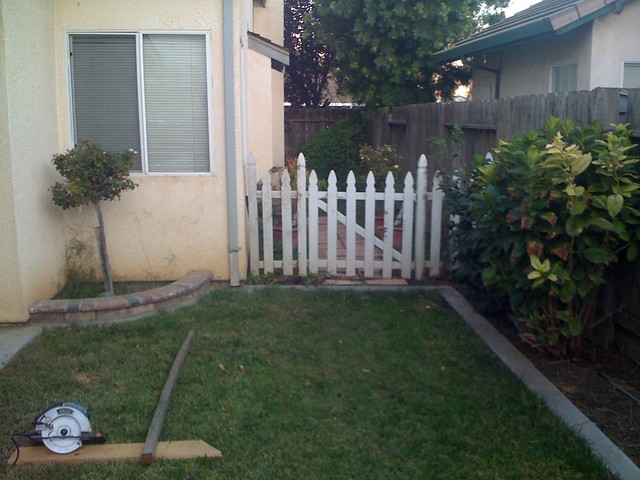
This was the existing landscaping.
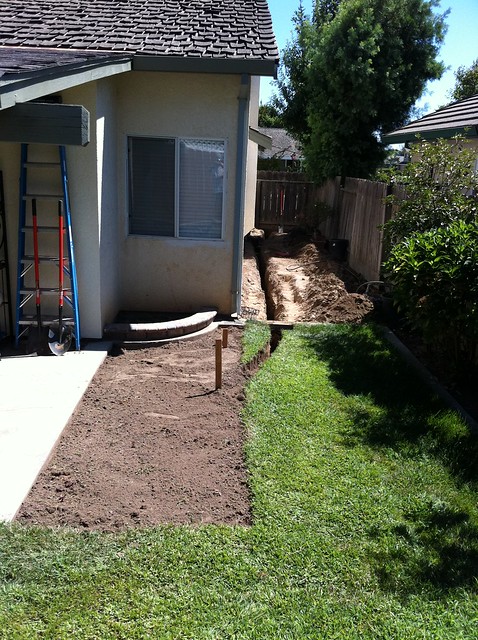
We removed everything from the side yard and the digging began. The trench had to be 24" deep for the lines to be run.
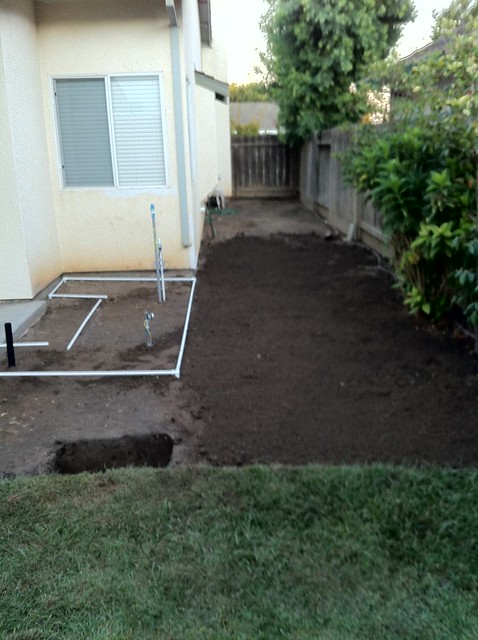
Plumbing, gas line and electrical conduit installed and passed inspection. The area has been graded for concrete and an 18" square footing hole for the patio cover post bracket was dug. The PVC pipe was used to allow us to walk around the proposed island to insure that our clearances were okay. The PVC frame will appear in another picture.
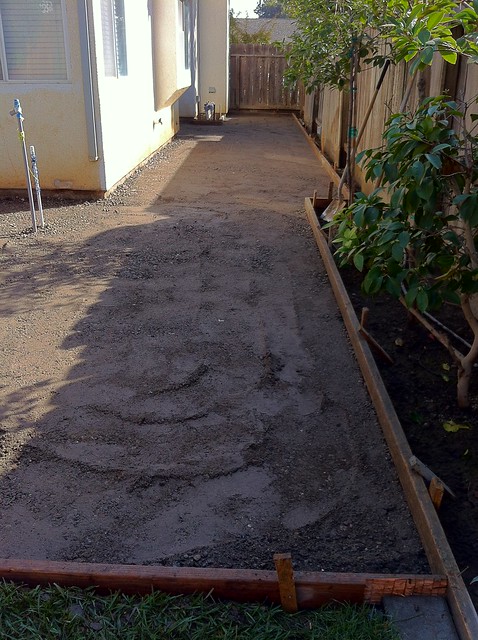
The concrete forms are installed and the gravel base material has been compacted. Ready for concrete.
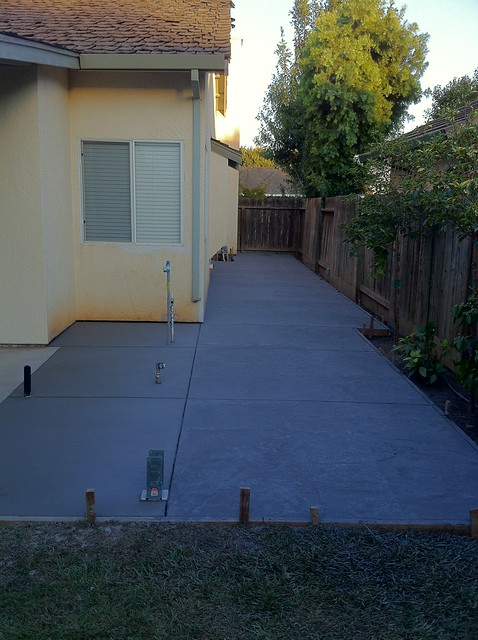
The concrete was poured and the concrete along the side of the house was stamped. Next thing on the list is painting this side of the house.
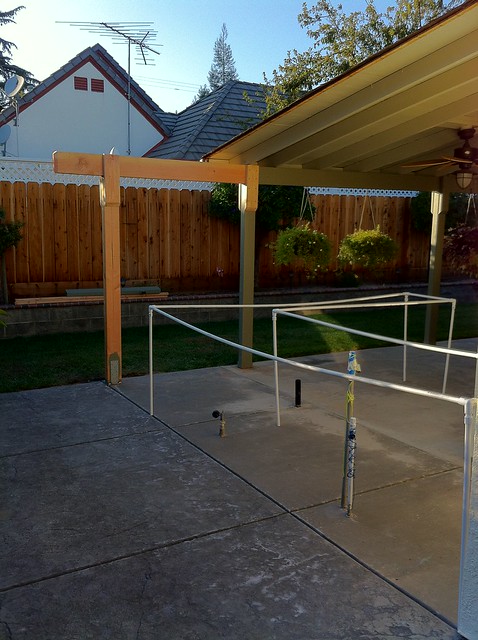
The post and header is placed for the extension of the patio cover. The PVC pipe was used to verify the islands planned dimensions to the patio. We wanted a three dimensional layout vs. tape on the ground to walk around the structure.
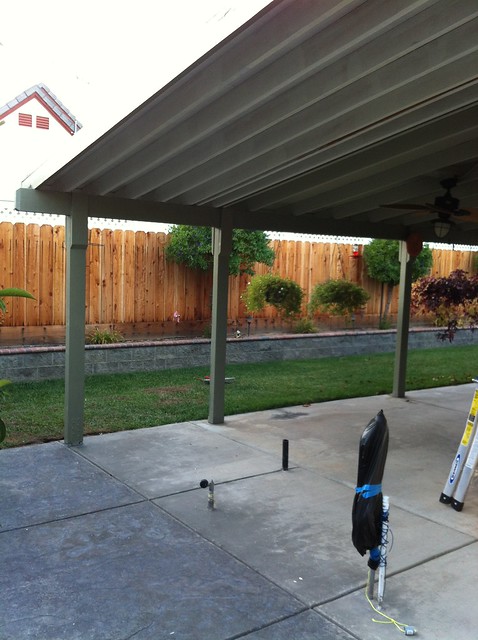
The patio cover extension was built and in the process of being painted.
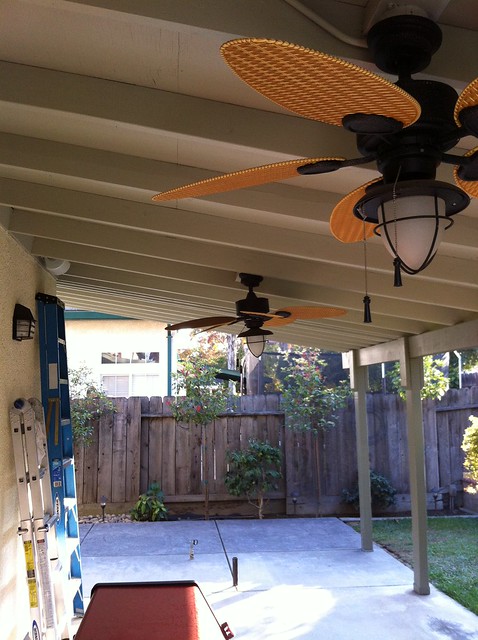
Another perspective of the addition to the patio area. Ceiling fans and speakers installed and the patio area is ready for an BBQ island.
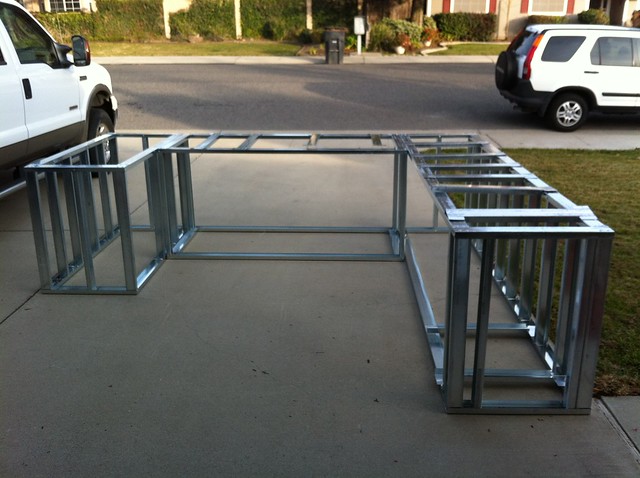
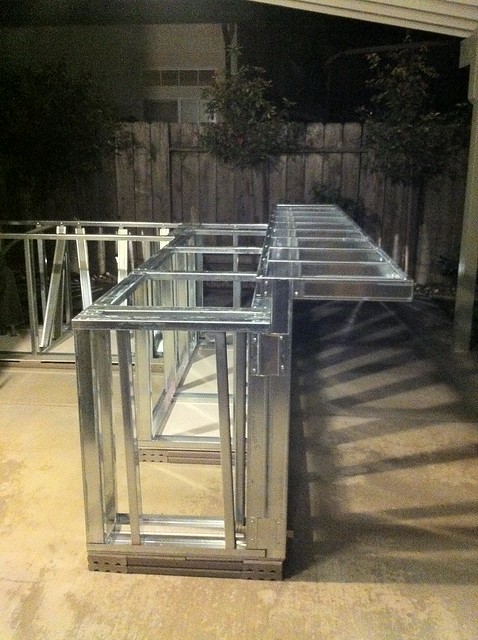
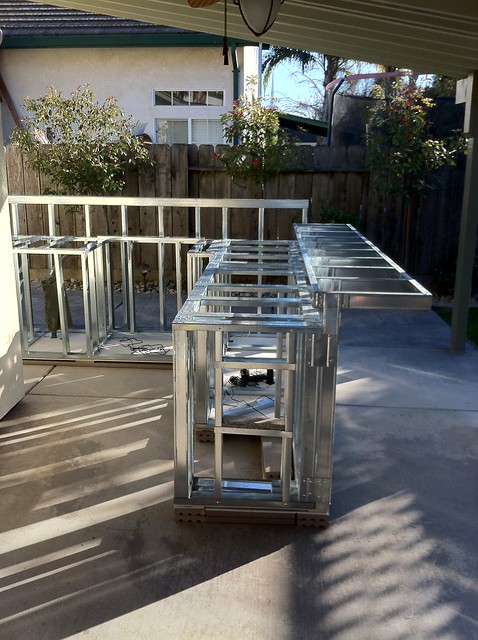
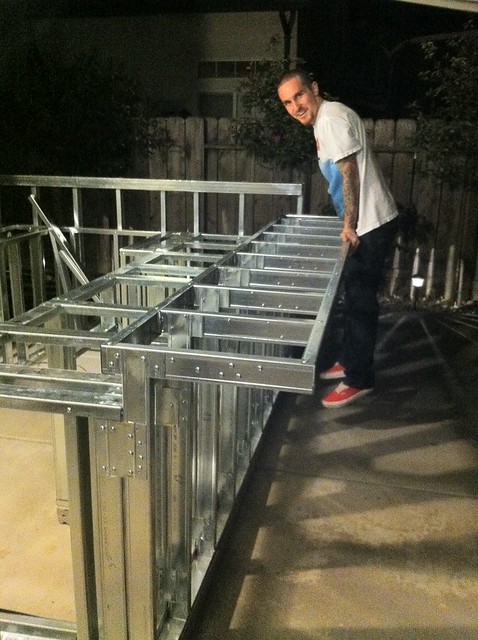
We built the three sections of the island in the garage and dry fit them on the driveway.
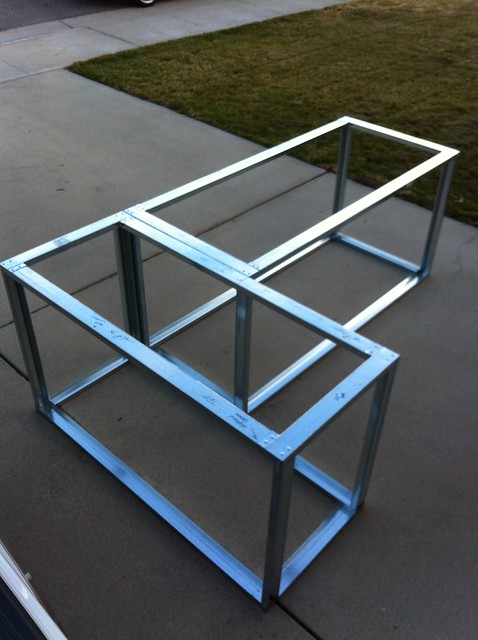
This is the basic structure of the island.

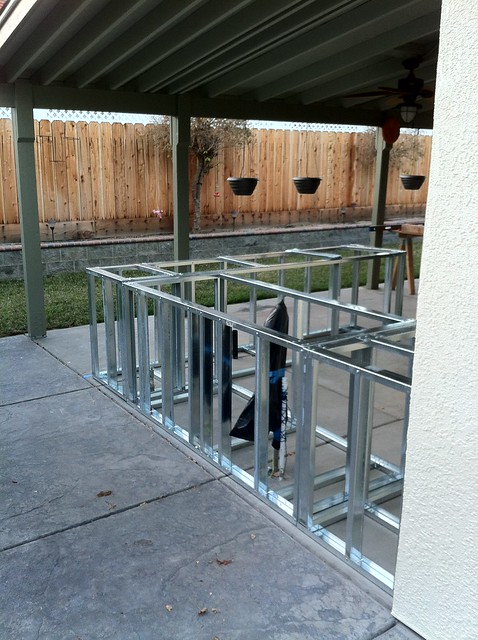
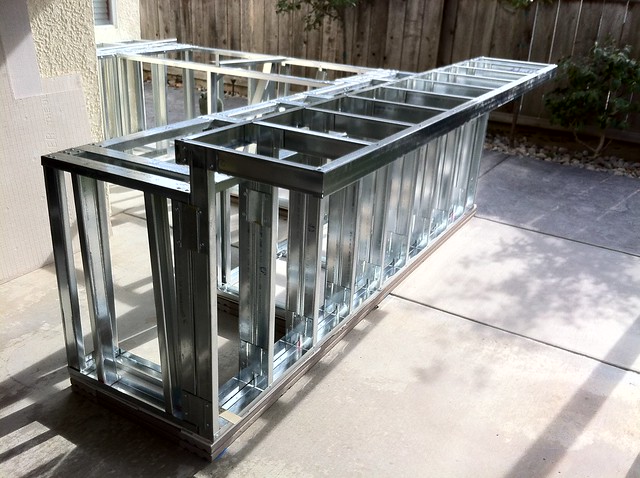
The vertical studs and cross supports for the island were installed with the measurements of the doors and appliances noted on the upper and lower rails.
Another view of the vertical studs and cross supports for the island.

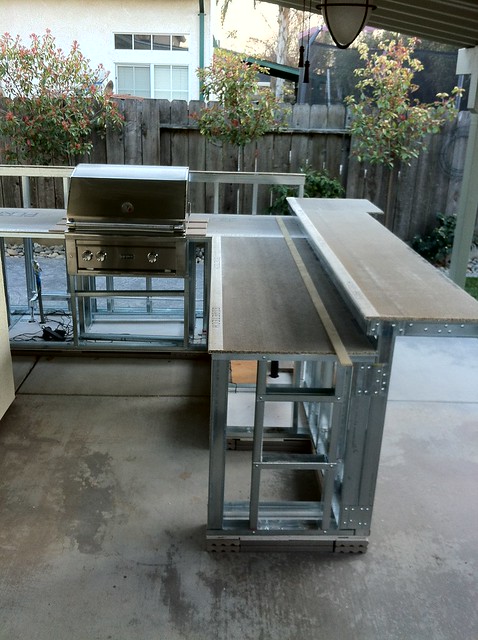
The house was painted and the basic steel structure was placed in its location.
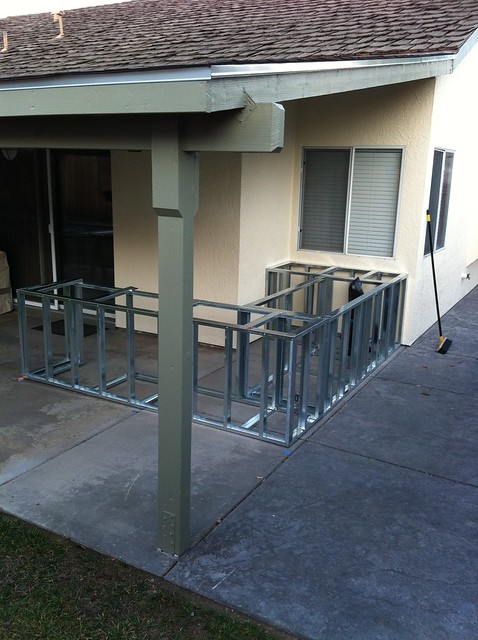
Another view of the basic steel structure.
We used 1/4" Hardibacker to seal the bottom of the island and we attached composite decking boards to keep the structure off the concrete. We planed the composite boards to level the structure.

We wanted to add more detail to the bar top, so we created a overhang on the back side of the bar top to match the overhand on the back splash behind the BBQ. We wanted to add L.E.D. strip lighting under the lip for indirect lighting.
Another view of the bar top. The bar top is supported by vertical studs placed at 12" on center and supported by 12" x 12" galvanized corner braces.
Most of the steel cutting and assembly has been completed. The back splash behind the BBQ has been attached.
Testing the bar top structure.
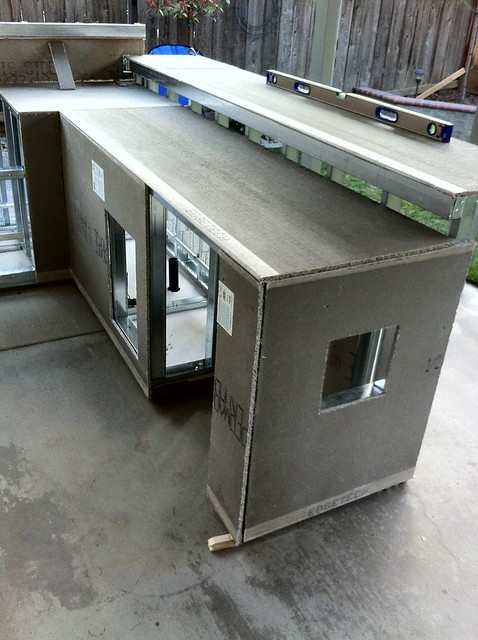
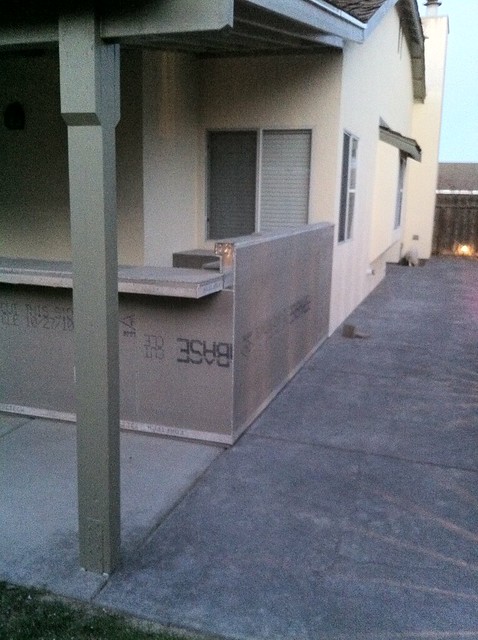
The first test fitting the BBQ with the Permabase material that will be used to enclose the island.
The Permabase sheeting was easy to cut and install. The square cutout on the end of the island was added to create a little shadow box with tile.
The installation of the Permabase continues and the addition of electrical outlets and switches gets the project closer to adding ceramic tile. The switches in the corner are for the electric water heater and the L.E.D. lighting.
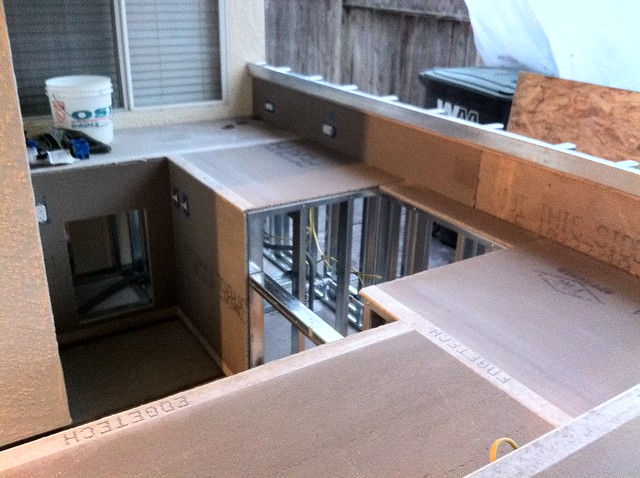
More electrical outlet boxes on the island. You can never have enough outlets in any kitchen.
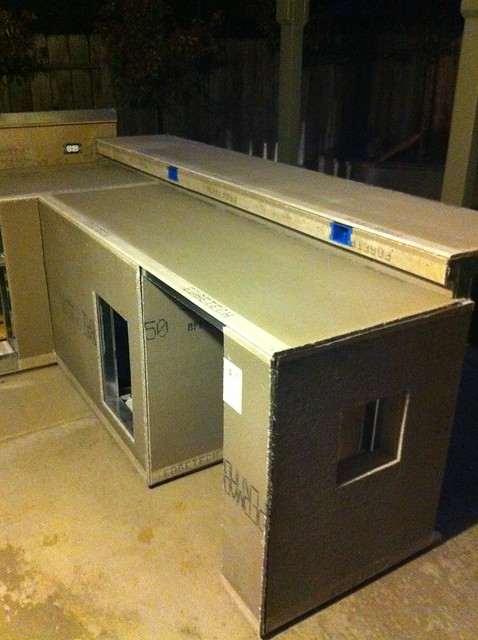
Another view of the island prior to installing the vents, tile and texture to the Permabase.
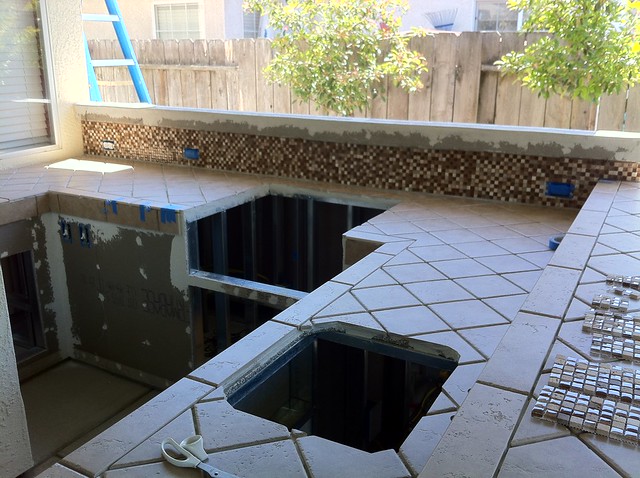
Permabase sheathing and electrical completed and the process of installing the bull nose tile and field tile to the edges of the counter top.
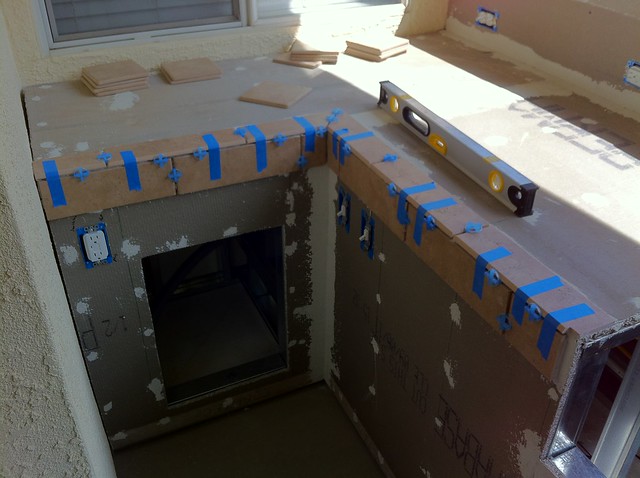
Cutting and dry fitting the field tile to the counter tops section. The bar sink is placed to insure that all measurements and cuts are correct.
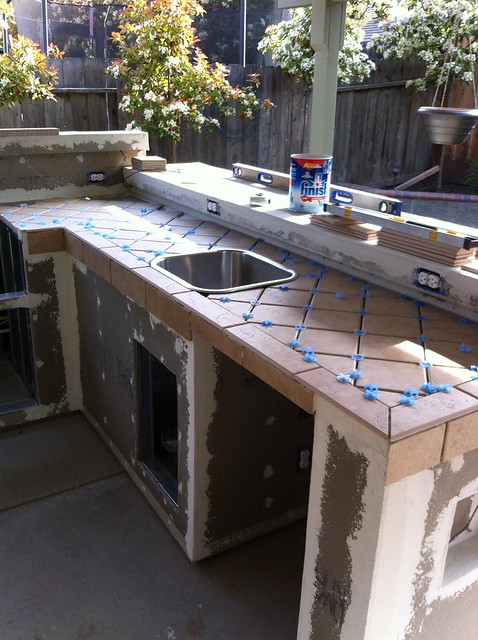
The lower counter top tile has been secured and the bar top tile is being cut and arranged.
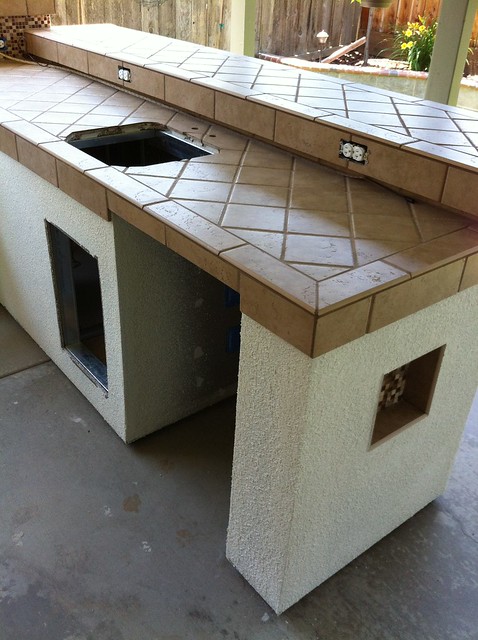
The back splash behind the BBQ section has been tiled with a glass mosaic tile.
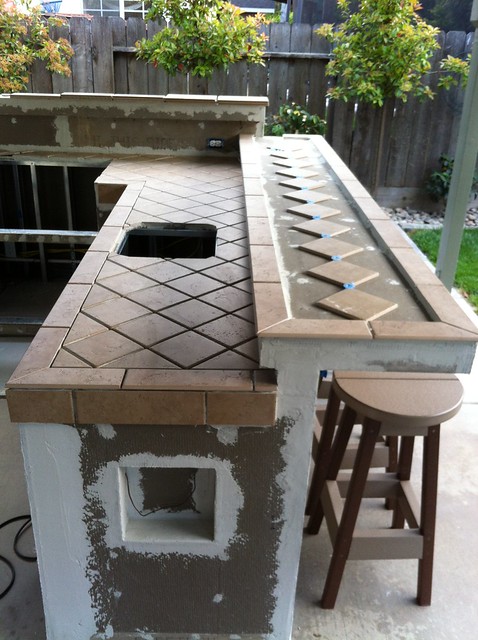
The tile has been completed, and the exterior of the island has been textured to match the home.
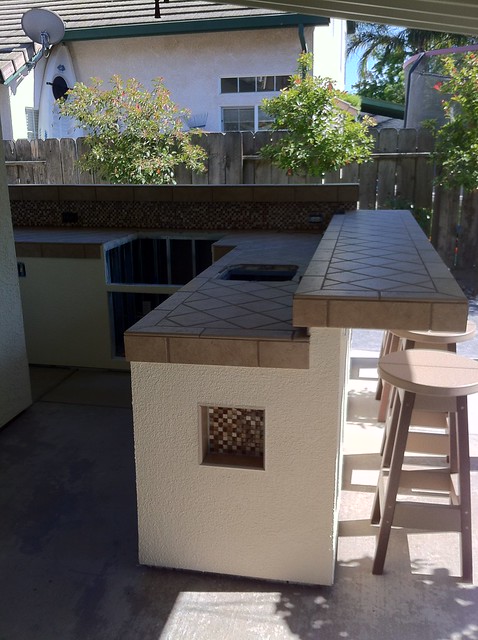
The textured sides of the island have been primed and painted the same color as the the house, and the shadow box has the glass mosaic tile installed to match the back splash.
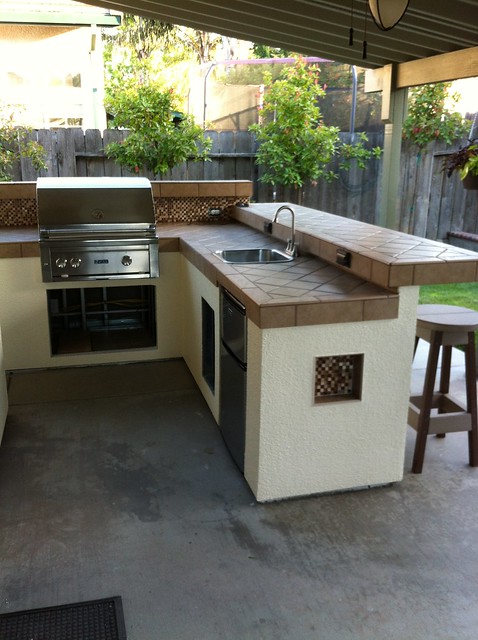
The sink, faucet and BBQ have been installed. The doors are next.
Everything installed except the outlet cover in the corner. As soon as my local Home Depot restocks them, it's done.
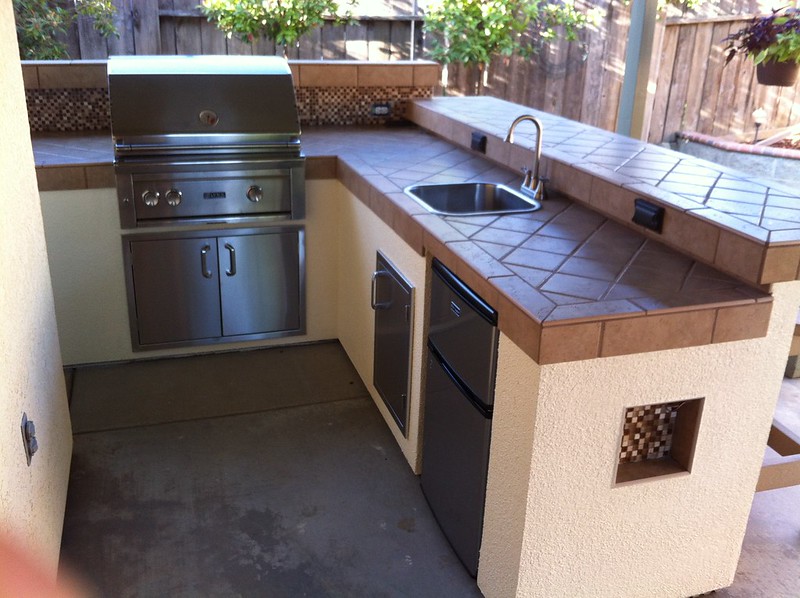
Another view of the island showing the sink and refrigerator.
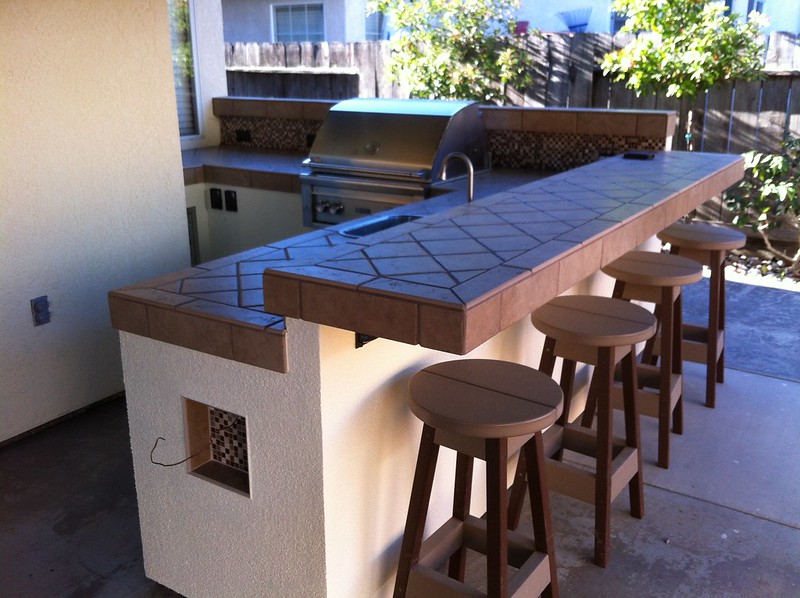
Another view of the island. The wire protruding from the shadow box at the end of the island is for L.E.D. lighting. The bar stools are made of composite materials.
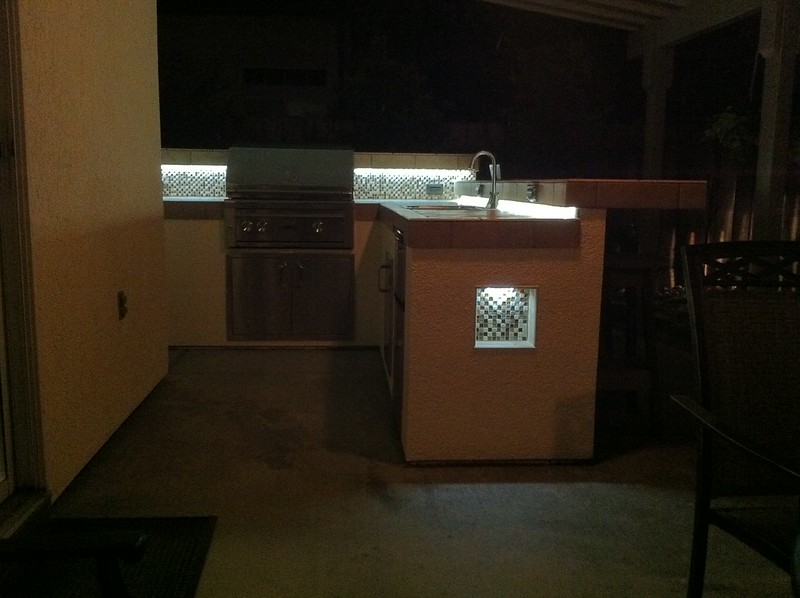
A view of the island at night. We placed L.E.D. exterior strip lighting under the lip of the bar top, back splash and the cutout at the end of the island to add indirect lighting.
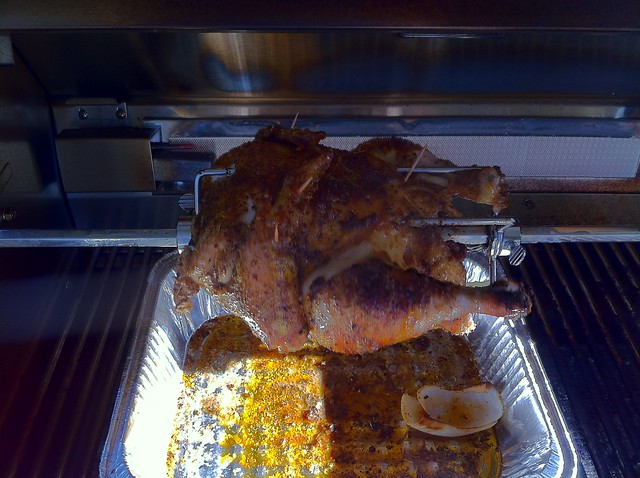
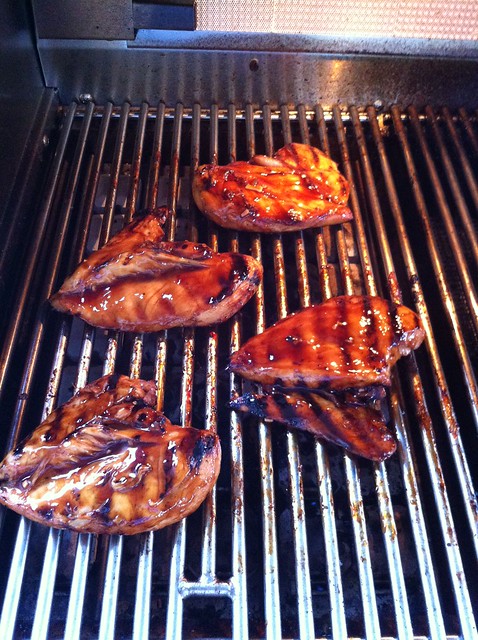
Island passed inspection and all systems are working. Let the Barbecuing begin.
I must say the level of info shared here is outstanding and I really wish I had found this before I started building my island.
We spend a lot of time outdoors and we plan on adding a new pool within the next 12 months. We've been in this house for three years and wanted to extend the patio area to entertain. So after about two years of looking and planning, we decided it was time to tackle our next project. As the talk of the outside island/BBQ started, the project has evolved. We went from an L-Shaped design to a U-Shaped design with a sink and L.E.D. lighting. I have included pictures from the beginning of our island/BBQ project through it's completion.
We developed and submitted the building plans to the city to add an extension of five feet to the patio cover, run water, gas and electrical from the front yard to the back patio area.
This was the existing landscaping.
We removed everything from the side yard and the digging began. The trench had to be 24" deep for the lines to be run.
Plumbing, gas line and electrical conduit installed and passed inspection. The area has been graded for concrete and an 18" square footing hole for the patio cover post bracket was dug. The PVC pipe was used to allow us to walk around the proposed island to insure that our clearances were okay. The PVC frame will appear in another picture.
The concrete forms are installed and the gravel base material has been compacted. Ready for concrete.
The concrete was poured and the concrete along the side of the house was stamped. Next thing on the list is painting this side of the house.
The post and header is placed for the extension of the patio cover. The PVC pipe was used to verify the islands planned dimensions to the patio. We wanted a three dimensional layout vs. tape on the ground to walk around the structure.
The patio cover extension was built and in the process of being painted.
Another perspective of the addition to the patio area. Ceiling fans and speakers installed and the patio area is ready for an BBQ island.
We built the three sections of the island in the garage and dry fit them on the driveway.
This is the basic structure of the island.
The vertical studs and cross supports for the island were installed with the measurements of the doors and appliances noted on the upper and lower rails.
Another view of the vertical studs and cross supports for the island.
The house was painted and the basic steel structure was placed in its location.
Another view of the basic steel structure.
We used 1/4" Hardibacker to seal the bottom of the island and we attached composite decking boards to keep the structure off the concrete. We planed the composite boards to level the structure.
We wanted to add more detail to the bar top, so we created a overhang on the back side of the bar top to match the overhand on the back splash behind the BBQ. We wanted to add L.E.D. strip lighting under the lip for indirect lighting.
Another view of the bar top. The bar top is supported by vertical studs placed at 12" on center and supported by 12" x 12" galvanized corner braces.
Most of the steel cutting and assembly has been completed. The back splash behind the BBQ has been attached.
Testing the bar top structure.
The first test fitting the BBQ with the Permabase material that will be used to enclose the island.
The Permabase sheeting was easy to cut and install. The square cutout on the end of the island was added to create a little shadow box with tile.
The installation of the Permabase continues and the addition of electrical outlets and switches gets the project closer to adding ceramic tile. The switches in the corner are for the electric water heater and the L.E.D. lighting.
More electrical outlet boxes on the island. You can never have enough outlets in any kitchen.
Another view of the island prior to installing the vents, tile and texture to the Permabase.
Permabase sheathing and electrical completed and the process of installing the bull nose tile and field tile to the edges of the counter top.
Cutting and dry fitting the field tile to the counter tops section. The bar sink is placed to insure that all measurements and cuts are correct.
The lower counter top tile has been secured and the bar top tile is being cut and arranged.
The back splash behind the BBQ section has been tiled with a glass mosaic tile.
The tile has been completed, and the exterior of the island has been textured to match the home.
The textured sides of the island have been primed and painted the same color as the the house, and the shadow box has the glass mosaic tile installed to match the back splash.
The sink, faucet and BBQ have been installed. The doors are next.
Everything installed except the outlet cover in the corner. As soon as my local Home Depot restocks them, it's done.
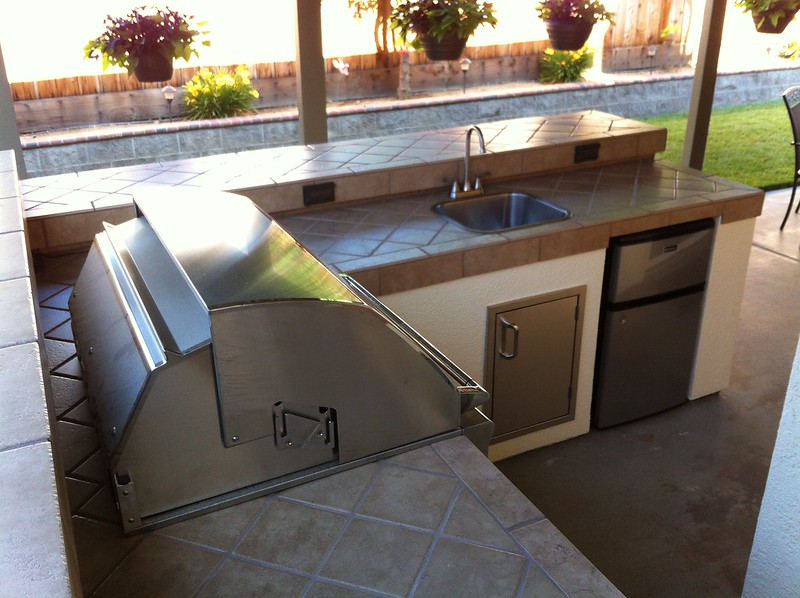
Another view of the island showing the sink and refrigerator.
Another view of the island. The wire protruding from the shadow box at the end of the island is for L.E.D. lighting. The bar stools are made of composite materials.
A view of the island at night. We placed L.E.D. exterior strip lighting under the lip of the bar top, back splash and the cutout at the end of the island to add indirect lighting.
Island passed inspection and all systems are working. Let the Barbecuing begin.
 Welcome to TFP!!!