DIY Automated Controls - Advice Solicited

Re: Grand DIY Automated Control Experiment

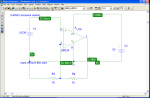
Well it's installed. It took a while but I felt a lot more comfortable when I found the master breaker inside the house and switched that off. Here it is: http://www.youtube.com/watch?v=BearEoveHlY. Master writeup will come after I see it work for awhile in the heat, after I install the microchip reset supervisor thing (forces NSLU2 to always power on after power outage) and get the pressure and temperature sensors running. That's Phase II. As you'll see in the videos I wasn't able to fit 3 contactors in my sub panel, only 2. And the wiring looks like a rats nest but I insist it's safe.
 
Very nice piku, that is pretty cool.

I'd have to admit that you have a pretty harsh environment for the NSLU2. It's going to get quite hot inside that box, using a Peltier had come to mind as someone else has already suggested.

http://cgi.ebay.com/Peltier-Junction-La ... 1636r37745

Two important things that I would need, perhaps phase 2 for you, is water and air temp monitoring.

Also let us know how the NSLU2 power on thing goes. I read through the pages of suggestions to get that working and a bit confused as to which would work.
 
I already ordered with my first mouser order a "reset controller" by microchip. It's supposed to just solder onto the board and functions perfectly. We'll see. I have to crack everything open because I suddenly feel the need to be able to (from remote) query the certain status of the arduino relays. It'd be nice to know that it accepted and acted upon my instruction. So more work to build up the protocol to be bi-directional. I'm also going to add another conduit which will terminate into nothing in preparation for adding the temperature sensors I'm currently building. I was originally going to use one temp sensor for outside air temp and one for pool water temp. I think now however that I'll take outside air temp from weather.com or whatnot and use the second temp for internal enclosure temp. Today it hit 86 outside and the machine pinged fine all day without any hiccups. Most of the time it will just sit there idle which should help out somewhat with temps. But again, this is all a grand experiment so some loss is acceptable.
 
I pulled everything today to make some changes and everything so far is good.

I uploaded new code to the arduino that lets me query the status of the relays so that I can confirm that the arduino took my command. This will be good for my future projects like a touch panel. We wouldn't want the touch panel to indicate that the light or pump was on when it was actually off or vice versa. That's just not okay.

I also pulled the pressure sensors off the board to play with them (on the bread board). They need to be hooked up through a strange (to me) circuit called an op amp circuit. If anyone knows about these I would seriously appreciate help. I experimented tonight with an LM324 quad op amp but it didn't really work properly. The pressure sensors put out 0-40mV and need to put out around 0-5V. They don't even need to put out exactly 0-5V, just something with a little better resolution.

I tested the temp sensors and they work perfectly so they'll probably be put in soon once I find the right plumbing arrangement for it. They don't need any amp circuit or anything but put out the right voltages as is.

I installed the reset supervisor thing onto the NSLU2 and it works perfectly and now everything will come on on it's own after a power failure. Nice since the case to the whole setup has 8 tight screws. I also glued a nice heatsink onto the main NSLU2 processor. So far the unit has survived 90+F heat and a WILD storm. I want to see how it'll do in the REALLY good heat. My theory is that the wireless card will tank first since that's the largest heat producer.

I am going to purchase a pH and ORP sensor and start playing with them. I have dreams of inputting fairly static parameters - CH, CYA, TA, and having the ORP and pH tell me how much chlorine/acid to add nightly/weekly in useful (quart) units. The arduino is useful for input from all of these things and THIS is why I didn't go with a dumber control system. I think I could even use the arduino to control valve actuators but I won't be developing that since I just have no need yet. I need to get solar panels :p

It's all such overkill but you can't deny, it's really cool. And an open source version of these hugely expensive pool control systems with specified parts and schematics would be good for the community all around I think (though bad for pool dealers perhaps).
 
piku said:
I am going to purchase a pH and ORP sensor and start playing with them. I have dreams of inputting fairly static parameters - CH, CYA, TA, and having the ORP and pH tell me how much chlorine/acid to add nightly/weekly in useful (quart) units. The arduino is useful for input from all of these things and THIS is why I didn't go with a dumber control system. I think I could even use the arduino to control valve actuators but I won't be developing that since I just have no need yet. I need to get solar panels :p

It's all such overkill but you can't deny, it's really cool. And an open source version of these hugely expensive pool control systems with specified parts and schematics would be good for the community all around I think (though bad for pool dealers perhaps).

I just installed a chlorine pump that has provisions for external control. I think it just needs a voltage to turn it on, if the switch is set for external control. It would be really cool to have an system with an ORP sensor, that could also control the chlorine pump, and add chlorine as required :-D

Randy
 
Well that would make my life easier as well to have the electronics for that already done. I'd just need to add a relay to my board (I am gunning for 4 relays/contactors - pump, light, chlorine pump, booster/squabot.
 
Here is a link to a good PDF on op-amp design: http://focus.ti.com/lit/an/sboa092a/sboa092a.pdf

One issue you may be having with the LM324 op-amp is that the output will not go to the V+ rail. It will only to to a value about 1.5 V below that value. So if you are supplying the LM324 with 5 volts supply, the output will only go to about 3.5 volts! You will need to get what is called a rail to rail output op-amp.

I have been thinking about a DIY pH and ORP monitor/controller for my pool system. pH and ORP probes present an interesting series of problems. They are very high impedance, on the order of 100 megohms or more. So special op-amps with ultra low bias currents must be used. In addition to that, with such high impedances, leakage on the surface of the circuit board becomes important. So guard rings must be used. This is not a simple project.
 
dschlic1 said:
Here is a link to a good PDF on op-amp design: http://focus.ti.com/lit/an/sboa092a/sboa092a.pdf

One issue you may be having with the LM324 op-amp is that the output will not go to the V+ rail. It will only to to a value about 1.5 V below that value. So if you are supplying the LM324 with 5 volts supply, the output will only go to about 3.5 volts! You will need to get what is called a rail to rail output op-amp.

I have been thinking about a DIY pH and ORP monitor/controller for my pool system. pH and ORP probes present an interesting series of problems. They are very high impedance, on the order of 100 megohms or more. So special op-amps with ultra low bias currents must be used. In addition to that, with such high impedances, leakage on the surface of the circuit board becomes important. So guard rings must be used. This is not a simple project.

Couldn't you just use this http://www.66pacific.com/ph/simplest_ph.aspx and put the output to an ADC? I think orp works along hte same lines, just different range. Several people in the fish aquarium scene are doing this and one even pushes his results to the internet.

I don't need 0-5V. Right now my freescale MPX pressure sensor puts out 0-40mV. The arduino has an accouracy to about 4.9mV. This means my arduino would be able to directly sense roughly 6psi at a time. So I would be able to know if the pressure is 0-6 psi, 6-12 psi, etc etc all the way to the pratical max of 30 psi for the sensor. Obviously I want a little more accuracy than this... but not much! I just want down to 0.x precision which could easily fit in 3.5v when we're talking 0-30 psi. It needs amplified to only around 300mV. If I boost it 100x it'll get right around the range. Add onto this the fact that at 22psi my pump is clogged and we have a only a very small range to read.

With the circuit above I believe the arduino can read the ADC with enough precision (10 bit) to be useful. I don't know if 2 9v batteries can take the heat or how long they would last powering the op amp. Probably quite some time.

The problem is I think all the op amp calculators out there account for 741's with +/- 12V. I calculate to get a 100 gain I should use a non-inverting design and use 10 ohm for Ra and 1K for the feedback resistor but I think that's wrong now. Basically I tried a number of different designs on the op amp but it only shifted the voltage. THe sensor goes 0-40mv alone and when connected to the op amp goes from like 1.504 volts to 1.544 volts. Not what I need and I'm quite confused about how to proceed since I don't get them. I'll read your pdf though.
 
I thought back to my short time as a Computer Engineering student and remembered a program we used called Pspice. As it turns out this program is free for student uses so I downloaded it. As it turns out the LM324 is a component built into the library on this program. So I built the circuit as I had it and got the same voltage I got at home in the real circuit! So I started adjusting parameters according to some of the stuff I read in that PDF you linked me and I got *exactly* what I wanted - a 100 gain amplifier. I simulated with a number of different input voltages and it's perfect! I can't wait to implement at home. I have to figure out how to hook the pressure sensors up to my plumbing. Should be fun.
 
I want to use a microcontroller with a LCD display. An example of one that I am looking at is here:
http://www.sparkfun.com/commerce/product_info.php?products_id=37

I want to have the pH and ORP amps on a PC board mounted onto the back of that unit. So I need to have a custom PC board and then might as well go and use high quality specialized op-amps for high impedance applications such as pH probes. Cost difference compared to overall cost of the project is very small. I estimate that the project, complete with controller, custom pc board, case and probes will be in the order of $200 to $300. So spending $25 for high grade chips vs $5 for run of the mill seems to make sense.
 

Enjoying this content?

Support TFP with a donation.

Give Support
*sigh*. I'm lost. I thought I had the circuit simulated until I realized there's an error. My pressure sensor strangely has a 5V/gnd input and a voltage output and output GROUND as well. Interesting that they would separate these and as it turns out if you ground the output ground to the supply ground the sensor doesn't read right! So in my schematic which worked sooo wonderfully (100 gain) if I disconnect my sensor's ground from the 5v ground the output is messed up. I think I need to make a differential op amp possibly but I don't know. Can anyone fix this mess for me? I just need a 100 gain op amp with LM324 and I need my sensor's output ground to not connect to the 5v source ground. Take away the wire as illustrated but still get 3V at the output.
 

Attachments

  • Picture 2.png
    Picture 2.png
    43 KB · Views: 375

Attachments

  • guinea-pig.jpg
    guinea-pig.jpg
    19 KB · Views: 346
Okie, well I know I haven't posted on this thread in a bit but I ordered the new pressure sensors from Mouser and sure enough they were exactly what I needed. I also took the (in my opinion) daring step of taking a hacksaw to my pool plumbing today. In the end it all worked out as it's out there happily holding 10 psi without complaining a bit. I plumbed in 2 tee's in the pressure side, one for the pressure sensor and the other for the temperature sensor. I also got the flex PVC and all the different little elbows and fittings i need to redo the suction side (which incidentally looks to be on its last legs anyway). But I decided not to do that today and to take things one step at a time. You can see photos of the system thus far as well as the plumbing that I did in prep for phase II (temp and pressure readings) today.

http://picasaweb.google.com/evaporated/DIYPoolControl
 
Good to see you making progress here. You are way beyond me with your electrical and programing skills, but I can still appreciate the detailed write ups. Hopefully I'll be able to put some of it to use.

One suggestion, you may want to switch your brass fitting for your pressure gauge for a plastic one. I used the brass one for my chlorine injector pump an it only lasted about 6 months. It was so corroded that it broke when I took it out. Granted , it was seeing considerably higher levels of chlorine, but you may still want to consider switching.
 
This morning I checked and my case temp is reading 109 (28 degrees warmer than ambient temp) so I guess the slug can survive some pretty high temps (it's not that hot out yet). The pool temp sensor went wonky (499 degrees F) and probably got disconnected somewhere during reassembly. I ran out of time to actually install the sensors into the plumbing since it was about 1am. I bought and will receive soon a Nokia 770 which I intend to use as a wall mount touch screen controller. I don't know much about the OS it runs (maemo) but I know it can run C# and GTK apps which is good enough for me. I am going to start writing the control program today in C that will run directly on the slug. It will take commands to turn relays on and off as well as update sensor readings in a MySQL database. The wall mount controller will then query and update the database. It will hopefully work well but I don't know. I can't find any evidence of anyone else attempting to use the 770 as a glorified remote control. Incidentally the auction for this 770 ended at 8:30am on saturday morning after the 4th! I'm not sure what the seller was thinking but 90% of the USA is still drunk or sleeping and I got the thing for only $70.

It's funny because last night I promised my fiance that this is the final stage and I realized that's a lie because I want to tie in a Ph/ORP sensor which will require more conduit. I also want to do chlorine injection for automated ORP control which requires pump, tank and more plumbing (unless I figure out a way to tie into my existing tee for pressure which may be possible. I was looking at those sensors and I think the only effective way to make that happen is to suction cup mount it inside the skimmer and run the line to the equipment.

Hit a high of 139 this afternoon with ambient at 90. Wowza.
 
Another $$ lesson learned. So I put everything together, tested all the sensors and everything seemed well. When I screwed the top on the enclosure (bah 8 screws, getting annoying). When I got everything all put away I tested again and the case temp and 2 pressure sensors were working but the pool temperature sensor was reading bad values. Today I isolated it down to the wiring inside the probe housing which if you read earlier I epoxied together. During my attempts to remove the sensor from my epoxied housing I thoroughly and absolutely destroyed the sensor. So now I have to order yet another one. At least these sensors aren't nearly as expensive as the pressure sensors. BTW. My pressure side is 12.51 PSI right now :p. For the hose to the pressure sensor, I just pushed on 1/4" ice maker hose onto the barbed ends and didn't even clamp the ends. It's staying on nice. There's a tiny bit of pool water protruding into the ice maker line (to build up pressure). So now I will order new temp sensors or perhaps try to find them locally.

Oh and my Nokia 770 was shipped :) Exciting!
 
Long time since I posted. This is the status. Despite the high heat we've had lately the NSLU2 is surviving just fine though when I open the box occasionally it smells funny in there. I redid the suction side plumbing now which went pretty well despite this being the first time I worked with flex PVC. Flex PVC incidentally is *very* expensive at Lowes so I managed to work with just 1ft of it. I managed to shoe horn mono and gtk-sharp onto the Nokia 770 but I am still working on developing the app for it. I wrote the daemon in C that runs on the NSLU2. Right now it is pretty stupid and just polls the database for state changes and initiates them and reports back to the database what the state is. It updates every 4 seconds. Since I redid the suction side plumbing I managed to hook up the other differential pressure sensor to the suction side. Because the pressure sensor is differential it has only a positive result and can't technically measure vacuum. That said you can simply convert your "negative PSI" result to inHg to get the vacuum. So you just multiple the suction psi number by 0.491154 to convert to inHg and then you can plug the numbers into the head calcs. Now I know my return dynamic head is 31.416 and my suction dynamic head is 12.21. Using this and my pump's head curve I can find my GPM flow rate at any given time.

The pump curve on Hayward's site is not an equation but rather a visual graph. I've spent some time researching and I've found you can turn it back into an equation. You simply take a number of sample points from the curve and plug them into Excel. Generate a scatter plot and add a trend line of 3rd order polynomial. This will generate an equation for your pump's head curve. In the case of mine it's y=-2E-05x^3 - 0.0059x^2 + 0.0544x + 60.091. Using this equation I can plug in any total dynamic head number that I can calculate currently and get a current GPM number. Using this I'll be able to display inside on the touch screen controller a current reasonably accurate GPM flow rate of the system, and will even be able to display gallons pumped over time and make trend graphs. It's all very geeky but fun nonetheless. It will be cool to be able to walk up and have it tell me that it's filtered 5,465 gallons so far today :p. I received 4 replacement temperature sensors but haven't put them on yet. I had to do some real plumbing (copper plumbing in the house) which incidentally I was successful at :) The giant hole I patched in the wall isn't looking too bad either. Learning like 6 trades all at the same time. Anyway, I'm nearing completion of the project at which point will come the writeup. Expect it to be pretty detailed. Oh and I'm roughly $340 into the project so far so I'm far overbudget but I'd pay more for the level of functionality I have. It's pretty sweet to be able to switch on the light from the sofa and know from work that my pump isn't burning up.
 

Enjoying this content?

Support TFP with a donation.

Give Support
Thread Status
Hello , This thread has been inactive for over 60 days. New postings here are unlikely to be seen or responded to by other members. For better visibility, consider Starting A New Thread.