New 16' Intex AGP Family in CA

May 15, 2012
23
Hey all!!!!

Your site rocks! I have been lurking around for a few weeks now and just recently joined. I have learned tons from reading all your posts and all the great help you guys give each other. I will be reading pool school quite a few times as i see reference after reference to it.

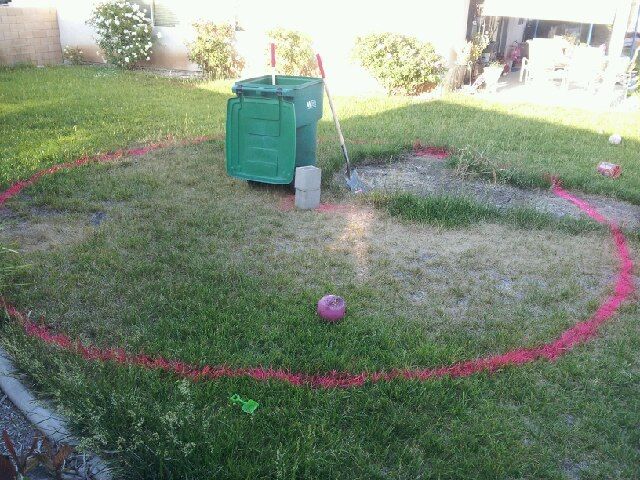
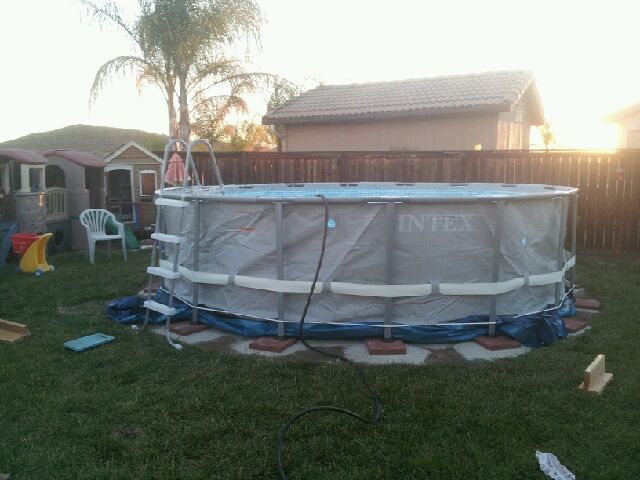
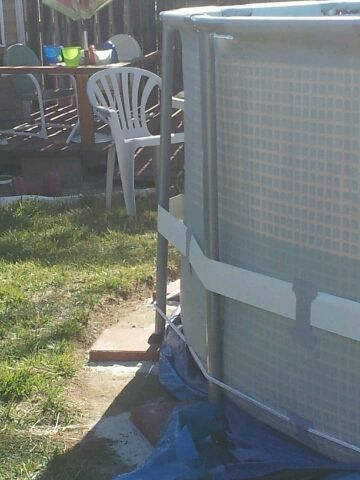
We just bought our 16' round Intex at lowes, wife works there and it was a price we couldnt pass up so my Dad bought it for us (well our 3 yr old, grandpa's little girl).

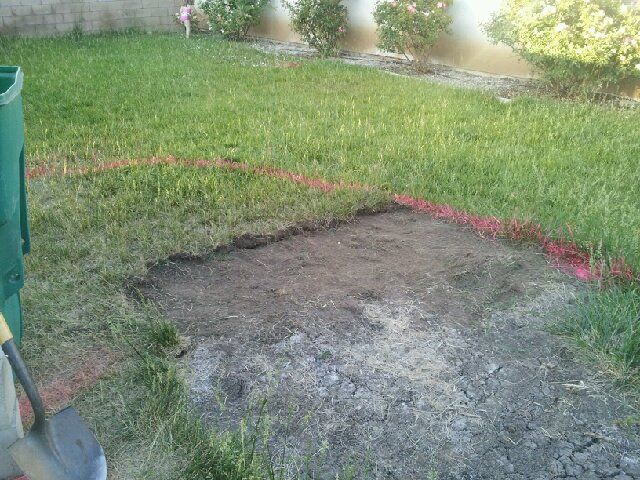
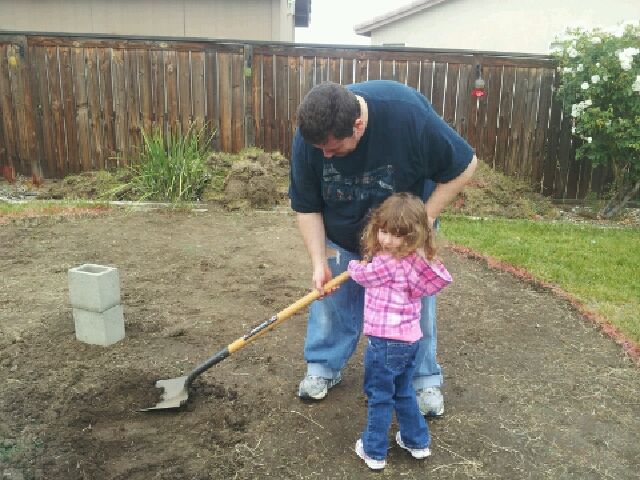
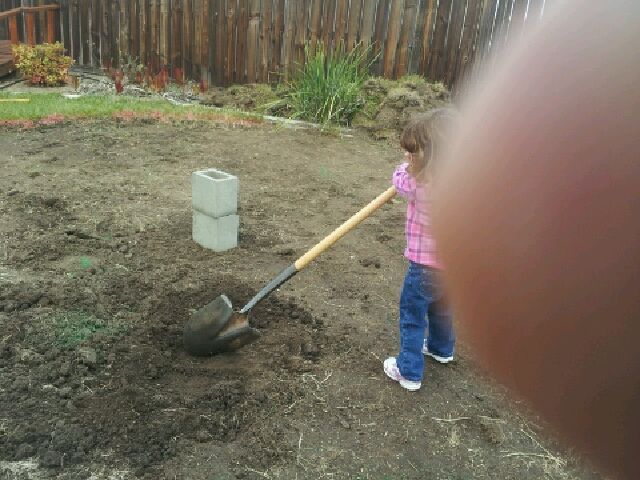
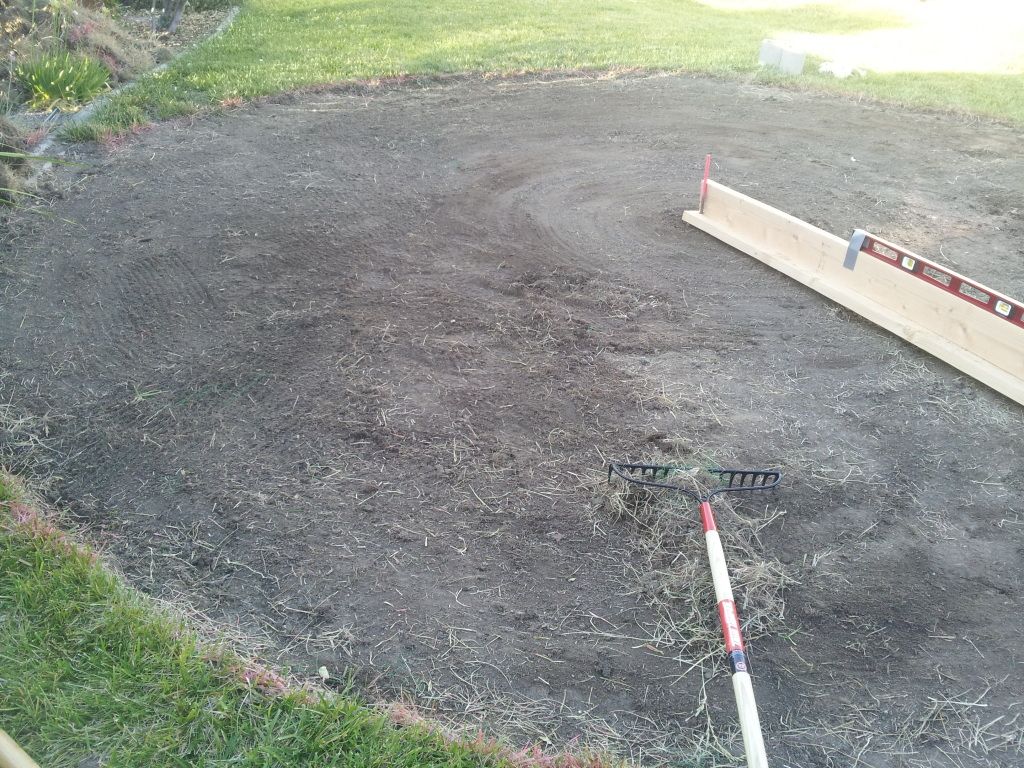
I havent started leveling anything yet but understand that as close to perfect level as possible is the goal for these soft sided pools. Plan is to level as best I can on the dirt after I dig the grass out. Then do a thin bed of sand for a nice smooth surface and final leveling (I plan on tamping the slightly dampened sand to pack it as best I can). Then some 3/4" foam insulation board, not the expanded polystyrene, i cant remember the name of the good extruded stuff you guys have posted up but I may need to special order it as it doesnt seem to be a normal stock item here in CA. I have to make sure to tape all the seams. I hope that using foam boards will extending the life of the liner as long as possible. Okay then, how should I layer the items going under the pool and is it worth using the tarp provided with the pool? Sand then tarp then foam then another tarp??? How do you guys go about getting the wrinkles out of the liner as you fill?

I am going to be using all the factory equipment for this first season at least and maybe try to upgrade items later on as I can. I am going to try to scrape together enough to order one of the nice test kits you guys all mention. Since my plan is to use the supplied equipment is there a concern with the stock filter element? I read a post on here where one of the guys said they supply disposable paper filters.

Okay, enough rambling. Thank you all in advance for your input and help as well as all the information I have already learned just reading your guys stuff!

oh, one last question... if i set up initially as a chlorine pool can i switch later on to a salt water generator.
 
We get the wrinkles out by putting around an inch of water in the pool and then working them with our feet from the center out toward the edge. Little push here, little pull there until they are gone. The little bit of water in the pool provides weight to prevent the wrinkles from coming right back when you move them around. Works pretty good for us and it's kind of fun too. :)
 
Steps that I used to create my origninal pool area:
1. Choose area, use a can of marking paint to paint a circle 2' larger that your pool. ie 18' pool = a 20' circle.
2. Cut sod off and dispose of. (if you do not do this it rots and stinks terrible) Rent a sod cutter either manual or powered.
3. Attached a 4' level to a 2" x 6" x 1/2 the width of your circle plus 6" ie 20' cirlcle 10' 6" board pegged to the middle of the circle.
4. Swing board in a circle trimming away any high spots and filling in any low spots (fill only 1/2" or less).
5. Tamped entire area with a hand tamper. (lots of work, rent a plate compactor it goes alot faster and not as hard on the back and shoulders.)
6. Put down 2" styrofoam (the pink, yellow or blue stuff). Tape the seams with Gorilla tape. Cover it all with a HD tarp. (don't use the tarp that they send with the pool, get a good HD one) Folks have been using thinner (down to 1/4") with ok results.
7. Setup pool, place 2" pavers/patio blocks under the legs. Match the thickness of the block with your foam or dig the block into the ground so it is even with the top of your foam/tarp.
8. Fill pool with 2-3" of water (I use hot water) and smooth all wrinkles out. I start in the middle and work my way out.
9. Fill up the pool with the rest of the water.
10. Test water with your new TFTest kit (you did order one right?) use results on The Pool Calculator and add BBB (if needed) to your Pool.
ENJOY THE POOL!!!!
Mike
PS, I did eliminate a few steps. Like go to store buy beer. Go to store buy AsperCreme for the aching muscles. Go to store buy more beer. LOL
 
docchop1 said:
We get the wrinkles out by putting around an inch of water in the pool and then working them with our feet from the center out toward the edge. Little push here, little pull there until they are gone. The little bit of water in the pool provides weight to prevent the wrinkles from coming right back when you move them around. Works pretty good for us and it's kind of fun too. :)

okay, I see how that would work, good idea
 
mcoonan said:
Steps that I used to create my origninal pool area:

10. Test water with your new TFTest kit (you did order one right?)

PS, I did eliminate a few steps. Like go to store buy beer.

Thanks Mike for the list, this will help a ton! I have to admit that I have not bought a test kit yet but will be looking at these this afternoon.

sooo.... was that originally step #1 ??? ha! I mean heck, I dont want to stray from a plan that obviously works!!! :cheers:
 
Okay everyone, thank you all for the helpful input, getting some proven know how is going to be invaluable. From the bits I had already read on the site I made a small step in breaking ground... I painted the outline of the pool (the pool is 16' but I ran and 18 1/2' circle), I drove in the rebar for my central pivot to use during leveling and I actually started to dig some of the grass.

Digging grass sucks!!! Need I say more?! I am going to take Mike's advice and see if I can find a sod cutter locally to help this along.


20120521_182332.jpg
20120521_190021.jpg
 
mcoonan said:
Steps that I used to create my origninal pool area:
1. Choose area, use a can of marking paint to paint a circle 2' larger that your pool. ie 18' pool = a 20' circle.
2. Cut sod off and dispose of. (if you do not do this it rots and stinks terrible) Rent a sod cutter either manual or powered.
3. Attached a 4' level to a 2" x 6" x 1/2 the width of your circle plus 6" ie 20' cirlcle 10' 6" board pegged to the middle of the circle.
4. Swing board in a circle trimming away any high spots and filling in any low spots (fill only 1/2" or less).
5. Tamped entire area with a hand tamper. (lots of work, rent a plate compactor it goes alot faster and not as hard on the back and shoulders.)
6. Put down 2" styrofoam (the pink, yellow or blue stuff). Tape the seams with Gorilla tape. Cover it all with a HD tarp. (don't use the tarp that they send with the pool, get a good HD one) Folks have been using thinner (down to 1/4") with ok results.
7. Setup pool, place 2" pavers/patio blocks under the legs. Match the thickness of the block with your foam or dig the block into the ground so it is even with the top of your foam/tarp.
8. Fill pool with 2-3" of water (I use hot water) and smooth all wrinkles out. I start in the middle and work my way out.
9. Fill up the pool with the rest of the water.
10. Test water with your new TFTest kit (you did order one right?) use results on The Pool Calculator and add BBB (if needed) to your Pool.
ENJOY THE POOL!!!!
Mike
PS, I did eliminate a few steps. Like go to store buy beer. Go to store buy AsperCreme for the aching muscles. Go to store buy more beer. LOL
Nice job on these simple to follow and concise steps mcoonan :cheers:
 

Enjoying this content?

Support TFP with a donation.

Give Support
Okay guys, a small update and a question...

I have all the grass out and have started leveling (I did have to relocate a sprinkler too). My folks came out Memorial day weekend and my Dad helped me dig out the remaining quarter of the grass I had... and my Mom snapped these pictures of my little one helping..

20120526_105905.jpg
20120526_105847.jpg


I am kind of surprised how soft the dirt is under the sod! compared to the rest of flower beds and stuff that might as well be solid rock this dirt is very easy to dig.... so I am doing a lot of tamping to pack this as hard as possible as I shave down the high side. So far so good. I may end up putting down a layer of sand after all seeing as how soft the dirt is and then foam on top of the sand..... which brings me to my question.... foam.

Out here in CA, I dont know if it is the lack of any kind of real weather or what but no one carries extruded polystyrene insulation!!!! Both Home Depot and Lowes dont have it in house and my lowes wont even special order it for me!!! Are they kidding!!!! They all have the expanded stuff like its the hot ticket which of course I dont need (or want). Well, I guess I shouldnt say no one has it; my local Depot has 1/2" sheets... but isnt that kind of thin to use?? Help Guys!! Now what do I do? Does anyone know where I can get the extruded Polystyrene here in CA without having to pay an arm and a leg!!??

P.S. I finished my first round of pool school and will be going thru it again (nice information guys, thanks again). I am also scraping together my cash to get a TF-100 Kit

:?: :?: I want to update my post and my question... my local depot has 1/2" foam in the 4x8 or 1" in a 2x8 foot sheet but the small sheet is more expensive. can I get away with the 1/2" or is the 1" just really that necessary???
 
Just a small update... things are coming along... slowly... but they are coming along. I had a high side and a small indent as far as a low side. I have been taking everything down to get as close to the low as possible. I got down until the indent was just a small divot and filled it in and whetted it and tamped it; walking around and around on it has also proven to pack it pretty hard. So all I really have left is to finish shaving down my high side (on the left in the pictures). I am finding more grass roots and sod netting??!!! I think there was a second layer of sod under there...??? that might account for the extra 1 1/2" high I still have to take down. But things are coming along nicely.

I am doing my leveling via the board and level method pivoting around a center point. I used a few ideas I found around the internet and made this sled type thing. Spin it one way and it keeps a slight tilt and acts like a sled helping spread and compact; spin it the other way and it tips quite a bit and acts like a plow helping to move the dirt. I stop every few passes and tamp everything; I want it all as hard as possible.

okay okay... enough rambling... :blah:

20120602_181957.jpg
20120602_182014.jpg
 
okay, wow... got my stones for under feet leveled across the pad.
sand is down, spread and packed.... got a tarp down... foam is going down, in the process of taping it now. And of course its hotter than blazes today. if things keep going at the pace my Dad and I are working the pool should be up and filling by tonight!!! whoo hoo!!!!

I got my TF-100 test kit in the mail on saturday... so I have to brush up on how to test. I read that I should test my tap water first right?? So that I know what I am starting with and what to add to get to shock levels.
 
okay, we were trucking right along got all the foam taped up, second tarp down.... liner all warmed up in the sun. we are starting to assemble the pool and I am about 1/3 of the way done when i see it! Sunlight shining thru a hole in the wall of the liner almost big enough to put my finger thru!

I had to take it all down and luckily the Lowes store I bought the pool from was willing to swap out liners with the one remaining box they had (I am sure it helps that my wife works there) but an hour later my Dad and I are re-assembling the pool. we had just enough sun left to half way warm the liner so it still wasnt too bad.

But, the good news is we got the pool up and started filling it!!

Well, its filling so in I went to start smoothing out the wrinkles. Boy, that was harder than I thought it was gonna be. I got most of them out and only have a few ripples left so i am pretty happy with it. while working out the wrinkles I did come across a rock that had made it under the tarp! luckily there was only 2 inches or so of water in the pool so my Dad was able to force his hand under and get it out; that could have been bad.

I will be buying me chlorine on the way home from work today so that I can start testing and testing and then use the calculator to figure amounts to get to shock.

whoo hoo!!!!

Thank you all again for the wonder information on this site!


20120624_195130.jpg
 
okay, I wanted to give a quick update.

I have to admit that I was okay, even thru finding the hole in the liner and all, right up until I started to fill the pool..... then the panic and worry sets it!!! "Did I level well enough?" "Are my blocks set okay?" "Did I get my foam level enough with my blocks?" Oh good lord, if I could have thought it I did and practically worried myself sick. Well, a small word of encouragement to those thinking of doing this or just getting started. Setting up a level pool is possible! Just take your time and do it right; just like everyone on here says. Follow their directions and you will come out successful!

I listened to the folks on here and I did pretty good. Aside from one leg that has a weird angle to it my pool came out pretty darn level. what, maybe .5 to .75 of an inch at most all around. Not to bad. Honestly, just listen to the guys on here they know what they are talking about. I thought this leg was a problem but now that the pool has been up for a day the liner has stretched and it now touches and is pressing on that leg. It is the only one that did that. Should I be worried or just
20120626_181714.jpg
20120626_181728.jpg
20120625_170817.jpg


so now... come my pool care noob questions. I have been reading and reading pool school and perhaps I have just missed it but am i supposed to shock the pool or just start adding what the pool calculator tells me to add?
 

Enjoying this content?

Support TFP with a donation.

Give Support
Thread Status
Hello , This thread has been inactive for over 60 days. New postings here are unlikely to be seen or responded to by other members. For better visibility, consider Starting A New Thread.