Dane's "How To" for a quick & easy pool cooler

DaneCE

0
Jul 1, 2011
342
VA
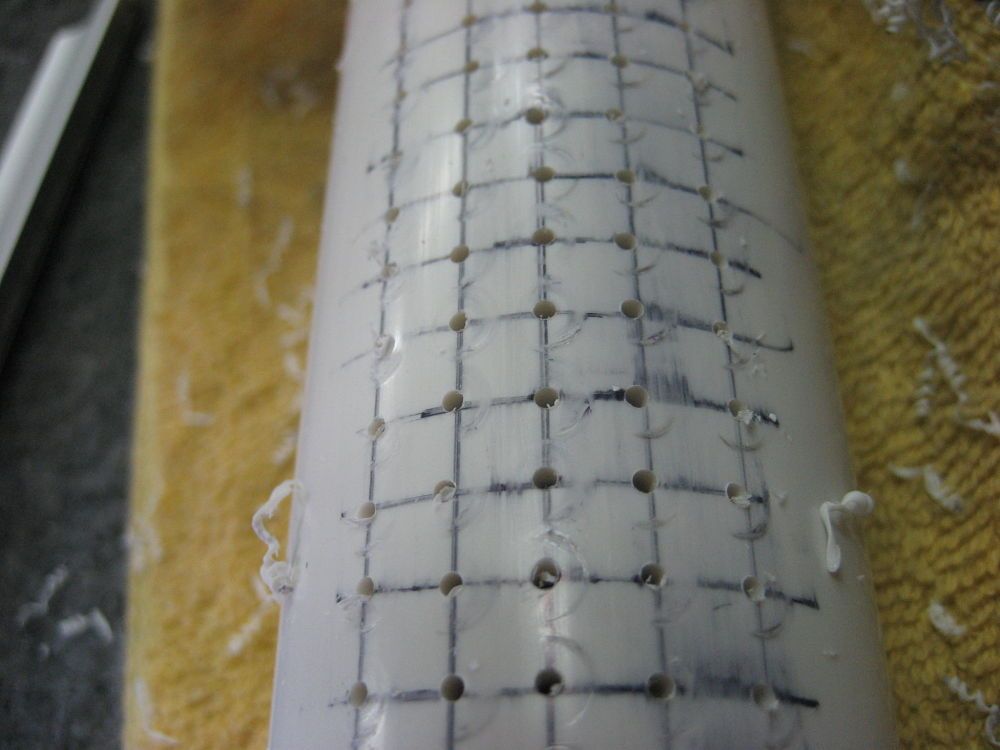
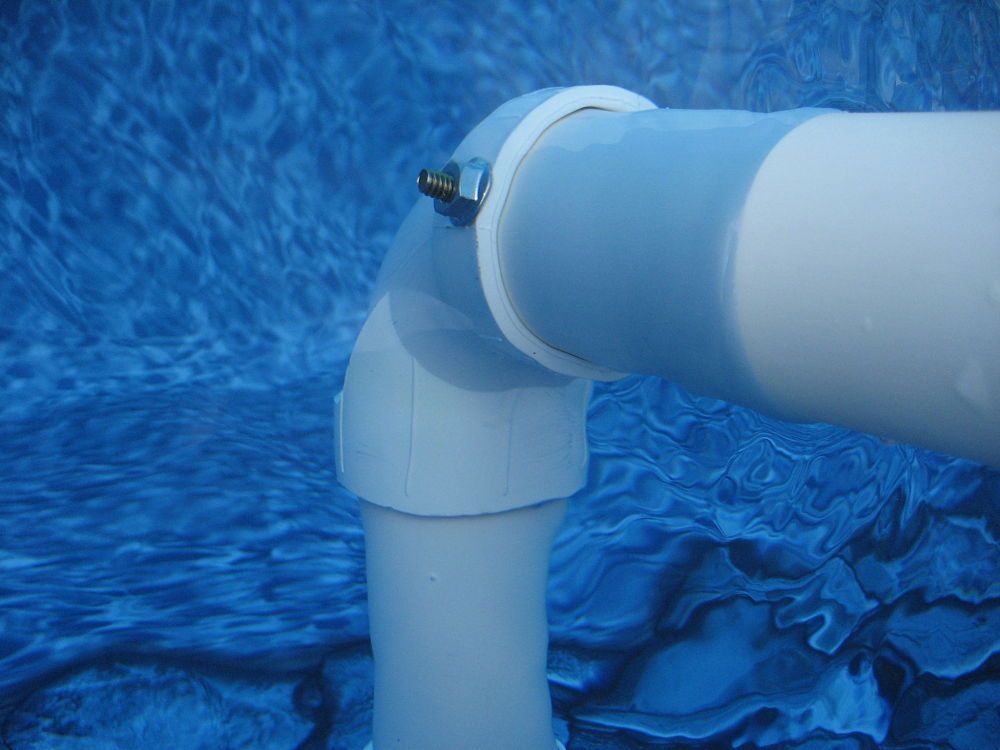
After reading about this simple project here at TFP I decided to make one of these pool coolers. I made my first version on July 14 similar to the one I have pictured. For my first attempt I used approx. 120 1/8" holes which worked fine but I wanted to improve with a second try.

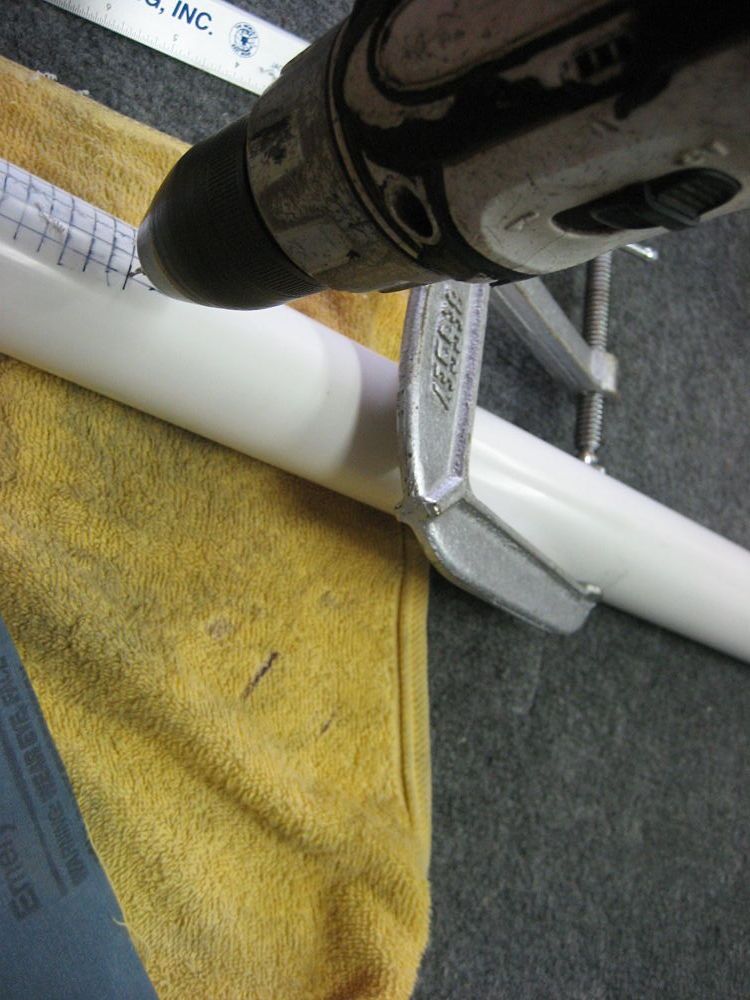
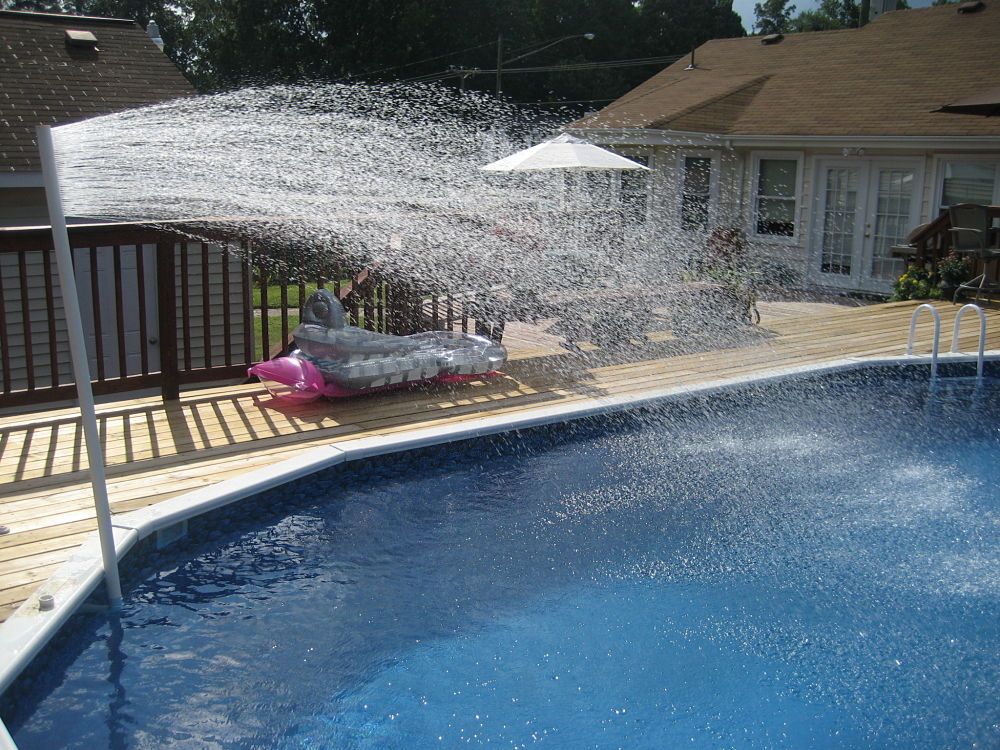
I extended this version an additional foot to 6 feet and used a 1/16" drill bit to create smaller droplets.

This "How To" will be completed in multiple posts.

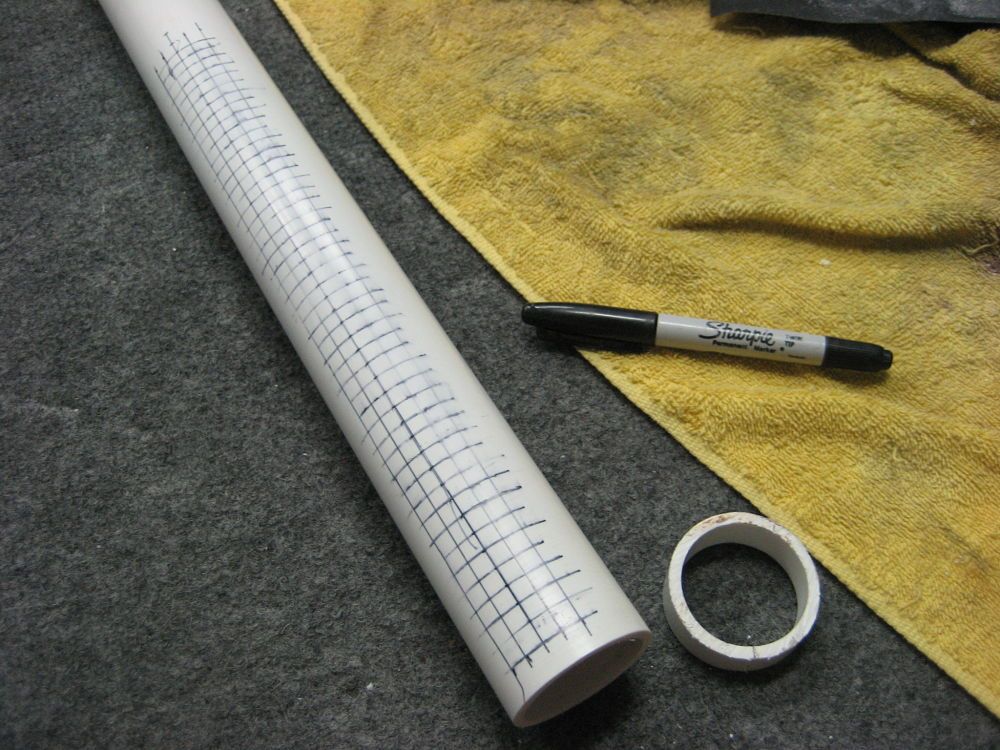
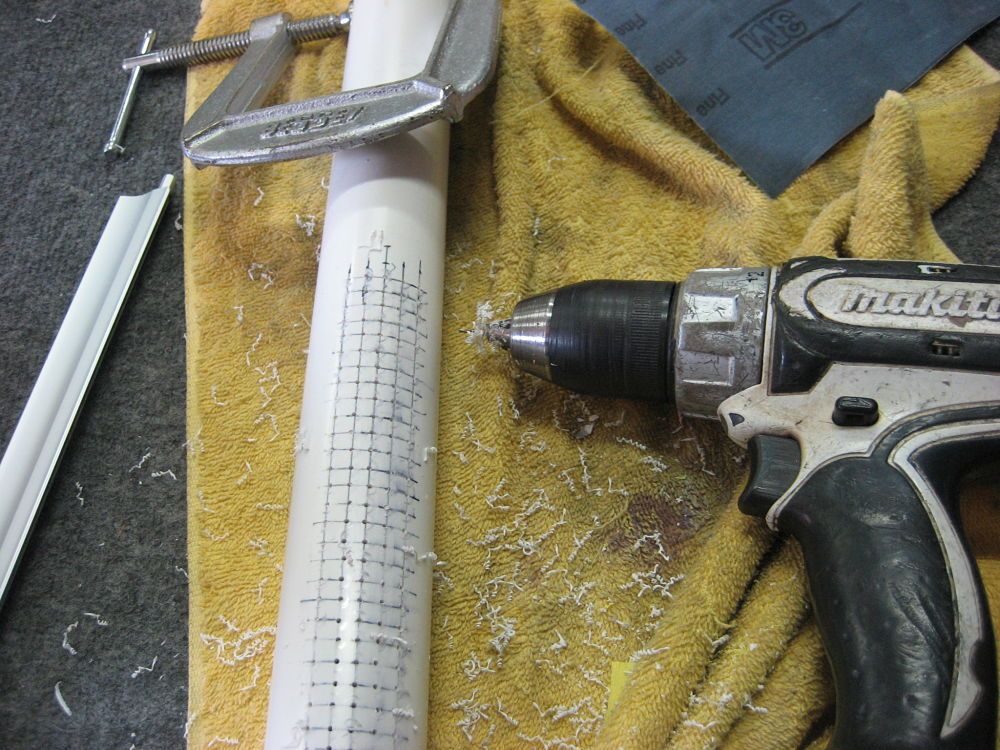
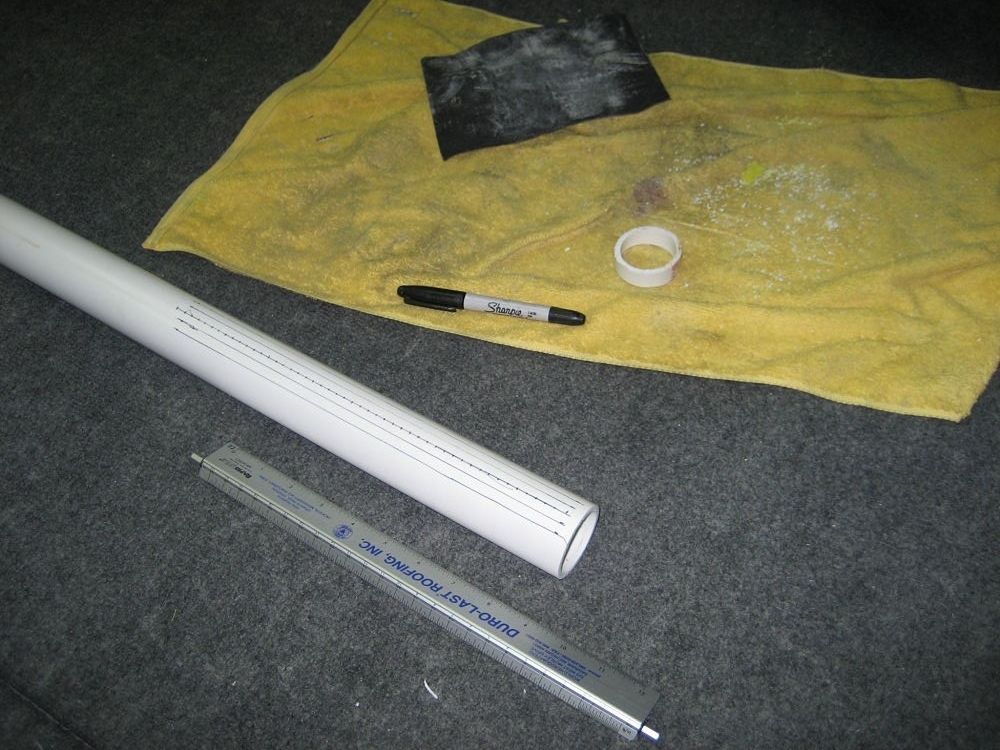
My first step after cutting a 10' piece of 1.5" PVC to 6' was to draw 5 lines 12" long onto the PVC, 1/4" apart. Then I made a pen mark every 1/4" along the length.

1.jpg


2.jpg


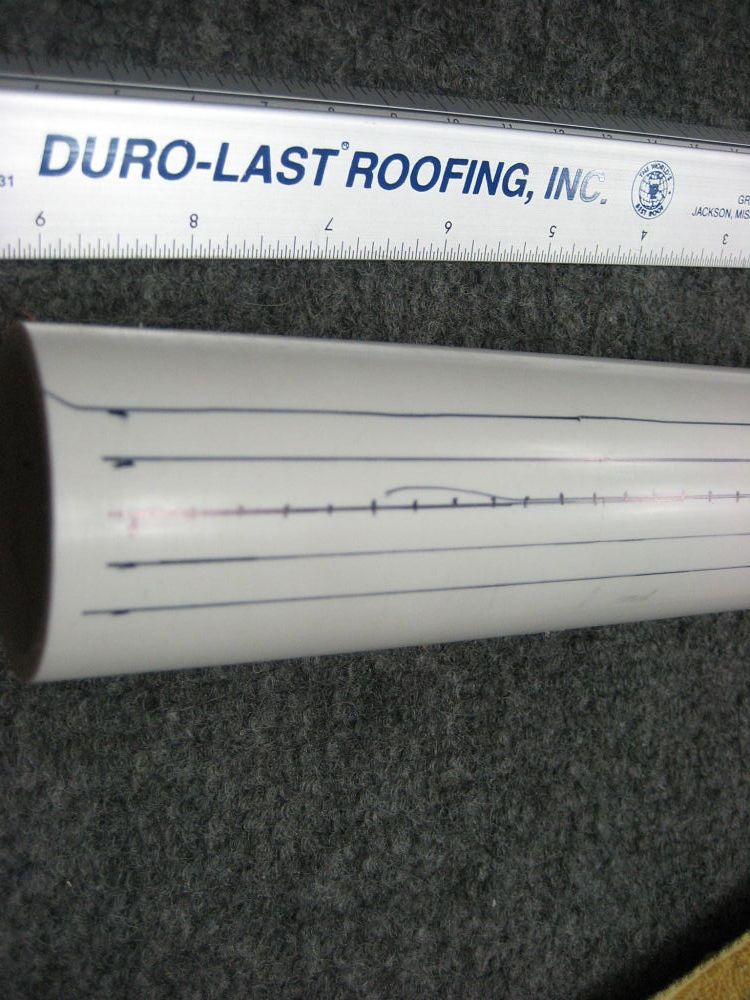
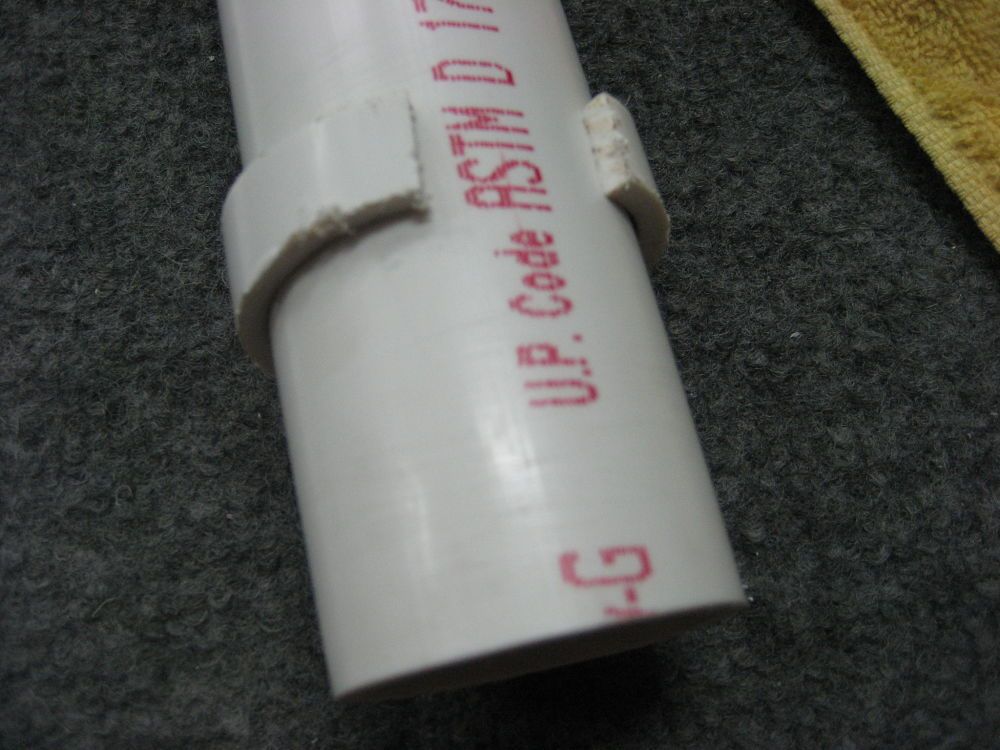
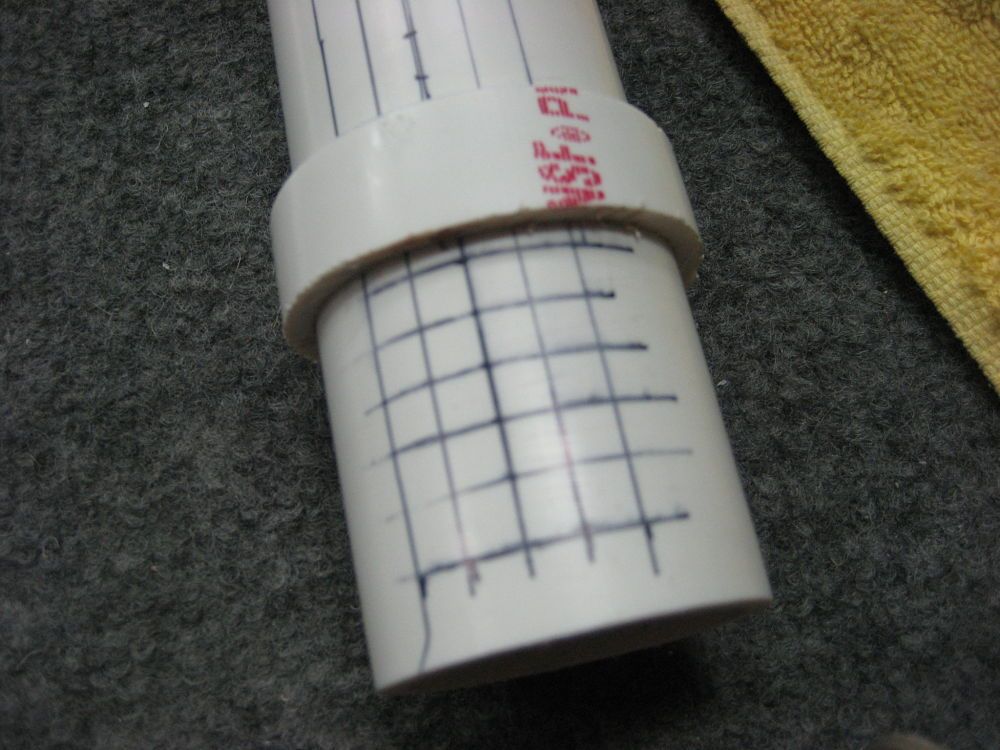
I then used a small piece of the 1.5" pipe to draw the horizontal lines every 1/4". I made one cut in this small piece so that it would stretch around the project piece.

4.jpg
 
It's time to drill. I used a C clamp to help stabilize the pipe. This was all done on the floor in my finished garage on carpeted 3/4" plywood that serves as part of my free weight station...no fancy work bench needed.

7.jpg


At this point I've drilled 235 holes. Don't worry, it took me only 15 minutes.

8.jpg


As you can see here, I wasn't perfect in hitting all of the cross hairs...it doesn't matter. After all holes are drilled, some of them will have remaining bits of PVC which can be removed by holding the drill bit with your fingers to push through the hole to clean it out.

9.jpg
 
To cap off the top of the pipe I used a 20 cent test cap. Super glue worked great on my first version so I repeated here.

10.jpg


Installing the pipe to my AGP should be similar to others in most cases. Simply removing the return eye, flange and male thread piece is all that is needed. After measuring the distance from the return at the pool wall to a vertical "plumb line" to the coping, I determined how much additional pipe extension I needed to clear the pool wall coping. I used PVC glue to connect these 3 pieces.

11.jpg


After the super glue dried I gave it a test run with the 235 holes that I had so far. I was getting too much distance from the pool cooler and wanted to decrease the pressure by a small amount. I didn't want to go any lower on the pipe so I put holes in the center of the squares that I had drawn. After this final step I used emery cloth to sand off the Sharpie ink. Since pump pressure and other factors come into play,you might need less or more holes. I added an additional 44 holes and might add more later. Personal preference for the distance of spray will also play a role. Although my main purpose is to cool my water once it reaches 88, I know my son and his friends will have fun playing with the giant shower.

12.jpg
 
Here it is in action.

13.jpg


Having 250~300 small holes creates a large field of small drops which in theory will optimize the effect. I plan to need it later this summer when it really gets hot. Yesterday my water temp was 87. After an abnormal cool off overnight (60), my water was 80 at sunrise(cooler not used)...next week, heat wave.

This simple project takes less than 1 hour and costs around $10 for the PVC.

Thanks for reading.
 
Last edited:
You need to be careful about creating a lot of stress on the wall fitting as the fitting or the wall panel could be damaged. There is a lot of leverage there. You should make sure that kids do not hold onto the pipe and that nothing hits the pipe.
 
JamesW said:
You need to be careful about creating a lot of stress on the wall fitting as the fitting or the wall panel could be damaged. There is a lot of leverage there. You should make sure that kids do not hold onto the pipe and that nothing hits the pipe.

Would it help to brace it? Perhaps with a deck board with a hole in it that slides down over it and screws to the deck.
 
As you can see there is a tilt to the pipe. Because it's a "dry" connection to the 90 elbow, the force pushes the pipe back where it sits tight against the coping because I left a 1/2" gap. I've only run it 2 hours so far as a test but it didn't budge in that time. The part that screws into the return doesn't move when the pump is turned on. If anything, the force is pulling outward on the return since the fulcrum point is at the coping edge where the pipe pushes against.

I have a Hayward Pro Series 150 lb. sand filter and Hayward Power-Flo Matrix 1 HP pump. My normal gauge reading is 18 PSI. When the cooler is connected, it reads 15/16 PSI...about the same as when I have a hose connected to the skimmer for bottom cleaning.

I have tested the "what if" when the dry connection is broken. There is no violent popping off since water pressure isn't high with a full 1.5 opening. I'm going to try using the cooler overnight when I do need it. I won't allow it to be used during the day when the pool is in use unless I'm present.
 

Enjoying this content?

Support TFP with a donation.

Give Support
I decided to make my cooler more stable today. After a good free weight workout and a cool dip in my sparkling 84 degree water...oh yeah, and an ice cold beer of course. Wait, a beer after working out you ask. :cool:

Just a small tweak to make sure the main pipe doesn't come loose at 3 AM. I drilled a hole through both the main pipe and the elbow so that I could bolt them together. While the pipe was dry I made some reference marks on both pieces after guessing the correct position. I then connected the cooler and turned the pump on to see how close I was. I was only a 1/16" off so I adjusted for a slight turn to the right and drilled the hole.

Of course it best to use stainless steel but I used what I had on hand. I plan to replace later on.

14.jpg


Just a note regarding the stress on the pool wall at the return:
I went under my deck to witness close-up exactly what's happening when the pump is turned on with the cooler connected. At turn on, the PVC fitting moves outward(toward the water) less than a 1/4" for about a half second then rests in its normal position as when the return eye is in use. I don't feel that this would cause any harm.


Here's another shot just for fun...my deck replacement in progress.

15.jpg
 
With my current temp over 90, I am looking for some chilling. Got a couple of questions:
1. How much water do you loose? Do you need to refill?
2. On windy days, does the water blow all over the place?
3. If this is your only return, what is circulating the water in the pool? How are the dead bugs from the far end getting to the skimmer?
 
Dr_Obbins said:
With my current temp over 90, I am looking for some chilling. Got a couple of questions:
1. How much water do you loose? Do you need to refill?
2. On windy days, does the water blow all over the place?
3. If this is your only return, what is circulating the water in the pool? How are the dead bugs from the far end getting to the skimmer?

Because I haven't put my cooler to real use yet I can't really answer #1 yet.

The day I was testing for a short time there was wind at 15 mph and gusts. I have the spray width adjusted so that it falls about a foot short of hitting the coping on either side. I saw only a small amount of spray on my deck. If the wind was up to 25 or more there could be much more.

The lack of circulation is a small problem. I did notice that the spray pushes surface debris to the far side. I normally run my pump 8 hours per day so at no time is there much junk floating around. After 10 minutes of using the return eye after disconnecting the cooler the surface had returned to looking pretty again.
 

Enjoying this content?

Support TFP with a donation.

Give Support
Thread Status
Hello , This thread has been inactive for over 60 days. New postings here are unlikely to be seen or responded to by other members. For better visibility, consider Starting A New Thread.