Its time... Pool resurface and deck updates

TFP_wanna_be

0
Bronze Supporter
May 26, 2010
129
Orlando, FL
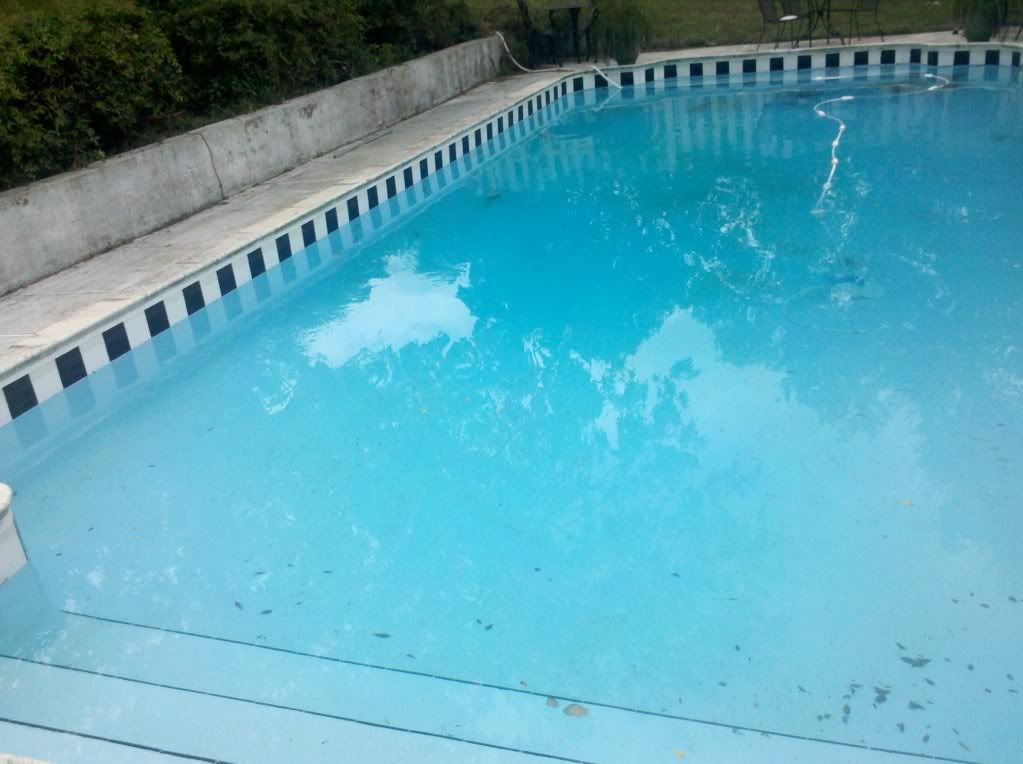
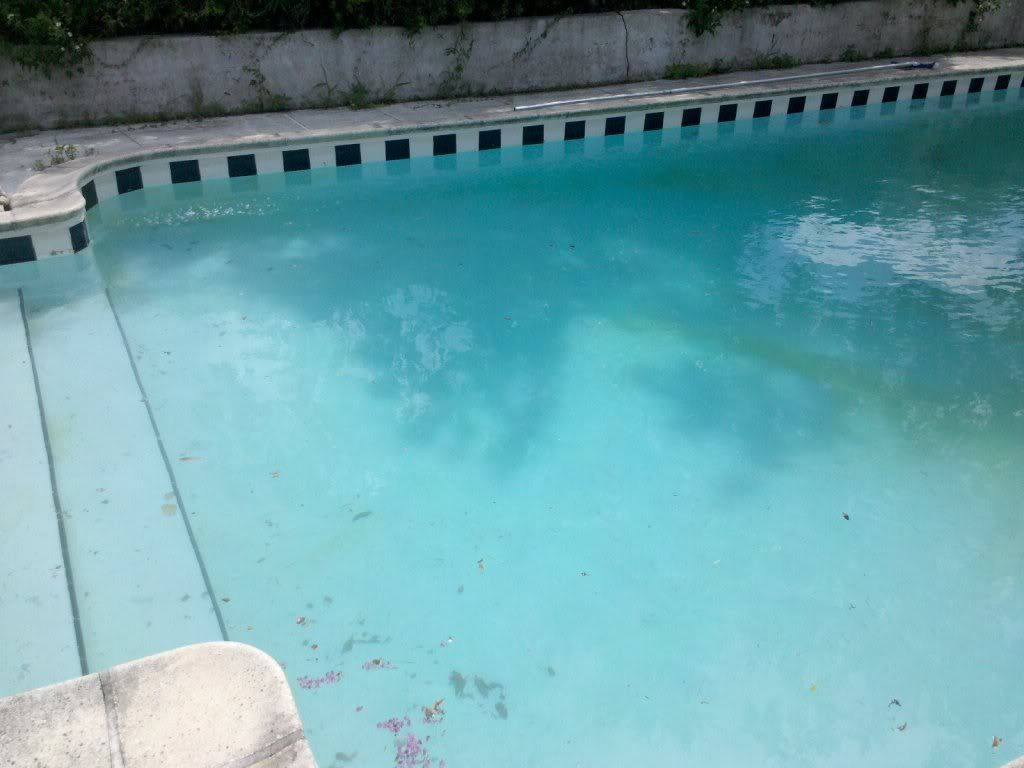
We have decided to take a leap and freshen-up the back yard. Plans are a pool resurface, deck is undecided, yet will get attention when I sort everything out. I do not want fashioncrete and hope to update the overall look of the pool a little. I'll keep the pics current!!

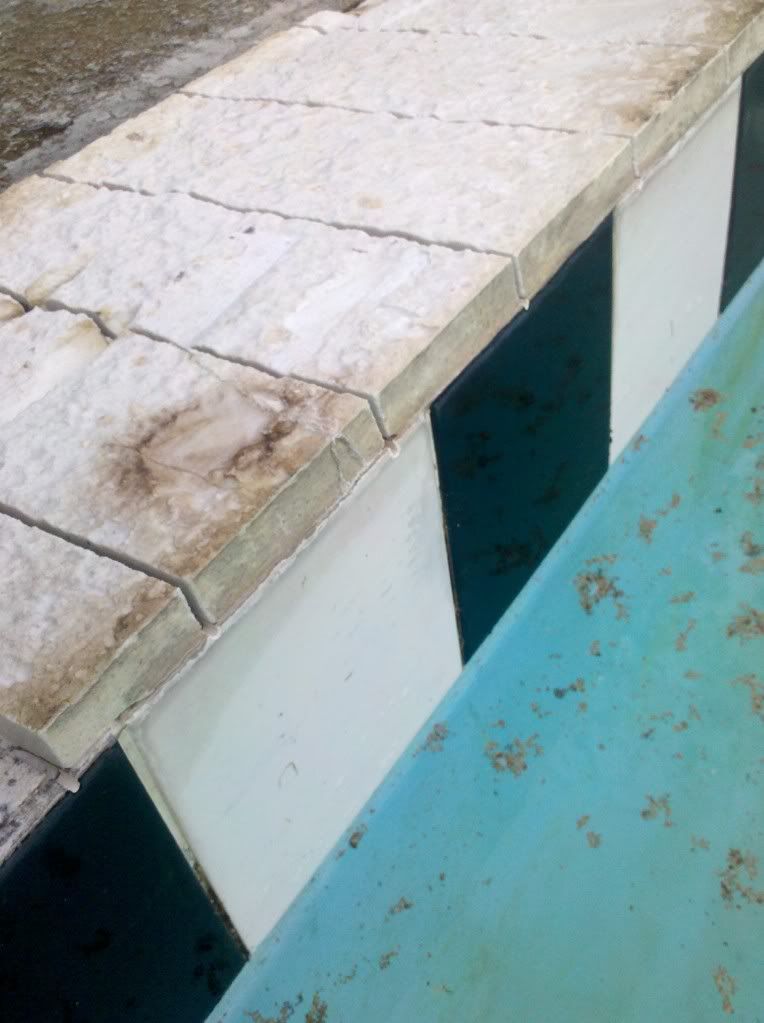
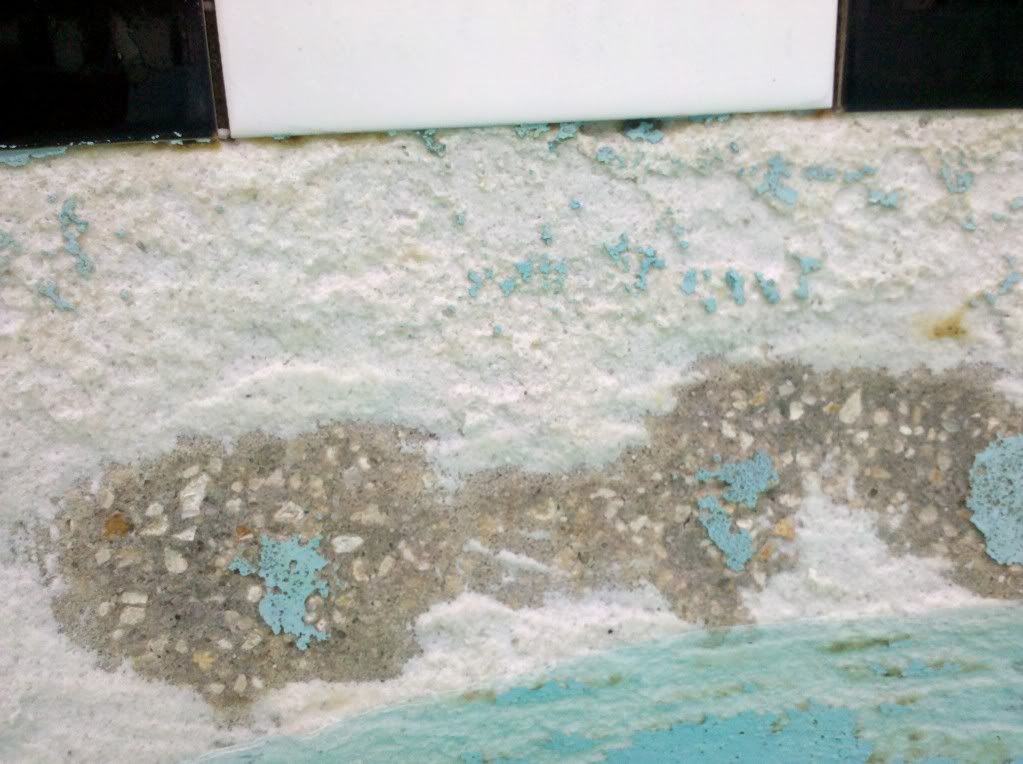
The old coping had to go... It was just too rough and dated! The coping sits on top an INCH of plaster/filler. The top of the coping was 2" above the deck. New deck ideas are flush deck to coping. Looking at thin pavers over the concrete etc...

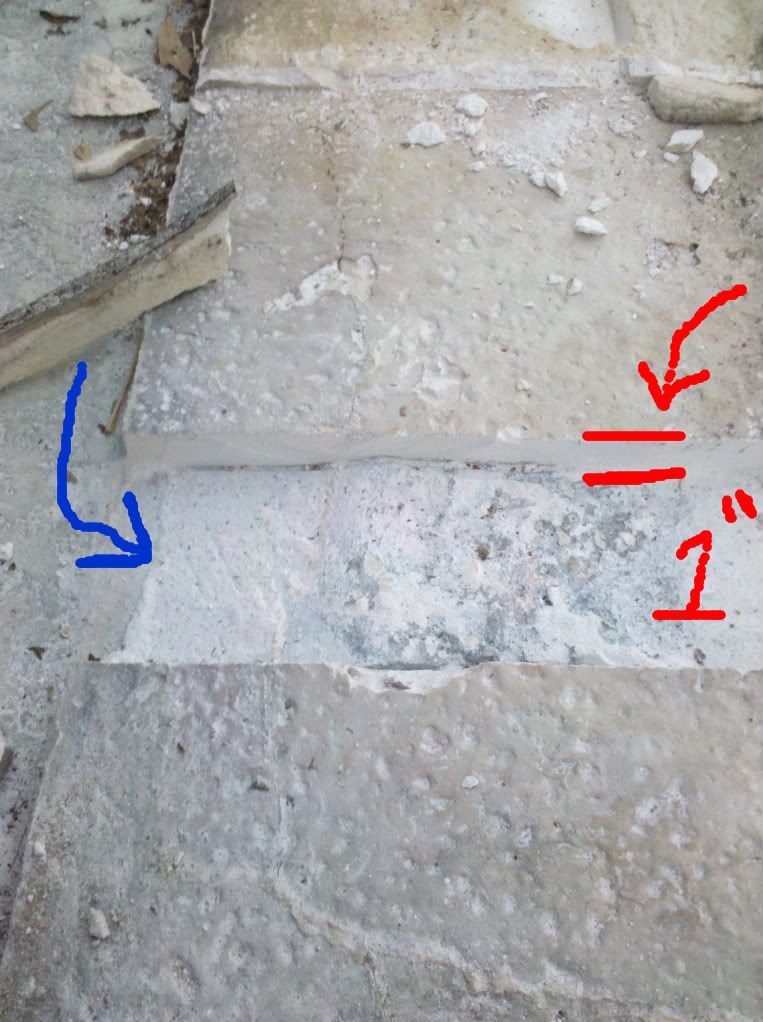
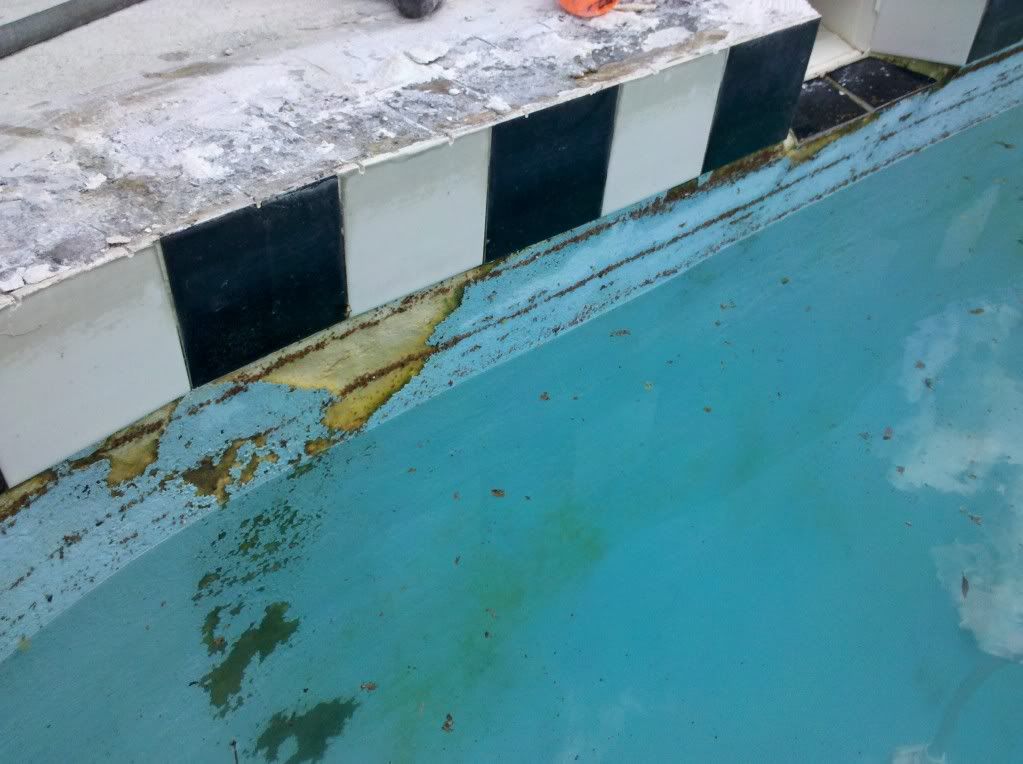
Not sure as to what the final deck is going to be, the pool resurface was put on hold... My existing tile is not bullnosed so I was told that I could either get the deck done first and then do the pool or do the pool and tile resurface, and then risk the tile damage by the coping work (rip out old coping and filler section after new tile was installed). I was also told by a finisher that when my coping was removed a 2"-3" gap would be between the deck and the wall. He felt like we would have to fill with crete and that would be a waste I removed some of the coping sections and cut a slice out of the sub filler (red arrow) and BAM - no gap..!!

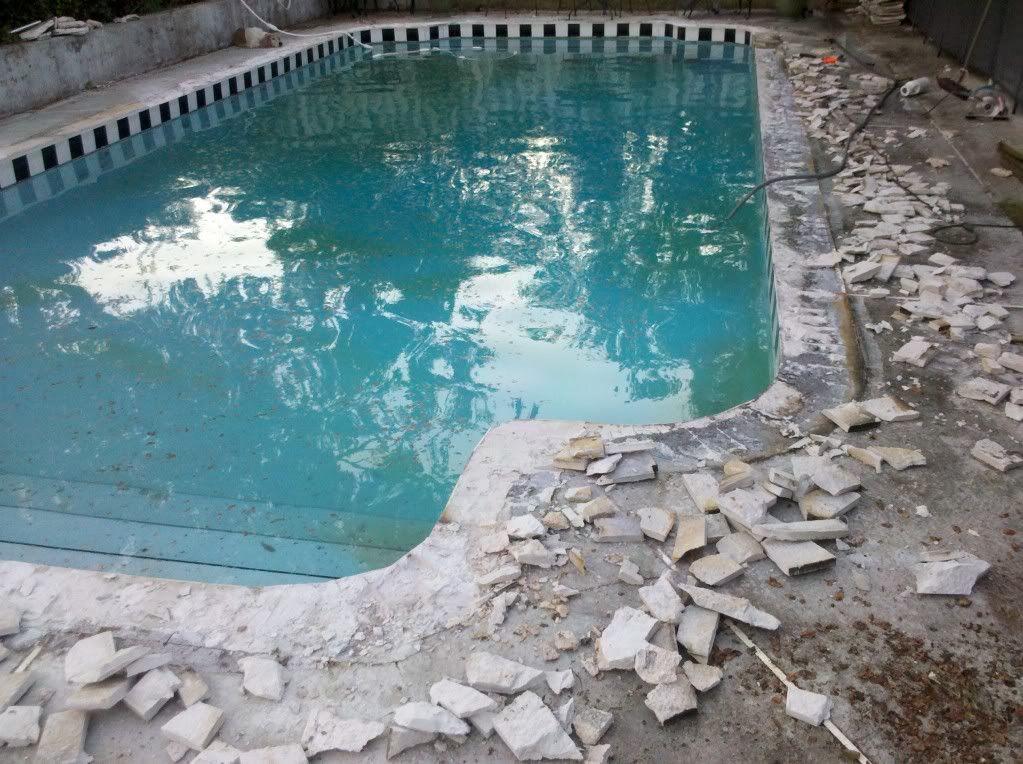
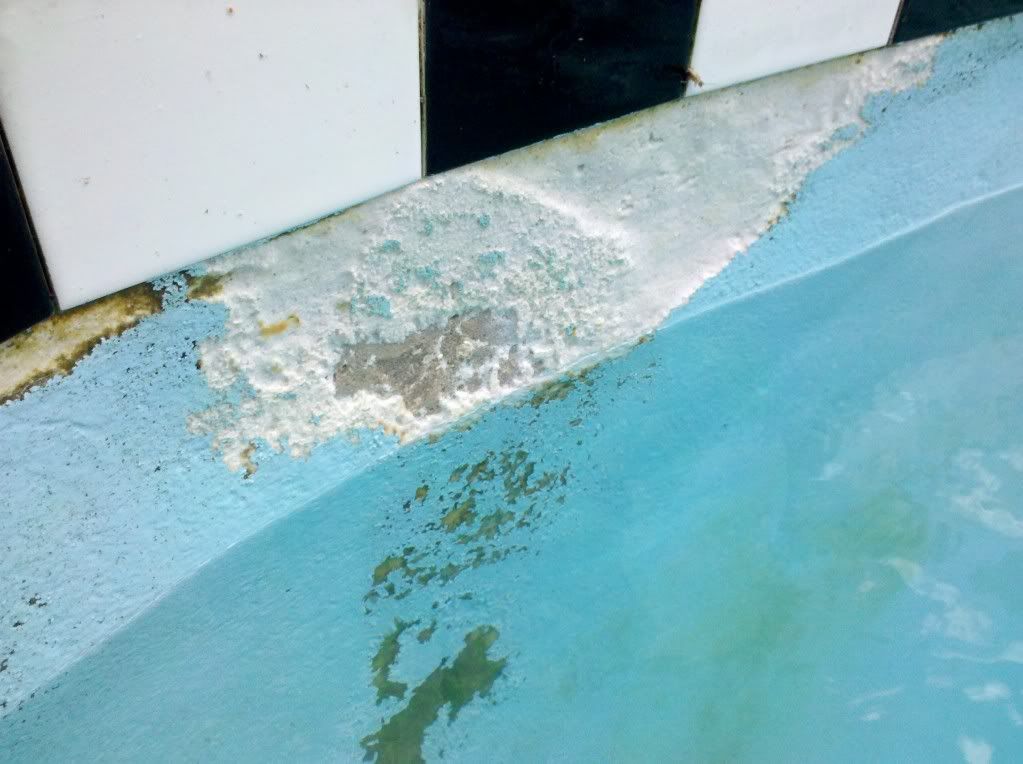
This week I will remove all the coping and sub filler - get the whole thing down to a single level/deck level, coping removed. This puts me closer to being able to put the pool guys to work. I also want a NEW RETURN LINE ADDED to plumb my polaris. Right now the booster pump connects to the pool over the sidewall. Still dont have a firm price to move on, but I'm not too worried - this has to be done.

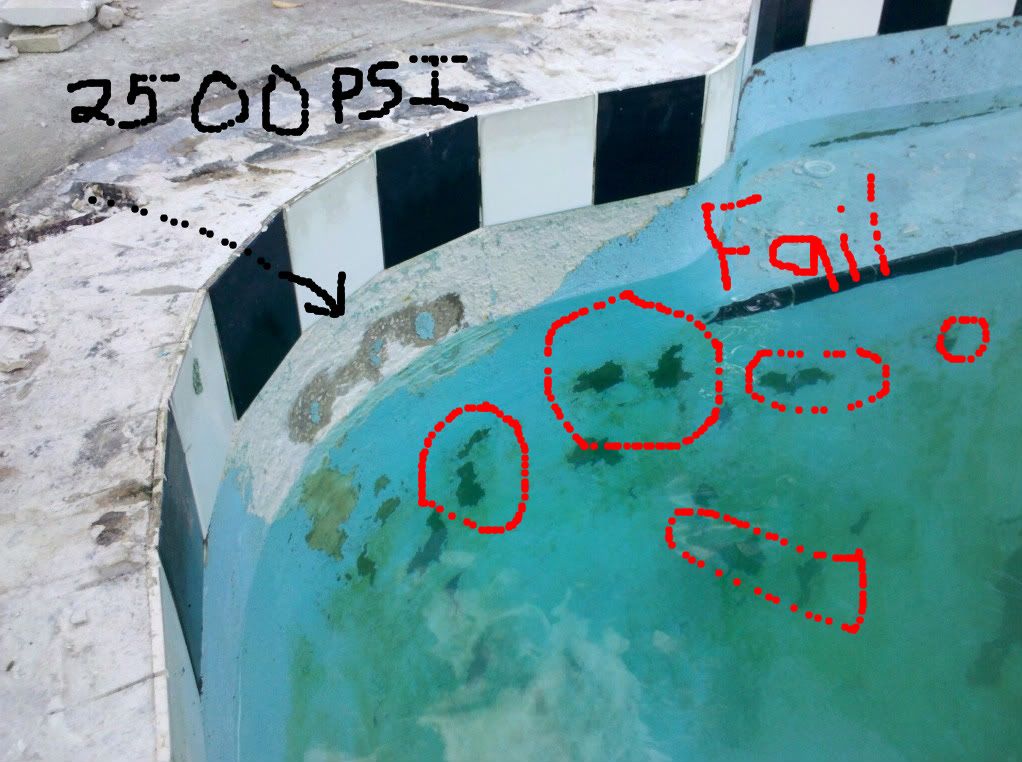
16X32 8ft. deep w/ steps & shelf in deep end. First resurface price was $6500 + 1400 for standard tile. It was only over the phone nothing in writing. I'm shocked at the pros that have not called me back :roll:
0f3e4723.jpg

1b04a83a.jpg

131f6c00.jpg
 
The pool dictates elevation, so you need to get the pool figured out first, and then you can address the deck. Your coping (whatever it ends up being) is going to be set and the deck will follow. With the existing coping being so thin (one inch), you will most likely be putting on something that will raise the deck elevation up to meet it. Since you are already higher than the existing deck, that will allow for the opportunity to put something (pavers?) over the deck, as long as the existing deck is sound.

You do need to do the tile and coping at the same time, and you if you are going to remove the decking it needs to be done now also. I would put the plumbing under pressure during the deck demo so that you know the lines are safe once you put it all back together. Leave an expansion joint between the decking and the coping for movement differential between the two.

For quick pricing reference, use $18.00 per linear foot on your water line tile to remove and replace, and use $45.00 a linear foot for white plaster, and add a couple hundred bucks for the deep end. That should get you pretty close to pricing.

Keep the pictures coming!
 
Back at it this evening and found some cheap labor.... The second pic is an example of a pool (taken from a mag) that has a flush deck that I like a lot!! The general shape is like my pool - that is the deep swimout and the steps. I like the square coping vs the older round look. Since my phone isnt ringing :sleep: , I'll make some calls next week AFTER I get this phase complete.
3c9eba20.jpg

f54f2dab.jpg
 
Thanks!!! :lol: Yeah... the pump was off for a week+ doing my leak testing... That water is gonna go green for a while... I dont plan on getting in it until its resurfaced...

Question for you guys: I need feed back on two more 'projects'


- the legacy CareTaker in-floor cleaning system is shot. The main valve is shot and the jets all need to be replaced AND I'm in LOVE with my polaris. I 'plan' on removing the heads and chipping the pvc back and then filling with crete and then the final resurface material can cover them smooth. Is there a preferred crete to fill the lines?

-next, since I'm so in love with the polaris, I want to plumb a new return line for the polaris booster pump. Right now, my return goes over the deck and My question is what are the steps and materials to cut a hole on the pool wall and seal? (In my mind, I cut the hole and water-jet the length of the deck (5ft) and then connect to the booster pump) My current line is 3/4", but I'm pretty sure the standard wall connector is 1.5" and has a reducer down to the standard Polaris line.

Your thoughts?
 

Enjoying this content?

Support TFP with a donation.

Give Support
Jackhammer down around the Caretaker heads and bust out as much of the plastic as you can. A bag of Red-E-Crete will mix up just fine and fill in the voids.

Which Polaris do you have (I may have missed it in your sig :oops: )? If it is a suction side cleaner, then I would run an 1 1/2" line all the way to the pump. If it is a return side cleaner, then (IIRC) a 1" line is needed to the booster pump for the cleaner. Punch a bigger hole through the pool wall and "dish" out around the hole to allow the plaster company to fill the penetration area to water stop. Go 45 degrees from the face of the pool wall back towards the penetration, and maybe 3-4 inches out from the edge of the pipe (I hope I am explaining it well enough). You want to give the plasterers an area in which to pack quite a bit of plaster around the pipe.
 
simicrintz said:
Jackhammer down around the Caretaker heads and bust out as much of the plastic as you can. A bag of Red-E-Crete will mix up just fine and fill in the voids.

Which Polaris do you have (I may have missed it in your sig :oops: )? If it is a suction side cleaner, then I would run an 1 1/2" line all the way to the pump. If it is a return side cleaner, then (IIRC) a 1" line is needed to the booster pump for the cleaner. Punch a bigger hole through the pool wall and "dish" out around the hole to allow the plaster company to fill the penetration area to water stop. Go 45 degrees from the face of the pool wall back towards the penetration, and maybe 3-4 inches out from the edge of the pipe (I hope I am explaining it well enough). You want to give the plasterers an area in which to pack quite a bit of plaster around the pipe.

Thank you!!! I have a polaris 300? It operates on a booster pump and a pressure line connects to the polaris. The water source is connected at the DE filter - after the filter. The booster only runs with the main pump. When you say room to pack in the plaster... cut a 2" hole for a 1" pipe? And dish out around say 4" out from center. I can handle that. Should I use the Red-E-Crete deep in the hole sounding the pipe or a hydrocement etc? Say as far back as I can get it...? I do appreciate your help - I may do this next week. I'm booked this weekend..!
 
You probably have the 360/380 (here's the manual for the 360: http://www.polarispool.com/files/manual ... ual360.pdf).

A 2 or 3 inch hole would be great, as it will allow plenty to work with for the plasterer. Remember, the plaster is the pool "waterproofing", so you want to give those guys a fighting chance!

Fill the floor heads as much as you like with the sack crete. Leave that kind of rough at the surface for the plasterer also. They do not like it too smooth, as the rougher surface will allow them to work the material in.

Keep up the good work :goodjob:
 
I'll get my sig updated this evening... The Polaris looks to be an older 360 model - Just replaced most of the bearings and she is ready to get back to work!!

Deck demo is complete. I still need to rent a tool to grind-down the peaks. I found it at home depot...

I had a few people look at the pool... None are getting the access you are getting as I drained offer a foot of water to share my concerns with the community. When I prep'd and painted the pool years ago I did so because I felt the pool surface would fail again. As luck would have it, the paint failed in the legacy trouble spots. When I share this in person, I'm told 'dont worry - we put a bondcoat on the old stuff before the new stuff goes on'. On guy mentioned he would sandblast another mentioned 'tipping' it with 4000psi pressure washer. I got in there today and hit a few spots with my Wal-Mart 2500psi briggs to see just what might happen.
On the Steps: removed the 2-part epoxy paint and left a very rough surface. Pulled the CareTaker jet too..
9391bc68.jpg

Next... Deep end. This is down to the SHELL right? This is the bare crete right?
b4dc6740.jpg

Closer... As you can see my pressure washer has removed some of the plaster..
1df9a2da.jpg

Now on the skimmer side - more of the same... BEFORE.
6ba20f46.jpg

After a little pressure washing...
496b003a.jpg

...So with that do i say 4000 psi will remove the bad stuff and the bondcoat will insure the new stuff adheres? Do I go for a full chip-out? No turning back now :hammer:
 
Sometimes a pressure "wash" will work, and others time it will not. I would be willing to bet you will require a full chip. The re-plaster is only as good as the prep below, and you have severely degraded plaster, which typically necessitates a full chip.

And, yes, you are seeing the gunite shell in the photos. That plaster is shot!
 
'severely degraded plaster' Thats what I figured... I dont have any interest in doing this myself (I dont think anyway...)

My main concern, as its been said, and I believe it 110%... The resurface can only be as good as the foundation it was applied to. Again, this was my fear years ago and that was a factor in the epoxy paint. I just wanted to be sure I wasnt falling for a bondcoat special. Heck, my paint lasted 3+ years, I'm sure I would be happy as can be for a few years and very sad there after....

So I guess I need to connect with a finish company that 'will' take it down to the gunite shell.
 
On those heads, you can use an "inside" pvc pipe cutter that attaches to a drill to get the top 6" out , follow up with an SDS hammer demo around it, that will take em out pretty fast. Then fill with hydro-cement and top with plaster. If you wanted to tackle the chip-out yourself, a side grinder and SDS hammer with a spade bit would take some time but be doable for a do it yourselfer to save some labor costs.
 
Lershac said:
On those heads, you can use an "inside" pvc pipe cutter that attaches to a drill to get the top 6" out , follow up with an SDS hammer demo around it, that will take em out pretty fast. Then fill with hydro-cement and top with plaster. If you wanted to tackle the chip-out yourself, a side grinder and SDS hammer with a spade bit would take some time but be doable for a do it yourselfer to save some labor costs.

I never thought of an 'inside' pipe cutter, sounds like a plan!! I was just gonna split them with a chisel the best I could.

Chip-out: Hmmm.... I may try it and see what how well it goes... I have a hand-held air hammer that should tell me what I'm getting myself into... Then I can get the right tools... Wonder what the savings would be to chip it myself? This has me thinking... :lol:
 
I've followed a few DIY chipped pools, and I have had to charge more to fix the chip out to warrant our work :shock:

The plaster company has to warrant the plaster job, so prep is critical. Any plaster outfit worth their salt will not attempt a high psi abrasion on a pool that needs to be chipped. Here, the guys can chip an average pool and spa in about 4 hours. That obviously accounts for some of the cost of the re-plaster, but it is not a huge savings to have it done, and, like I said, it can sometimes increase your cost!

Just something to think about!
 
simicrintz said:
I've followed a few DIY chipped pools, and I have had to charge more to fix the chip out to warrant our work :shock:

The plaster company has to warrant the plaster job, so prep is critical. Any plaster outfit worth their salt will not attempt a high psi abrasion on a pool that needs to be chipped. Here, the guys can chip an average pool and spa in about 4 hours. That obviously accounts for some of the cost of the re-plaster, but it is not a huge savings to have it done, and, like I said, it can sometimes increase your cost!

Just something to think about!

THANK YOU!
! This is a new layer on the pool project... If the plaster doesn't 'pop-off' nicely - I wont be messing with it...

Having the shell exposed in these pics is more than the pros got to see. In both cases, I told them that I thought it was down to the crete in some areas they each said 'blast the paint off', but never acted as if the shell exposed was an issue, more so the bondcost was the cure all... Now, I see that the plaster comes off at so-called 2500 psi... I guess I ask for a chip-out and plaster price. Help me to be clear - I'm not interested in a Pot Blaster, High PSI water - Chip Only??

Polaris Location Question: Where is the ideal location for the new return line for the Polaris. The wife wants it in the center side wall same height as jets on opposite wall(so she doesnt see the port & line from the porch) :whip: 
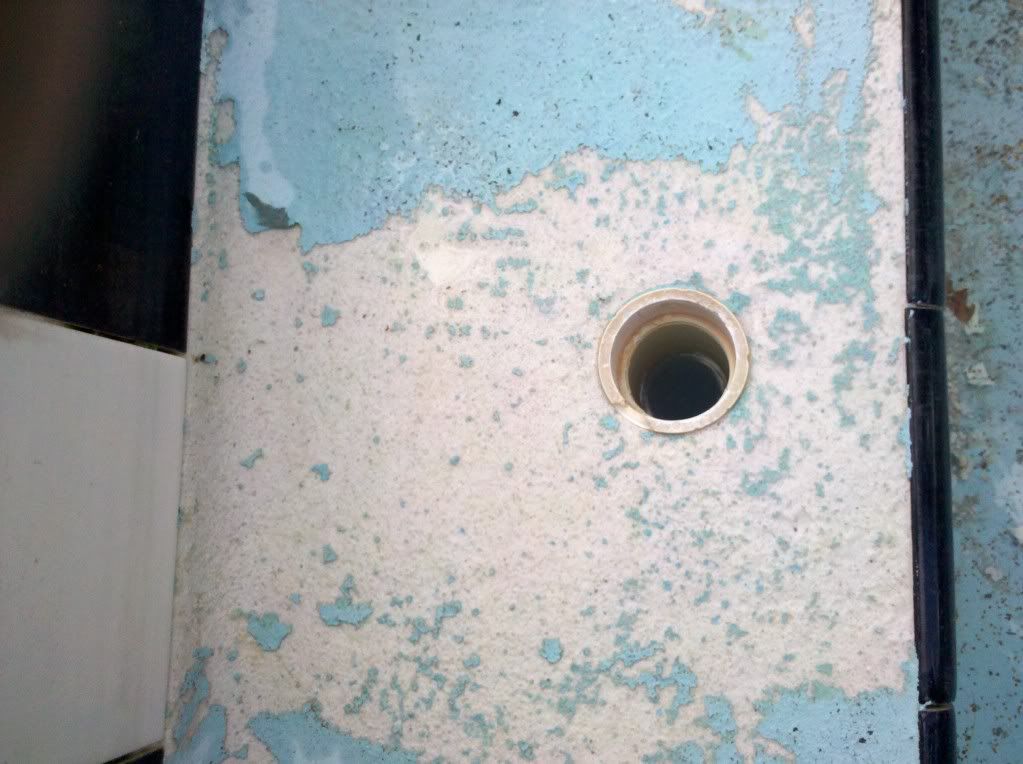
. My thought is this would divide the pool 50/50. Today, the line drops in on the deep end and the Polaris runs the entire pool length. Any reason NOT to place the new port in the center? Beside its going to be a PIA to plumb :blah:
 

Enjoying this content?

Support TFP with a donation.

Give Support
Thread Status
Hello , This thread has been inactive for over 60 days. New postings here are unlikely to be seen or responded to by other members. For better visibility, consider Starting A New Thread.