Last year I had a leak that I was never able to find, and I finally resorted to replacing the liner.
Yesterday, I looked out the window, and saw a tremendous amount of bubbles coming out of the return. I went out to investigate, and found that my water level had dropped 3/4" from 6:00am to 4:30pm, and the level was low enough that the pump was sucking air through the skimmer. I had noticed that the level was low that morning, but since I'd had the fountain on overnight, and saw evidence that the wind had been blowing the water out of the pool, I didn't get too concerned. Since we're expecting rain today/tomorrow, I had decided not to top off the pool yesterday morning.
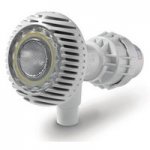
When I saw how far the water had dropped, I knew I had a leak and was pretty certain where it would be. Sure enough, there was a 1/2" tear right above the return. The return is an Aqualuminator, so instead of an eyeball, the whole outer ring turns. I had noticed earlier in the season that the ring would sometimes bind while turning it, but since fixing it requires taking the plumbing off the wall I was putting it off until fall when I'm ready to winterize.
I've told the kids repeatedly to leave the return alone, but they still play with it.
I had to make a quick run to the pool store to grab a patch kit, and slapped a patch on it last night. In the process, I discovered that the liner all the way around the return is pretty worn (the pattern is worn off, and the liner is rough in a couple of spots,) so I put a couple more patches over those areas, just in case. This on a one year-old liner. I'm not too happy right now.
This fall, I'm going to fix the binding issue. In the process, since I'll have all the pluming off anyway, I'm planning to put a large patch over the whole area as reinforcement to protect the liner. I may even do two layers. I'll try to remove these patches first, but if they don't come off easily, I'll just put the reinforcing patch(es) over them.
Aside from the aesthetics, does anyone have a reason to think that this is not a good idea?
Thanks,
Tim.
Yesterday, I looked out the window, and saw a tremendous amount of bubbles coming out of the return. I went out to investigate, and found that my water level had dropped 3/4" from 6:00am to 4:30pm, and the level was low enough that the pump was sucking air through the skimmer. I had noticed that the level was low that morning, but since I'd had the fountain on overnight, and saw evidence that the wind had been blowing the water out of the pool, I didn't get too concerned. Since we're expecting rain today/tomorrow, I had decided not to top off the pool yesterday morning.
When I saw how far the water had dropped, I knew I had a leak and was pretty certain where it would be. Sure enough, there was a 1/2" tear right above the return. The return is an Aqualuminator, so instead of an eyeball, the whole outer ring turns. I had noticed earlier in the season that the ring would sometimes bind while turning it, but since fixing it requires taking the plumbing off the wall I was putting it off until fall when I'm ready to winterize.
I've told the kids repeatedly to leave the return alone, but they still play with it.
I had to make a quick run to the pool store to grab a patch kit, and slapped a patch on it last night. In the process, I discovered that the liner all the way around the return is pretty worn (the pattern is worn off, and the liner is rough in a couple of spots,) so I put a couple more patches over those areas, just in case. This on a one year-old liner. I'm not too happy right now.
This fall, I'm going to fix the binding issue. In the process, since I'll have all the pluming off anyway, I'm planning to put a large patch over the whole area as reinforcement to protect the liner. I may even do two layers. I'll try to remove these patches first, but if they don't come off easily, I'll just put the reinforcing patch(es) over them.
Aside from the aesthetics, does anyone have a reason to think that this is not a good idea?
Thanks,
Tim.