Solar Cover Reels? Anyone make your own? HOW?

dpool

0
Sep 20, 2007
101
That's it - trying to deal with getting the solar cover (bubble wrap kind) off the pool on my ABOVE GROUND POOl and then BACK on after swimming ... and make it easy enough we don't need a whole crew out there to do it or need to take another swim after because we're all tired, hot and sweaty from trying to the the thing BACK on and in place.

Any Ideas?

I figure it's got to have something to do with PVC ... I'm ready!

dpool
 
dpool, do you realize you got that all out IN ONE BREATH?? :shock: LOL

My husband was just trying to figure out how to do this. So I'll be lurking on your thread to get ideas, if you don't mind! :-D

Anna did a thread showing how she cut hers into five pieces. But for now, we're wanting to leave ours whole. With the big storm last week, we'd have lost the whole thing if it had been in smaller pieces. But because it was still in one piece, the winds bunched it all up on one end of the pool. :roll:
 
Take it from me, pvc will not work. Matt4x4 built a wonderful reel system that many of us copied some years back. Check out his posts or take a look at any pix you may find in mine regarding solar reels. We both have instructions on how to diy. It is built onto posts off the end of the pool. Nothing to take off or move when you reel up. One person can reel up or pull out the cover onto the pool from inside the pool or outside standing along side.

Also ixne~ on the steel pipe as the reel part - too heavy and it sags. We found that the aluminum conduit type worked best - surprisingly as light as it is, it does support the cover very well. It did not sag in the center like the heavier metals or pvc. This is affixed to washers with bearings welded in - a crank handle on one side. Mount the whole thing about 3' off the back or side of the pool, about 2' higher than the rail. The straps are riveted onto the reel and affixed to the cover with rivets as well. You can also buy commercial reel strap kits. We just used regular nylon webbing which has held up nicely for some years. We do not take our cover in, we just cover it for the winter but if you have a commercial strap kit I think they come with buckles or something to remove the cover.
 
MNMOM, I'm just curious. When you reel your cover in, it has pool water on the one side, which gets reeled in too (a little of it at least). Does that dry out ok. I was thinking you would need to reel it in and turn the cover on its side to allow the water to all drain off.

Our pool was on its way to 94 today. So we had to remove the cover and we're leaving it off to see how much the pool will cool down during the night. Nice hot tub effect this evening though :shock:
 
NWMNMom said:
Take it from me, pvc will not work. Matt4x4 built a wonderful reel system that many of us copied some years back. Check out his posts or take a look at any pix you may find in mine regarding solar reels. We both have instructions on how to diy. It is built onto posts off the end of the pool. Nothing to take off or move when you reel up. One person can reel up or pull out the cover onto the pool from inside the pool or outside standing along side.

Also ixne~ on the steel pipe as the reel part - too heavy and it sags. We found that the aluminum conduit type worked best - surprisingly as light as it is, it does support the cover very well. It did not sag in the center like the heavier metals or pvc. This is affixed to washers with bearings welded in - a crank handle on one side. Mount the whole thing about 3' off the back or side of the pool, about 2' higher than the rail. The straps are riveted onto the reel and affixed to the cover with rivets as well. You can also buy commercial reel strap kits. We just used regular nylon webbing which has held up nicely for some years. We do not take our cover in, we just cover it for the winter but if you have a commercial strap kit I think they come with buckles or something to remove the cover.

Okay - well I already bought some SCH 40 2" PVC pipe ... so, we'll see ... .

NWMNMom ... I couldn't find any pics of what you were talking about - can you repost or send me the links?

So - for my idea ... I only have to span about 10' across my SPLASHER POOL so I bought 14' of PVC but it was too long to fit in the truck and it was bowing on the guys arm so ... . I had him cut it down to 3 sections of 4 with 2 feet left over for ???

What I'm thinking now is using one 4' section a 2x2 coupler, the 2'section and a 2x2 coupler and then ending with another 4' section. I know that gives me 10 feet so I'll see if it actually makes it across the pool. Hope it's warm enough - I get the feeling I'll be swiming for couplers at the bottom of the pool this afternoon. HA! If needed, I may use the 4' 2x2 4' 2x2 4' plan as originally figured(that gives me 12 feet).

Originally, I had a plan of using 2' T connects and small bits of pipe and some 3' T connects with adapters ... if it sounds confusing it is but it could work if I could get the Ts cut down.

So, as I was looking at my pvc pipe and pool I had this thougth of putting one of the 4' sections of pipe on one edge of the pool (it's a SPLASHER TYPE so we have those metal struts and pipes around the whole thing) and then resting the other section on the ladder (in a little indent that is just at the right height) and seeing if I could just wrap the cover on that. Since I've already cut the cover into two LONG sections, I was thinking if I could get BOTH sections on one pipe OR use two 4' sections and use one each. I don't know???

I had this all planned out and even bought little pieces in doll house scale to figure out the plumbing and the turns but now I just want to get the cover on and off. I'll work on perfecting it as the season goes on. Right now it just needs to be easier than it has been. Well, off to try - something!

dpool
 
I cannot find all my pictures just now but I do have one handy that shows how its ground mounted and the crank along with a link to the one posted by Matt4x4 in a post Matt and I both responded to regarding our build. (edit - Matt's link is not working so all I have right now is this picture)

BTW: There is some water in the cover when it is rolled up but it drains out nicely. To hurry that up, I give it a 1/4 turn every so often and the rest comes out. I have never had ice inside the cover over the winter - the small amount of moister in there when it rolls up is not enough to add weight at all - most of the water just drops out right away anyway. We put a poly wrap around it and bungie cord for the winter - for just sitting there on windy days, I do put a bungie cord on it without any damages.

It only takes one person to roll this up and pull it out. My kids were able to do it alone. Our reel is 22' wide - pool is 18' wide x 33 long so it is a lot of cover to reel up. Does a great job.
 

Attachments

  • DCP_0439.JPG
    DCP_0439.JPG
    103.8 KB · Views: 5,251
  • DCP_0438.JPG
    DCP_0438.JPG
    69.7 KB · Views: 4,516
Wow! That's a long pipe! I could see where PVC would bow/bend. How do the CRANKs work? By the way - nice pool! I like that it's off and away from the pool - I don't really have the space unless I went the long way and that would be a lot of pipe, too.

Well, as stated earlier - I went out and only had to fish one coupler out of the bottom of the pool!

I manged to get all of the shorter cut side of cover wrapped on one 4' length and have it resting on the side of the pool and in the indent of the ladder. Doesn't look to good but it's off the grass and off the top of the pool. It's light enough to tip the whole thing off and put into the shade standing up. I don't think the ladder solution will be long term either.

Now, I haven't ATTACHED the cover to the PIPE yet because I'm not done designing this thing and I'm not sure what materials to use. I think I read someone (you?) used webbing - like for lawn chairs? I do have a grommet kit that I bought a while back for this project but what string, rope, stuff to use?

Now, the longer half of the cover (yes, the 5' wide side) is too wide to have it neatly roll up in that section between the pool edge and the ladder. I did roll it up on a section of 4'. 2x2. 2'. 2x2, 4' and wound up putting that at the OTHER end of the pool. I was thinking one section would go north and one section will go south. This is going across the WHOLE width of the pool but only 1/2 of the cover (well actually more like 2/3 of the cover) Even with just this section, however, I have a significant amount of bowing. I think it's the 2' section that is making the weak spot even weaker. I was able to lift the whole bit off the pool and place it in the shade. It's very TALL and I'm sure the neighbor's were wonder - what's going on over there as I looked like that game where the lift and toss telephone poles. Now, one benefit of taking this off the pool is that when I tipped the roll off the edge- all the water pours off the cover - must remember that NEXT time and jump out of the way! HA!

So, I'm not done with this. I think I'm going to get a 6' length of SCH 40 2" pipe and see what happens. I think I'll buy the Ts for the ends but mostly so the cover doesn't wind off the ends. This will only make two trips to the hardware store for this project. Not too bad - yet!

Bummer, I had to put it all on hold as I noticed my WANDA WHALE had lost her mind and was only going in STRAIGHT lines - THAT's why the bottom has been looking trashed. She's been a hard worker for us for about three years without any troubles. I thought I had to dismantle her and repair but I just moved and groved things around and I think something was just jammed up because she's making turns and working in circles again. She's moving a little slower but is moving AND she's getting herself out of the corners, too. I wonder if I'm suppose to use lube on any of her parts. Hopefully, I won't have to repair or replace her too soon because all my budget is going into this pool cover project.

Okay - well that's it for this night - tomorrow's another adventure (and trip to the hardware store)!

dpool
 
NWMNMom said:
Well good luck with the project. snap some pix when its done and post?

If I could figure out how to take a pic and POST... THAT would be more incredible than making my own solar cover reel! I've got that my list of projects, too! HA!

Have a great day!

dpool

By the way - Wanda's working again so I'm back on the REEL project, now.
 
Well - I've lost my nerve and desire to sink any more money into this project. So, Here's where it's at. (If I ever figure out how to take a pic and post it - I'll do that next.)

So ...

I've got a piece of PVC PIPE that fits exactly across the pool at it's widest - about 9ft (yes it bows but not too bad). I've got Ts attached at each end of the pipe. I've attached the cover (with tarp clips) to the pipe with webbing strap I cannabalized from a rachet tie down (it was blue and matched the cover - nuff said). Now, I just ROLL the whole thing (with the Ts resting outside and on the pool rim/tube) like opening an old fashion can of HAM (you know the ones you had to use a 'key' to open up - do they still make them like that?) When it's all rolled up it's easy enough for one person to take off the end of the pool (or if it ever warms up enough to swim, we'll see if it can stay on the end of pool without causing too much trouble).

Putting it back on the pool can be a bit tricky especially if I miss the pool's side rail and one side goes into the drink - it takes some muscle to pull it out of the water and some fast feet to jump out of the way when the water rushes out the ends.

I'm thinking of attaching the left over webbing (with left over tarp clips) to the lead ends of the cover so that all I'd have to do is PULL the cover towards the other side of the pool to put the cover in place. I'll let you know how that works.

Now, I'm still trying to find a place out of the sun to store the whole thing when it's off the pool but because it's so tall I'm kind of limited. I can't easily get it into the new wheeled trash can I bought but I was thinking if I lay the trash can down and then stand/lean both up at the same time I can wheel it away and store it some distance from the pool. I'll have to put holes in the bottom of the trash can but if it doesn't work, I've got a new NOODLE and TOY storage caddy and that needs drain holes, too.

I was trying to get all technical and put bearings and wheels and all sorts of stuff but I just couldn't figure it without spending more money on it. My last thought was to cannabalize a GARDEN HOSE wheel thing and just and a longer pipe - maybe next year! HA! or later in the season when this CAN of HAM design get's too old.

Well, the pleasures of a small Above Ground Pool!
 

Enjoying this content?

Support TFP with a donation.

Give Support
mine is 30 feet long - custom made from a 4" dia. aluminum irrigation tube:

DCFC5141.jpg
 
here is a pic of ours - copied from Matts prototype. The bearing is welded in -
 

Attachments

  • DCP_0437.JPG
    DCP_0437.JPG
    105.3 KB · Views: 3,934
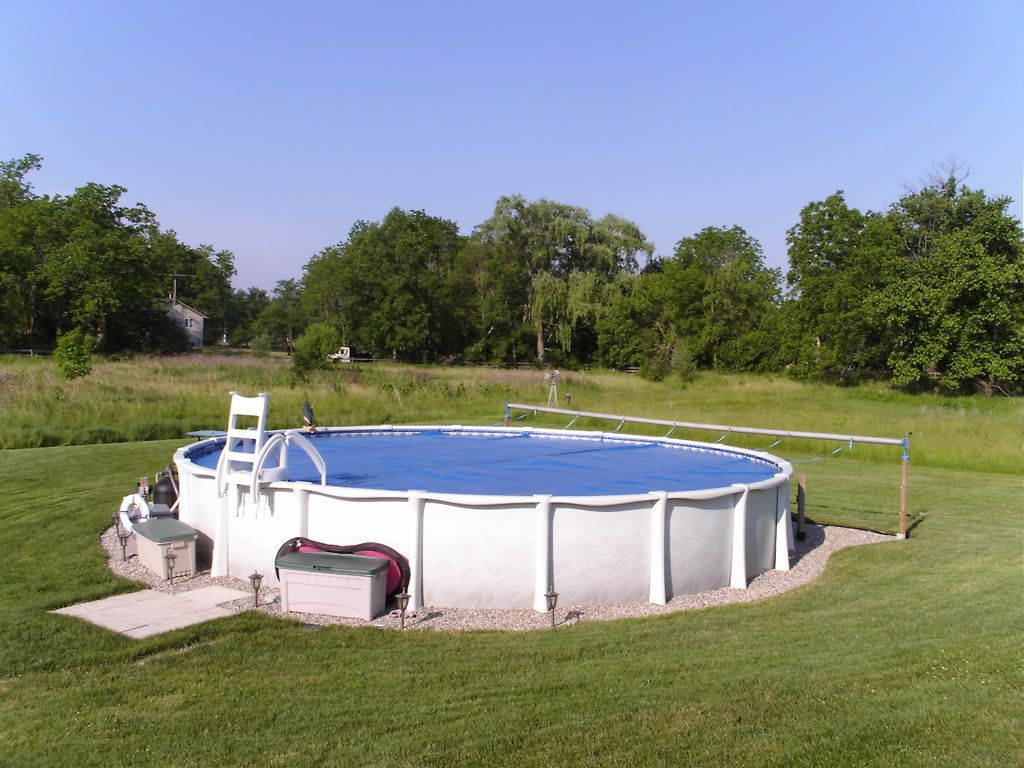
After pricing these out I decided to experiment with my own build. My material of choice was treated lumber since it will be on my deck. It works great, simple to build, and no bearings or special materials needed. I used 1 1/4" black pipe coupled together for a span of 18'. 1 1/2" pipe may be a better option for spans greater that 20'.

Materials:

One 2x8x7 treated plank
One 4x6x7 treated post
Four 90 degree angle brackets
Two ten foot sections of 1 1/4" black pipe
One 1 1/4" coupler
Two 1 1/4" 90 degree elbows
Box of 1 1/2" galvanized screws
Two 8" angle brackets
One 1 1/4" threaded end cap

I only needed 18 feet of black pipe to cross the span of my pool, and I had the left over 2 feet cut down into one 4" union and one 6" piece for handle (only threaded on one side). The entire cost was about $70 from my local Home Depot.

Step 1. Cut 2x8 plank down into two 30" pieces.

Step 2. Cut 4x6 post sections down into two 15" pieces.

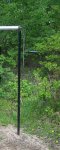
Step 3. Bore 1 1/2" holes through one end of the 4x6 posts, centered 3" from end.

Step 4. Center 4x6 posts 12" from the end of one of the 30" planks.

Step 5. Attach angle brackets to posts and secure post to plank (I predrilled these to prevent splitting on the ends).

Step 6. Add end brackets (I used framing brackets for these, they hand down about an inch below the plank and hook on the edge of my deck).

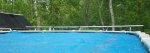
Step 7. Bring pedestals to pool area and assemble the black pipe between the bored holes.

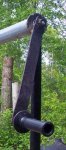
Step 8. Assemble 1 1/4" elbows, 4" coupler, and 6" threaded pipe into a handle and attach to one end of the black pipe. Put 1 1/4" end cap on other side.

Step 9. Attaching cover to black pipe. I used a single bead of silicone adhesive and wrapped the cover around the pipe. Then tie wrapped every foot along the pipe.

140x4qb.jpg


2rc3hwg.jpg


2e31isy.jpg


29zx2r8.jpg
 
gotja,

Where were you LAST year! HA! Welcome! Glad to see you've joined TROUBLE FREE - it's the BEST!!!

Your design and plan looks amazing. I decided THIS year, after spending the season NEVER unreeling the cover because it was too darn hard, I would make some thing that would sit on the OUT SIDE of the pool walls that can be moved (on wheels) but still didn't have a clue how to do the CRANK part. I think your plan is a good place to start. THANK YOU! I'll probably have to buy a new cover as the other one sat out ALL year and is brittle. I think, too, because of the one or two really really hot days we had last summer (sheesh!) the little bubbles in the bubble wrap POPPED! So I dare even try to put it back on the pool cause I'll be spending the REST of this summer scooping out little pieces of bubble wrap.

Not sure when I'm going to get to this project. I'll need to really study the above mentioned plan, buy lumber, get supplies ... time for a nap. At least this year - I got REAL POWER tools for Christmas. Amazing what I was able to do in the past with such limited tools but I'm ready.

dpool

Glad I was able to inspire you, we are really enjoying the ease and simplicity of its use this summer. Note that I bought a larger cover than I needed to so I could perma attached to reel. I would also recommend spending the extra 10-15 dollars and get at least a 12 mill thickness cover. Should get 3-6 years out of one unless you totally overdue the chemicals then cover the pool.

As far as wheels, I was going to do that if I put the reel on the deck side of our pool. My plan was to use plastic caster wheels off an old office chair. I would have drilled 4 holes in the pedestal feet and pop the wheels in. They are completely plastic, so no rust or bearings to freeze up.

Good luck with your project!
 
  • Like
Reactions: MrBeetle

Enjoying this content?

Support TFP with a donation.

Give Support
Thread Status
Hello , This thread has been inactive for over 60 days. New postings here are unlikely to be seen or responded to by other members. For better visibility, consider Starting A New Thread.