New Pool IG - Inland Empire, CA - Pool finished, end pix soon!

Re: New Pool IG - Inland Empire, CA - Decking Poured 10/6!

Nope, no mastic, I have yet to see anyone fully convince me that it's necessary in our environment. If water is going to get under the decking etc., it will find a way and I doubt that mastic along the ONE boundary between the decking and the pool will make a difference. I have friends with no mastic around their pool of 10+ years old, and it looks fine, our cement guy has done several pools (5+ years) with no problem without mastic, so... we went without it. Everyone from the PB and the cement guys related to them just went along and said "This is where the mastic goes and it's a set price of X"... when I started asking 'why?'... I was told reasons, but never full blown examples... I get the reasons and understand them back East etc. and in some situations, but not ours.

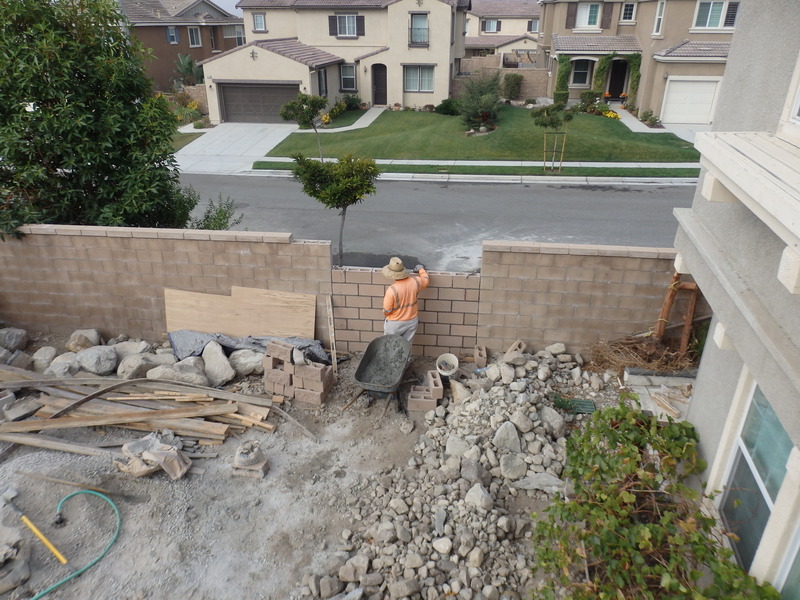
Yeah, our stone guys layed down wire to the pool rebar and bonded the pool. It's required by Rancho code and it was signed off on by the inspector before the decking work began.

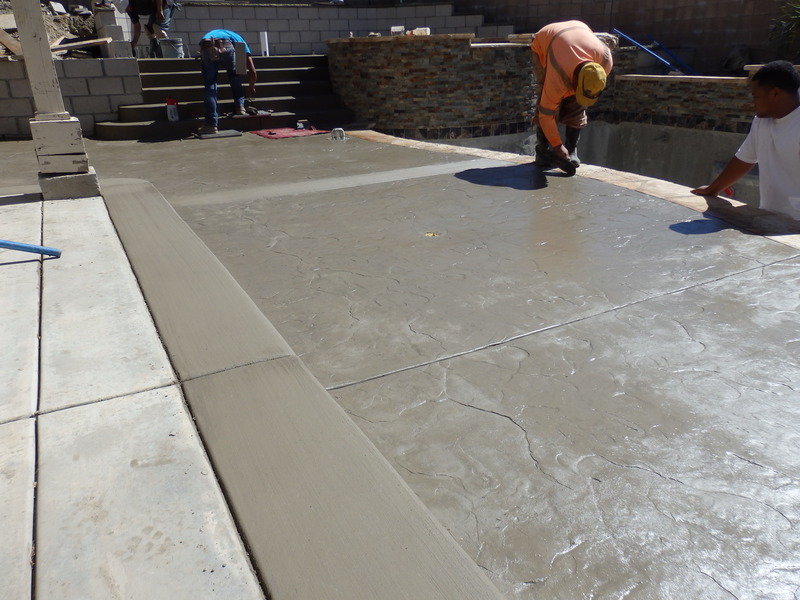
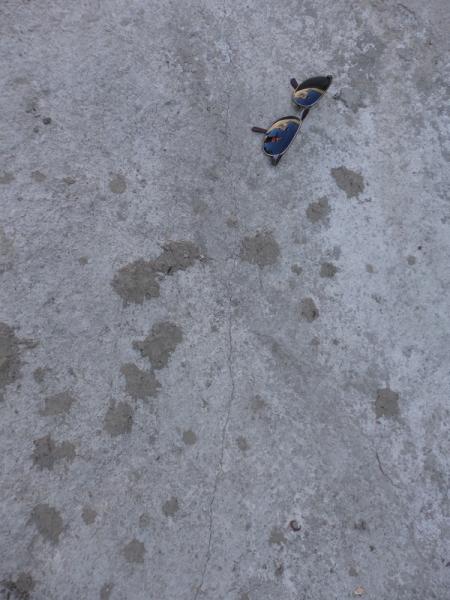
SO, the cement is done, it's drying and looking uneven at the moment due to the variable drying, but it should be walkable by Saturday, hoseable by ~Tuesday, and fully cured/color finalized by Thursday according to our cement dude. By last light tonight it is already multiple shades lighter than in the images below. The texture turned out great and really looks nice with being broken up by the few smooth cement lines. This has been 8 years in the making for our backyard. We await walking up the stairs this weekend!

PA060183-1.jpg

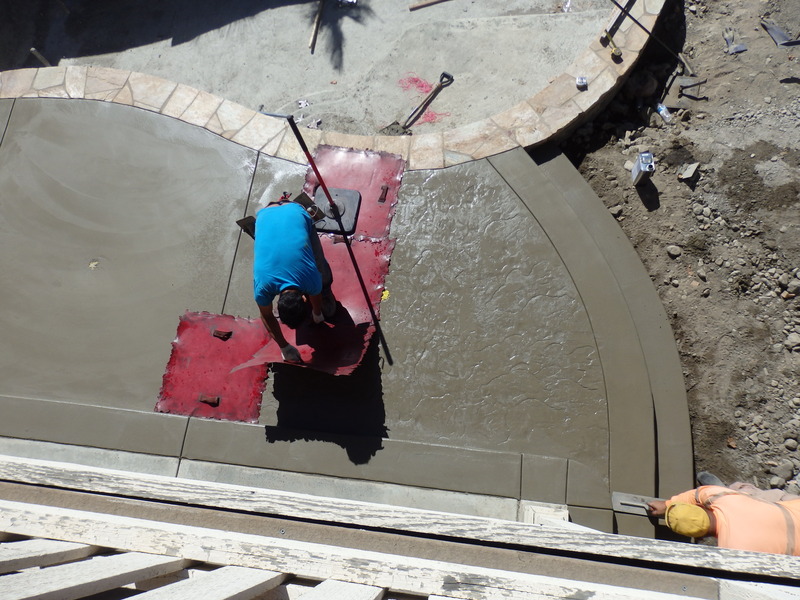
The stamping was fun to watch. The pattern is pretty nice, it's funny that if you're standing straight above the cement and look straight down from the balcony, you can notice the pattern repetition... but down on the ground any way you look at it, not a thing.

PA060192-1.jpg

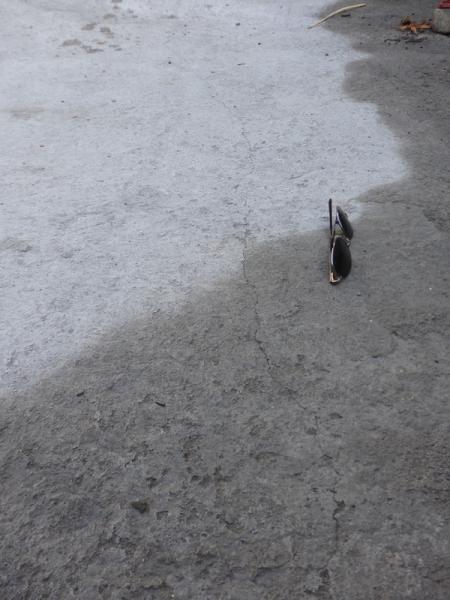
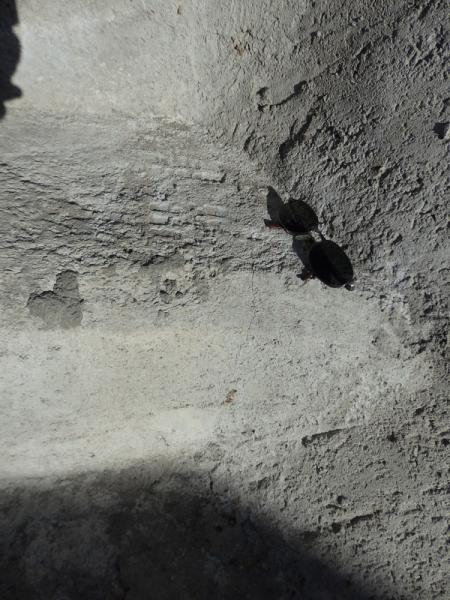
The release they put on the cement to allow the stamp to not stick to it is some sort of petroleum based oil I believe... and before pouring the forms they sprayed down the wood with diesel (again for non-stick purposes)... so for the time being the backyard smells like fuel. It gave a nice sheen to the cement, made it difficult to photograph the pattern in the afternoon sun, and it has taken longer to boil off than I thought it would. Either way, it's drying :-D

PA060198-1.jpg

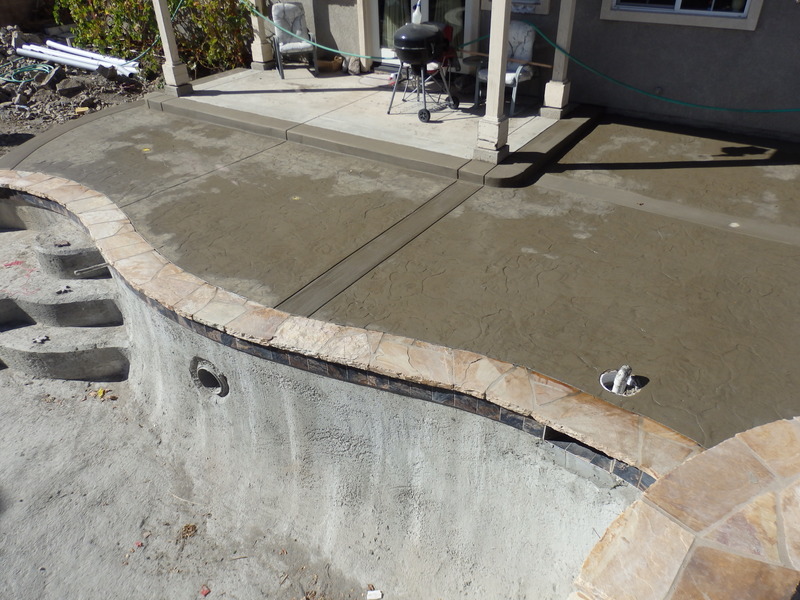
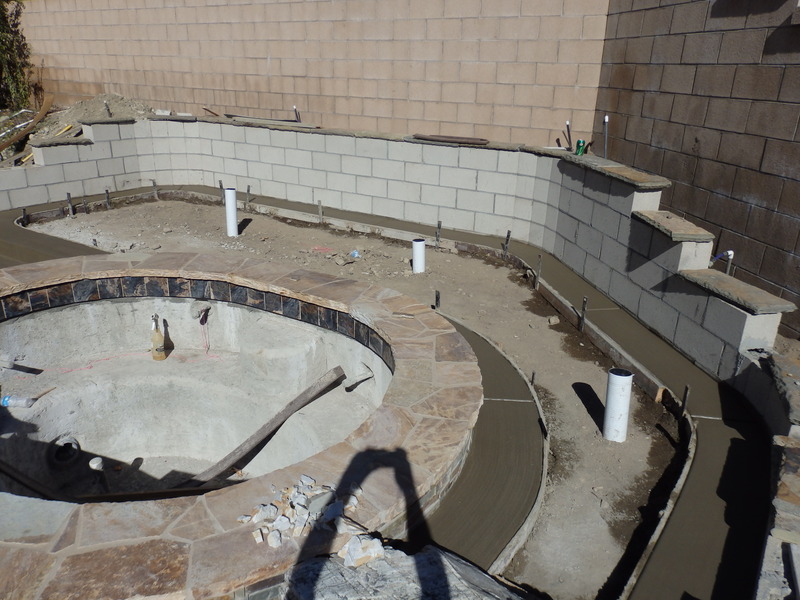
So, patio looks nice. It's funny how looking at the edge of the coping for so long with ~6'' exposed on the non-pool side, having cement now flush with it changes the look. The pool is growing up into a beautiful backyard!

PA060199-1.jpg

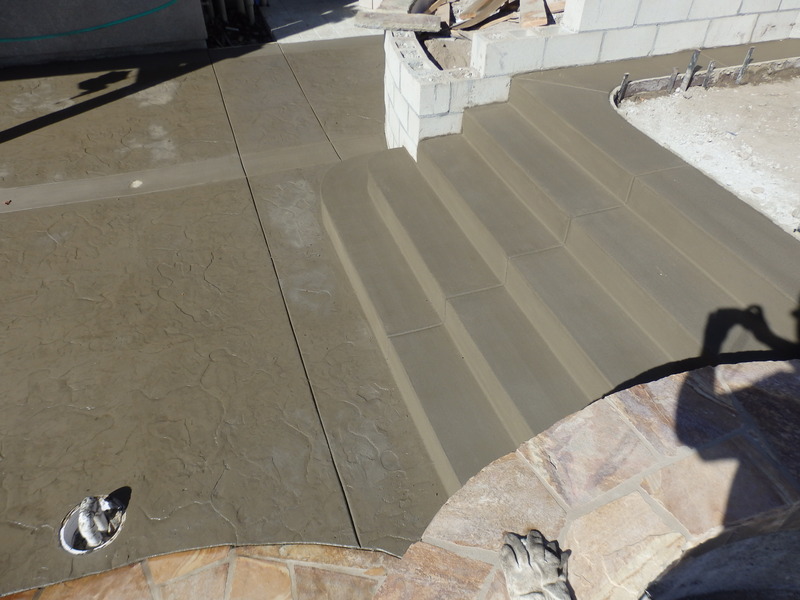
The steps look great. We like that we went with wider steps...

PA060200-1.jpg

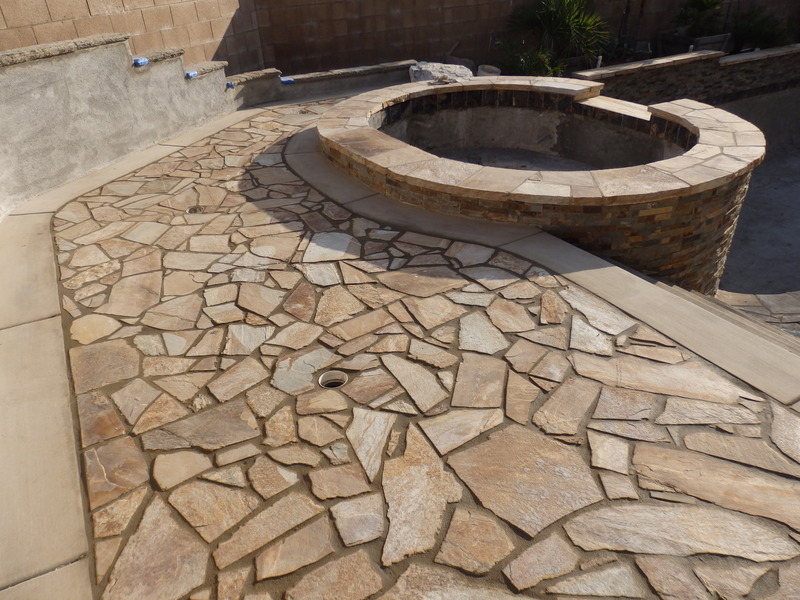
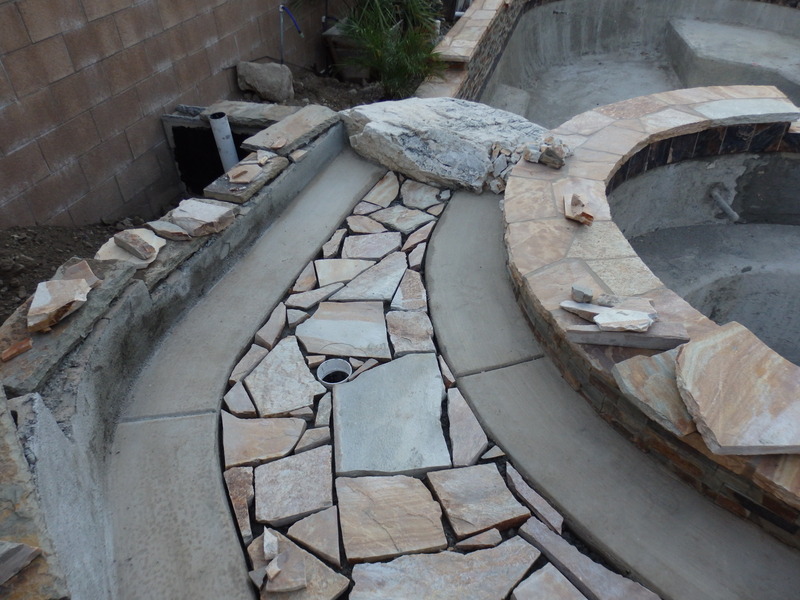
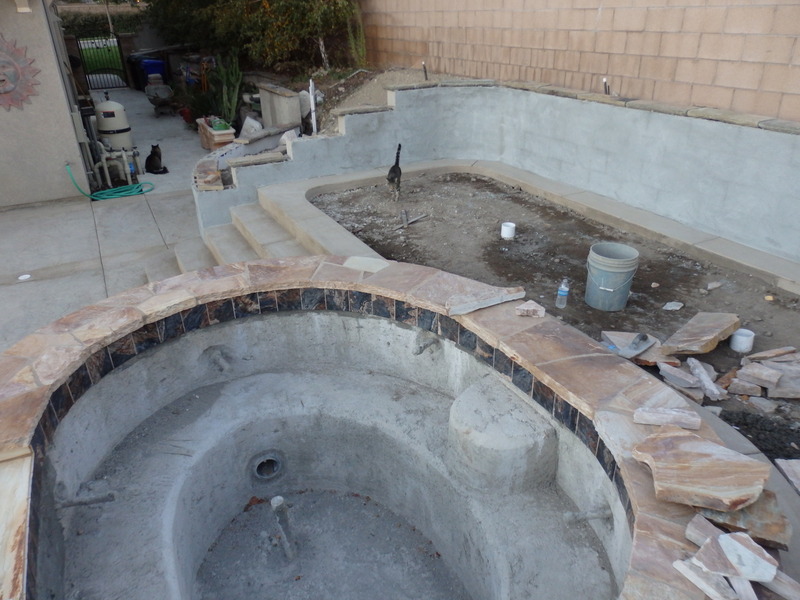
Here's the raised patio and the area being prepped for flagstone (aka left over coping). We debated back and forth about the 1' border around the patio... but finally decided to do it... it makes a thin area for the flagstone leading to the jumprock, but we figure it 'leads' to it...

PA060201-1.jpg

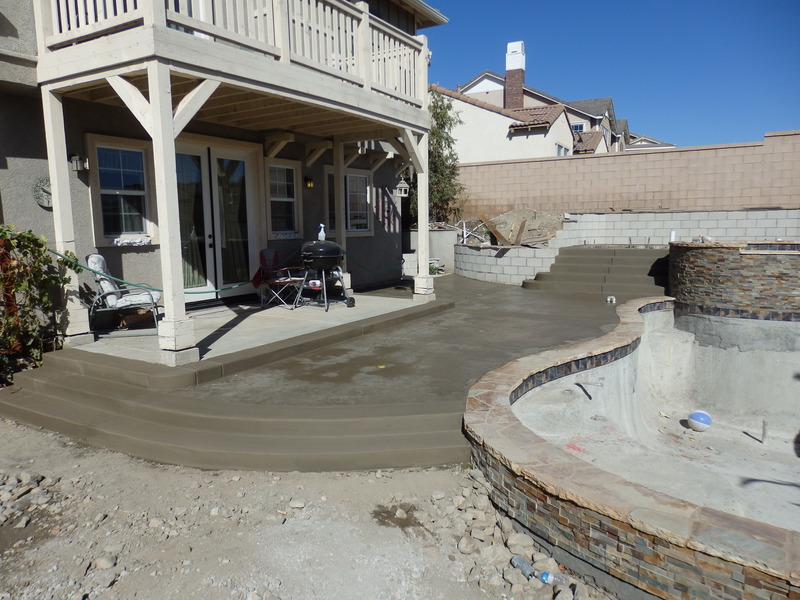
Not the best view, but an overall of the work and showing off the steps to the Phase II patio. Cement guy asked us to lightly spritz the cement tomorrow morning and evening so we'll be doing that. I'll take pictures to show you how much it has lightened through the night etc...

Cheers!
 
Re: New Pool IG - Inland Empire, CA - Decking Poured 10/6!

Yeah, there's very little clay in our soil here and no expansive clays. Your soil over there should be pretty close to mine (if not the same). Feel free to discuss it with your PB/cement guy, but we chose not to go with the mastic. Check back in 8 years to see if I regret it or not :p
 
Re: New Pool IG - Inland Empire, CA - Decking Poured 10/6!

Love the stamp! Nice pick! Loving the wide stairs as well.....they really add to the GRAND look of your raised area.

I like how the flagstone will "lead" to the jump rock....when will they be putting the flagstone down?

Kim:kim:
 
Re: New Pool IG - Inland Empire, CA - Decking Poured 10/6!

By mastic, I assume you are talking about the expansion joint between the deck and coping?

If that's the case (and it looks like you did not install one), that expansion joint (or more correctly isolation joint) is a required aspect of the structural design of the pool. Concrete expands and contracts far more than most would ever think. As the concrete deck expands, it will begin to put stress on the pool shell (which expands and contracts in a completely different manner) which will cause tiles to pop off, coping to come loose, or worst case, the bond beam to crack.

While the "mastic" used in this area is really for nothing more than to dress up an otherwise ugly expansion joint, the joint itself is absolutely required as a safeguard to isolate the pool shell from any other potential forces that may arise.

You may never have any issues by not having this expansion joint but I don't want others to read this thread and then also opt out of its installation. Take a look at your standard engineering detail attached to your pool plan, it is clearly shown there and it's something your pool builder should have absolutely insisted on installing.
 
Re: New Pool IG - Inland Empire, CA - Decking Poured 10/6!

One more note about that. It isn't just about clay soils. While clay soil can exacerbate movement of the deck thermal expansion and contraction alone is enough to cause fairly significant movement of the concrete. Especially when the concrete is bordered on both sides by relatively immovable objects, pool and house. It would be less important if the pool deck was bordered by yard on the other side.

Anyway, as you say, keep us updated on how it goes over time. Nice pool! I like all the steps.
 
Re: New Pool IG - Inland Empire, CA - Decking Poured 10/6!

Able to walk on the cement now, no dirt, which is nice. We had some things done today and should be finished by the week with this phase of cement work. Tomorrow is a break and things will continue on Wednesday. Scratchcoat was put onto the wall, the flagstone work was started, and the perimeter wall hole is being rebuilt.

PA100208-1.jpg

While the pieces might be small, we're using the left over coping as flagstone in the upper deck (we have it, might as well use it!). There are some larger pieces and those will be used in the larger space (next photo).

PA100209-1.jpg

The cats were exploring the yard. You can see the scratchcoat in place on the wall, tomorrow we'll line up the caps exactly where we want them and then the wall can be completed and stuccoed. The larger pieces of flagstone will go around up there on the patio... it'll be a nice spot to put a small table and a couple chairs... current thought on the name for the raised patio is the Lido Deck.

No pic of the wall, but the base was layed down, now just need to stack it up 5ft! What's nice is, once the perimeter wall is rebuilt, we can get the inspection going and get the electrical/plumbing work done and then the plaster. Finally get our PB out of our hair!
 
Re: New Pool IG - Inland Empire, CA - Decking Poured 10/6!

Perimeter wall going up-

PA120223-1.jpg

It is being built without reinforcement because in a few months we'll be bringing it down again to bring in a bobcat to finish the last 1/3rd of the yard (then we'll fully rebuild it). Just the way things worked out, time, cash, and practical wise.

We'll be calling to arrange inspection for Monday. I got a few things to do over the weekend to prep for the inspection. Still waiting to hear back from the PB on the gate guy, it's always a running theme... emails go unanswered for an average of 3-4 days...
 
Re: New Pool IG - Inland Empire, CA - CRACKS in shell!

Stonework is going well, caps take some time to work with... I wont say that our stone guy is 'slow', but he measures a lot... honestly it's appreciated because he is doing a great job.

Now then, it may be nothing, as I've heard it's normal, but this morning, we noticed that there are CRACKS in the gunite!-

PA130230-1.jpg

This crack dissipates into the side of the deep end, sweeps around up the slope of the pool and into the two lower steps where is ends.

PA130231-1.jpg

Here it is up the step.

PA130232-1.jpg

The second crack is a bit higher up on the pool slope and does a swooping downward, it is not as prominent as the other crack.

Crack_rough-1.png

Here's a rough diagram on where they are (1st crack is the long one). Their position and nature indicate to me it's the pool's deep end is pulling down the shallow end, the scalloped nature suggest vertical and horizontal movement lengthwise along the pool. That suggests actual movement, but, being these are not 'big' cracks, they could be related to simple shrinkage of the gunite and pulling of the slope from the deep end and the shallow end (cracking along the rise of the slope)...

Now then... I've heard that cracks are normal... it seems these have popped up recently though as we never noticed it during curing (bonding with) of the pool. Our stone guy said he has seen it before and says it's not an issue from what he knows... personally, I've heard that cracks form (though earlier in the process, this gunite was shot 10.5 weeks ago) and aren't an issue... but, a peace of mind would be nice. What do you guys think? I've heard that if we can't put a 'sharpened pencil' into it, then it's not a 'crack'.

So, even though I'm rather confident myself... what do y'all have to say?
 

Enjoying this content?

Support TFP with a donation.

Give Support
Re: New Pool IG - Inland Empire, CA - CRACKS in shell!

OH SO NORMAL!!!!!!!!! Did you hear that? LOL Yes it IS normal. As far as I know just about every shell develops cracks. Some worse than others but no real problems. The plaster will fill it in!

:hug: feel better?

Kim:kim:
 
Re: New Pool IG - Inland Empire, CA - Pre-Plaster Inspection Set For Monday!

Good to hear you guys say the cracks are fine... I'll be keeping an eye on them...

SO! The upper patio was finished today... Monday will be grouting the caps and stuccoing the wall and that will be it for the stone/cement work for now. We've also set the next inspection for Monday and all the alarms and stuff will be inspected... then on to the last parts of the pool...

PA140243-1.jpg

Pieces are a bit small, but, it's a good use of leftover flagstone. There's barely any left.
 
Re: New Pool IG - Inland Empire, CA - 10/17 Inspection Passed, Ready For Plaster!

Pre-plaster inspection just passed! So much effort put into making sure doors and gates were self closing, have alarms on them (loud ones at that), metal put onto the side gate so it no longer has a 'step'... he glanced at it all and signed it off.

Email sent to the PB and per a rare peep out of her last week, plaster might be done later this week!
 
Re: New Pool IG - Inland Empire, CA - 10/17 Inspection Passed, Ready For Plaster!

Looks great!!!! I'll send my daughter over to make sure it's swimmable...just saying :) LOL She's a sophomore at USD.

Seriously looks good, I really like your design.
 
Re: New Pool IG - Inland Empire, CA - 10/17 Inspection Passed, Ready For Plaster!

All that effort and ONLY a peek?? LOL BUT if you had NOT done it he would have a tape measure out and wore his pencil down to a nub writing you up LOL

SWEET on the maybe plaster!

Kim:kim:
 
Re: New Pool IG - Inland Empire, CA - 10/17 Inspection Passed, Ready For Plaster!

Plaster will probably get held up for a bit, having to play some hardball with the PB... trying to charge us for things we've already payed for (interesting they have no memory of them cashing the checks, the bank remembers), things we feel we're not responsible for (fun quoting their own contract to them), and laying out things that were written in the contract and never done by them (so that they owe us). It'll be interesting.
 
Re: New Pool IG - Inland Empire, CA - Plaster set for tomorrow 10/19!

Welp, after an hour long conference call with the PB owner, we came to an agreed price for the final check. Plaster is on for tomorrow and we'll fill up the pool... then we'll be 'schooled' on Friday. Huzzah!

Outside, the stone work is being finished and cleaned up, and the stucco is currently going on. It'll be a pool tomorrow!

Oh, he said to fill the pool FIRST and then once it's filled to the mid tile line, to THEN fill the spa. Agreed?
 

Enjoying this content?

Support TFP with a donation.

Give Support
Thread Status
Hello , This thread has been inactive for over 60 days. New postings here are unlikely to be seen or responded to by other members. For better visibility, consider Starting A New Thread.