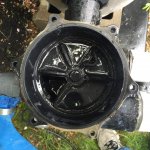
No matter what setting I set my Hayward Vari-flo sp0710xr50 to, it is filtering, but also blowing out waste water. There is enough water escaping out the waste line to keep the hose full and flowing, but still enough going back to the pool to keep the jets going. I'm also getting a fair amount of air in the line, which I think is from the same issue.
I've tried every setting on the valve and tried pulling water from only the skimmers or only the pool drain with the same results. I'm fairly certain the valve is the issue at this point. I have a parts list and diagram for the valve in case I have to replace a gasket or other part, but it looks like disassembly and reassembly could be a pretty tedious procedure. Has anyone tried doing this? Or is it easier to just spend the $80 for a whole new valve?
I should mention that I have no idea how old this valve is, but I know the pool is about 23 years old and this is most likely an original part. I can't run the filter with it in this condition, so I'm going to be stuck with a green pool until I fix this.


