Just bought a used Esther Williams 15x30 Carousel

Wichita Chief

0
LifeTime Supporter
Jun 29, 2015
122
Andover KS.
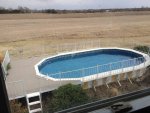
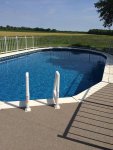
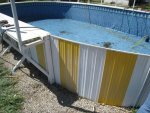
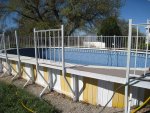
An it's all TFP's fault. I has such good results with TFP's methods last year with my 18' round Intex that when my better half commented "we should get something bigger" I took it and ran. Well along came an ad for a 15' x 30' Esther Williams Carousel pool and we went and looked at it. An exchange of money ensued and we commenced to taking it down with the former owners. Somewhere around 3-6 hours into it the "what the heck have I got myself into?" thoughts crept in. Luckily we got the original assembly manual with it and helping disassemble it helped too. We'll finish taking the base pieces apart and haul them home on Saturday. Right now I have a truck and trailer filled with parts and pieces. The pool is going over at the mom in laws house who has a nice big backyard without any trees too close by the pool. My house has way too many trees to make a pool work. Plus it's the family hangout and site of summer get togethers. I had already planned on redoing the base from last year as the base was not as level as it seemed. Random holes and divots weren't good either. Soooo. I guess I'm leveling a bit bigger area. I'll rent a Bobcat for a day to level the ground and truck the screenings around. I'm going to construct and use a water level this weekend to find the lowest point where it will be and get an idea how much I have to take down from the higher parts. I'm excited/scared in the same instant. We've built way bigger and complex things so this should be fine. For being set up for the past 10-12 years at the former owners place (and at another place before them. They are 2nd owners) The pool is in great shape. Except for a few bunch of rusted bolts it all looks good. We're going to hose off the dirt (they had it 12" below grade) and it should be good to go. I'll replace the bolts with SS bolts and of course get a new liner. It has a nice Hayward sand filter and a pump which is "a couple years old". I'll make sure it is sized correctly once I get it home and unloaded. I'll attach some pics once I get home or get time.
From reading on here I feel I have a grasp of how to go about doing the base. At the end of this I'll ask a couple of questions about that. We'll use the cove at the bottom inside edge instead of sand. We'll use the foam on the sides between the liner and the fencing (slats?) to protect the liner. We'll see how the shop vac thing works when smoothing out the liner on install. Without further rambling here are some questions:

  • When using screenings to level the base I'll use a plate compactor to pack it. Do I need to dig down 2" below grade to have a 2" packed base brought up to ground level or do I apply the base over my level, undisturbed earth?

  • The pool framework has flat pieces which tie one side to the other and are under the bottom of the pool. Will pink foam be enough to cover these and not be felt or do I need a thin layer of sand to cover these and level it out before I put my foam down?

  • As stated above I'm replacing many fasteners. Mostly close to where the water could affect them. Like the small bolts which hold the caps to the uprights near the top rail. Can I use 18-8 SS bolts or do I need the more expensive 316 SS bolts. I understand this would affect the next guy who has to disassemble this pool the next time more than me. And the bolts are not exposed directly to water but could be splashed over the years. Thoughts?
Thanks for any other ideas or clarifications! Don.
 
Don, Looks like you have a good project going :)

1. I went down 2 inches on one side and 22 inches on the other, then compacted 2 inches of screening in and then put sand and foam over that.. You can see my install below if you want.. Is it overkill, yes, but I already had the material so I used it :) The bottom is perfect, no issues with seams at all.

2. My original pool instructions wanted sand over the metal straps under the pool, it should say in the instructions but I would recommend sand and foam :)

3. I am not sure, go with your gut and wallet :)
 
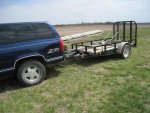
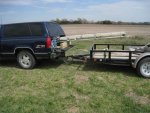
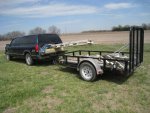
Well everything is home now. If I ever get photobucket working again I'll post pictures of the 15' pieces sticking out of the back of the truck. Luckily I had a trailer too so no hazard or danger there. I'm ordering my liner tomorrow and all the essentials to get it put up the weekend of April 30th. On question. Since I'm using the pink foam under the pool is there any need for a liner pad? What good would a Gorilla Pad or Happy Bottom serve? I've seen people say it covers the tape over the foam board joints and makes it smoother. Any other reason to spend the extra $100? There should be no weeds or rocks after the base prep.
 
It is up to you if you use one of the pads or bottoms. I have heard about how important it is to use at least 3 strips of gorilla tape to hold the boards together. You do NOT want it to separate and the liner sink down in the crack!

Kim
 
Well heck. Rain, rain, and more rain! At least all of my ordered stuff is here now. Liner, foam cove, wall foam and some captive nuts for my top caps around the pool. You know what failed to arrive? Sun. I'm going to clean and paint some more stuff while I have the extra time. I'll try to get some pictures posted this weekend too. It won't be long and we'll be baking in the sun, sweating and wishing for cooler weather as we're working. No biggie. If it was easy everyone would have a pool.
 
OH boy Oh boy Oh boy! I got Photobucket working again!!! And they posted fine! I'm telling ya I'm on a roll now! How about a few more?

IMG_7687.jpg

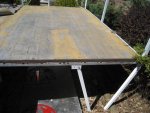
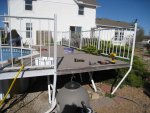
Here we are removing the patio section. Fighting some rusted bolts and some sticker bushes was fun! Turns out there were some aluminum bolts used in this thing too! (No.Those weren't rusted)

IMG_7685.jpg

Patio section and it's bracing removed now. Time to start on the actual pool. For that I have a 61 page instruction manual. For the patio section? Not included in the pool instructions. I have yet to find it online anywhere. My very favorite line in the manual "Although there are relativity few parts in your pool, none may be omitted in Assembly. " FEW PARTS???!!! I'd hate to see what a lot of parts are?
 

Enjoying this content?

Support TFP with a donation.

Give Support
IMG_7692.jpg

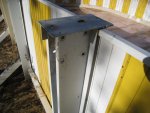
These top caps had some of the worst rusted stainless steel bolts in them up top where they fastened to the uprights. Those round head slotted bolts took a of our time during this step. I'm going back with regular hex head bolts. They are not exposed to the liner area (No danger of hurting liner) or where someone would normally rub against. I'll post a picture on assembly further explaining this. It turns out Menard's has pretty good prices on SS bolts in quantity packages. Also I found a online vendor for the captive nuts which snap into the top of these caps! Score!! I'll shoot a picture of those too.

IMG_7707.jpg

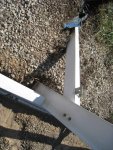
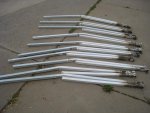
Almost there!! Here is the sides with the straps which tie each side together and also tie in the buttresses. Whew!! I'm tired. How about you? Approx 15 hours to get to this point. Over two different days on two different weekends.

- - - Updated - - -

IMG_7700.jpg

Now the fun part! Loading! Here is a crammed full back of my truck.

IMG_7699.jpg

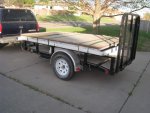
And full trailer at the pools new home. Few parts? Really?!
 
Last edited:
IMG_7716.jpg

IMG_7715.jpg

IMG_7714.jpg

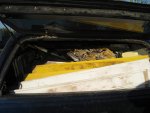
It took some thinking by me and the previous owner of how to load the long sections. We tried to call all of our friends who own car trailers but to no avail. I guess Sprint doesn't think we need coverage in a slightly rural area of KS. No bars!! Here. Let me make a TV ad!! We were steamed. But this loading did not require a 3rd trip back up and home (if we had found the use of a trailer). The 4x4's raised it to clear the trailer, and the trailer was there to protect everyone else. We went past a couple of Po Po's who did see us and weren't given any added attention. That's the old liner in the truck packed to hold the filter body and other items in the forward part of the bed in. Notice the nice dent where the Z71 sticker is. Late last year during a dinner stop after a long day of mowing the mom-in-laws place I got hit! We were not parked silly or sticking out anywhere. I got home and was like WHAT!!?? Where did this come from? It punched a hole in the fender too! Anyway, nice thinking on the loading.
 
Have fun putting that back together! I'll be over here watching!
 
WOW! That is a lot of pieces for not too many! Good thinking on the long parts! That worked great and saved you a trip! NICE

So why did they not want the pool anymore? It looked like they kept it up nice..........BUT it is a win for you!

Make sure to check the grade of the SS. There is ss and then there is better ss. Of course I forget what is better LOL so I will let you look it up!

Take a pic of where the pool is going to go and let us help you plan!

When do you think you will start putting it up? Have you ordered your new liner yet? Which one are you getting?

Kim:cat:
 
I did see that the most common or available SS bolts are 18/8 (304) or 316. There are many others but these are the usual choices. 316 is the better of the two. It is used in the more corrosive environments or saltwater marine applications. I don't believe the Menard's (or HD or Lowes) bolts specify which they are. I'd guess 304 using cost vs what I see online. Once I finalize the amount of bolts I need I'll compare the better 316 bolts online to what they have here. I kinda figure the OE bolts probably weren't 316 and lasted quite a few years so I may opt for the bolts I priced here. But this reminded me to recheck the 316 prices on what sizes I need and the cost is only 1 or 2 cents more each. Only needing 100 or so I should be able to swing that as long as they don't beat me up too bad on shipping.
The previous owners had some financial hardship and needed money more than a pool which has been used less in recent years.
I have the new liner here. I ordered one from an online vendor (not sure if I can say which one on the forum or not so I didn't) which has the correct EW bead vs a more universal unibead. It amazes me how it fits into a reasonably sized box. A heavy box!
I plan on starting the work on Thursday of Memorial Day weekend. With all the rain recently that shot down when I was going to do it. I also wasn't sure if everything would arrive for sure so I erred on the side of caution and postponed it. The weekend of May 14th would be the next weekend I'm not busy but I elected to do it MD weekend so I wouldn't have to burn an additional vacation day for the Monday following the install (because it ALWAYS takes longer than expected, right?) That also gives me time to clean some more parts and possibly paint too. I'll shoot a shot of the site this weekend. I'm excited yet apprehensive. Ya know?

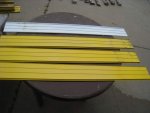
IMG_7725.jpg

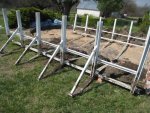
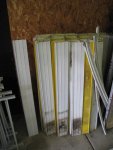
And boy do we have a stack of side panels to clean.

IMG_7721.jpg

And legs.
 
Last edited:
IMG_7726.jpg

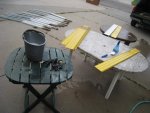
Getting a little cleaning done to see how well they clean up.

IMG_7727.jpg

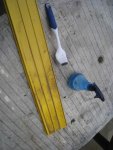
Spritz with a Simple Green solution after hosing off the caked on mud and dirt.

IMG_7728.jpg

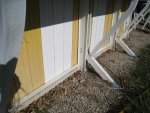
Not too bad for being ?? many years old and being partially buried for the last 12 years or so. We have how many more???
 
Last edited:
I like how you are thinking! Well done. I never try to guess what a person knows or does not know so just throw things out there like the different grades of ss. Better to say it and it not being needed than to NOT say it and they had no idea.....

Nice job cleaning up those! One at a time, one at a time.......you will see the last one one day! LOL

Hey I have an idea for the clean up! Do you have a big trash can? You can fill it with soapy water and put the rails in it and let them sit for a few mins then hose off! Just an idea to save you some scrubbing maybe.

Kim:cat:
 
That's a good idea to let them soak. You'll use less elbow grease.

Do you have helpers?
 

Enjoying this content?

Support TFP with a donation.

Give Support
Thread Status
Hello , This thread has been inactive for over 60 days. New postings here are unlikely to be seen or responded to by other members. For better visibility, consider Starting A New Thread.