My first and last pool Install

JackinthaBox

Active member
May 21, 2019
37
Conowingo Maryland
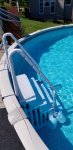
Just thought I’d finally share some pics because I love seeing everyone else’s. I’m a remodeling contractor so I’m very diy, however installation of the actual pool was a huge challenge for me. Not only because it was a used pool I disassembled last summer and didn’t have very specific instructions, but digging everything for the pressure plates and pavers was a huge pain because I have compacted #57 stone and crusher run under the pool. I had to build up a retaining wall (which I was also a virgin at) because there was a septic line preventing me from digging down as far as I needed...and I also wanted pool and pool deck to be flush and attached to existing deck. I’m just glad it’s done now and glad I found this site for all the great advice. My water has been crystal clear from the start.

E658B264-F143-42C2-AEF9-EAF4E7498DA6.jpeg4C5612A2-B8BB-46B1-B0D4-C91CE4E8A333.jpeg0BEBF37F-736C-49A3-9F29-0E7A45BE80CC.jpegD994B2B3-1705-42A3-8AC0-A9213313229B.jpeg77033746-5632-4C7E-8F8A-F360652553E3.jpegE658B264-F143-42C2-AEF9-EAF4E7498DA6.jpeg4C5612A2-B8BB-46B1-B0D4-C91CE4E8A333.jpegE658B264-F143-42C2-AEF9-EAF4E7498DA6.jpeg4C5612A2-B8BB-46B1-B0D4-C91CE4E8A333.jpeg0BEBF37F-736C-49A3-9F29-0E7A45BE80CC.jpegD994B2B3-1705-42A3-8AC0-A9213313229B.jpeg77033746-5632-4C7E-8F8A-F360652553E3.jpeg4D32A76B-CC08-4D68-8B5A-E7E7189EF4C4.jpeg419F44CF-D5DA-4CE1-92C9-28C1555ACACC.jpeg2F75AC2B-44C3-45B3-A5FE-CC4CA30625A7.jpeg93BF7022-3CAA-4B9B-B90E-8CA475544297.jpeg07BA44A4-FBCB-443F-A291-58648A1D0256.jpeg
 
Last edited by a moderator:
Thank you. I did that design on my main deck so I figured I had to follow suit. I hate butt joints in the decking so that’s the reason behind it. It’s ridiculous how much blocking is needed to run boards like that. It’s exhausting. Also a good tip for those building decks is to use a router on the cut edges so it matches the rounded factory edges. Takes barely any extra time and has smoother look and feel.
 
You do great work!! LOVE the deck!!

So tell me about those steps. I have some like that but they have a rail which my husband needs to help him get out of the pool. How do you keep it in place without the hand rail?

Kim:kim:
 
You do great work!! LOVE the deck!!

So tell me about those steps. I have some like that but they have a rail which my husband needs to help him get out of the pool. How do you keep it in place without the hand rail?

Kim:kim:
Man, if I only had a fraction of the skillset and mindset to pull something like this off lol.....

Excellent looking set up. Looks aesthetically pleasing and functional. Nice work!
thank you, the wall and pool ordeal was very new to me. It would have gone a lot smoother had I done it before (obviously). But the initial trial and error took up a lot of time and brain function. Probably took me about month and a half. All in all it ran about 7k. I got the pool for $300 which I thought was a pretty good deal . Wasn’t that old and didn’t have buttresses.
 
  • Like
Reactions: NY Smokeater
You do great work!! LOVE the deck!!

So tell me about those steps. I have some like that but they have a rail which my husband needs to help him get out of the pool. How do you keep it in place without the hand rail?

Kim:kim:
I put about 4 sand bags in the bottom. It stays out pretty well even with kids all over it. However the liner is getting indented from all the use, so I have a pad ordered and on the way. Hopefully that will prolong its life.
 

Enjoying this content?

Support TFP with a donation.

Give Support
The biggest flaw of this project is the liner bottom, we didn’t know what the heck we were doing and it was late and we were rushing while spreading the sand. Well now there’s a bunch of pits all over the place from the pressure. Oh well. As long as it doesn’t get punctured it all looks the same while floating on your back on a hot day lol
 
With the sand and the mat you will need to make sure they stay algae free by taking them out every once in awhile. Keep an eye on it to see how often you will need to clean them. You can also get some plastic coated weights to use instead of sand bags OR make some "weights" using large PVC pip with cement inside it with caps on them. May be easier to handle than sand bags without the risk of the bag breaking.

Kim:kim:
 
Very nicely done.

The crusher run base is the right way to go with how you installed the pool. The people who set up my pool for me had the same feelings about setting the blocks and pressure plates. They had to use a pick axe because I had compacted it until it was like concrete.

I totally agree about using a router on edges. Its a small quick step but it makes a huge difference in the look of the finished product.

The only place you need to really worry about divots in the sand under the liner is along the cove at the base of the wall. The cove keeps the liner from pushing out under the wall. Otherwise all the divots are just places for dirt to collect and can sometimes make it had to vacuum the pool.

Nice little green tractor you have in the background too.
 
With the sand and the mat you will need to make sure they stay algae free by taking them out every once in awhile. Keep an eye on it to see how often you will need to clean them. You can also get some plastic coated weights to use instead of sand bags OR make some "weights" using large PVC pip with cement inside it with caps on them. May be easier to handle than sand bags without the risk of the bag breaking.

Kim:kim:
Good idea. Yeah next season I’ll plan on some pvc pipe. We have tons of 3”and 4” left over from jobs. How easily does algae grow on the mats? I have a pretty clear pool at the moment but I don’t want that mat to be my Achilles heel.
 
Very nicely done.

The crusher run base is the right way to go with how you installed the pool. The people who set up my pool for me had the same feelings about setting the blocks and pressure plates. They had to use a pick axe because I had compacted it until it was like concrete.

I totally agree about using a router on edges. Its a small quick step but it makes a huge difference in the look of the finished product.

The only place you need to really worry about divots in the sand under the liner is along the cove at the base of the wall. The cove keeps the liner from pushing out under the wall. Otherwise all the divots are just places for dirt to collect and can sometimes make it had to vacuum the pool.

Nice little green tractor you have in the background too.
I also used some Geogrid in between layers of 57 under the crush. I didn’t want to pay $400 for an engineers opinion so I just over built to the best of my knowledge. That pool is super heavy and it’s only 2 ft from the back of the wall block. I didn’t want to take a chance of soil settling. Was honestly sketched out about the whole thing at first but so far so good.

I put that little Deere to work. Poor thing sure moved some material. Only has 100 hours on it so I felt comfortable with the abuse. Wouldn’t have done any of this if I didn’t own a machine.
 
I move my steps weekly to vacuum under them. You should do the same. I have mine bungie'ed to the top rail. Super simple. As long as your pool has adequate chlorine levels you shouldn't have a huge issue with algae. Just brush the mat n move the steps.
 

Attachments

  • 20190611_104304.jpg
    20190611_104304.jpg
    399.7 KB · Views: 39
I move my steps weekly to vacuum under them. You should do the same. I have mine bungie'ed to the top rail. Super simple. As long as your pool has adequate chlorine levels you shouldn't have a huge issue with algae. Just brush the mat n move the steps.
I like the bleach jugs! I've been thinking of uses for all the empties I'm accumulating!
 
The biggest flaw of this project is the liner bottom, we didn’t know what the heck we were doing and it was late and we were rushing while spreading the sand. Well now there’s a bunch of pits all over the place from the pressure. Oh well. As long as it doesn’t get punctured it all looks the same while floating on your back on a hot day lol
My floor is extremely pitted as well, I'm guessing water got under there over the winter and had it's fun moving stuff around. At first I hated it but now it almost makes it easier to walk around, gives a bit of traction lol.

Did you buy those steps new or it came with the whole pool setup? I'm looking to replace the ones that came with my pool and I think those are the best looking ones.
 

Enjoying this content?

Support TFP with a donation.

Give Support
Thread Status
Hello , This thread has been inactive for over 60 days. New postings here are unlikely to be seen or responded to by other members. For better visibility, consider Starting A New Thread.