Gunite Pool in a California Desert

void

0
Gold Supporter
Jul 2, 2017
9
Southern California
After lurking for a while, it's time for me to start my own build thread!

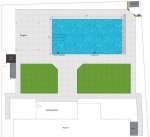
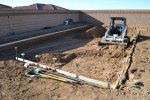
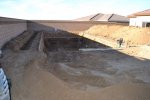
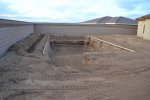
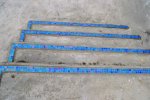
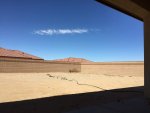
Attached to this post is a picture of the current state and a drawing of the end state. The concrete will most likely have some rounded corners - I just didn't want to mess with curves using Sketchup. Digging is supposed to start this next week.

Pool Specs:
  • Dimensions: 36ft x 18ft Rectangle (108ft perimeter)
  • Depths: 3.5ft to 7ft
  • Baja Step: 7ft x 7ft
  • Deep End Swimouts: 1.5ft x 2ft
  • Salt Water
  • Automatic Cover
  • Pebble Finish
  • 1 Skimmer
  • 3 Returns
  • Filter: Pentair SMBW4060
  • Pump: Pentair Intelliflow
  • Lights: Pentair 5G and GloBright
  • Automation: Pentair EasyTouch 4 with IC40
  • Pool Cleaner: Hayward Navigator
  • Autofill
  • Stamped Concrete Decking

Tile and colors have yet to be decided. Any comments welcome and thanks for looking!
IMG_2642 (1).jpgPool_Color_labels.jpg
 
HI!! Thanks for letting us come along for the ride! I hope it is not a bumpy one!!!!

Lets get started:

-Shelf-how deep? Do you think you will use chairs, loungers, use it as more of a "play pad"?

-skimmer and returns-where? Think about your prevailing winds. You want the stuff on the top to go towards the skimmer as much as possible.

-make sure to add an over flow pipe/grate for the times you do get big rains. You will thank me!

-light by the equipment for the times you end up doing something there at night

-Easytouch 4-you might want to think about going up to the 8. Better to have too many than not enough.

-steps from the shelf-I would think about putting them on the long side of the shelf. That will give you more play/standing area in the shallow end. It also opens up the swim lane more. Make sure to keep the step riser height no more than 7" It might make for more steps but they will be easier to use. Your PB might say "We do XX all of the time". The water helps buoy you." Just say "7" risers please" with a smile.

That should keep you busy for a while!

Kim:kim:

Hi Kim,

Thanks for the thoughtful questions!

Shelf depth: Builder recommended 12" of water and that seems reasonable to me for chairs and a play area. I believe loungers would be partially submerged at that depth.

Skimmer and Returns: The builder knows the area well and his recommended skimmer placement is at the far end of the pool to which the wind usually blows. The returns are placed to create a whirlpool effect and swirl debris toward the skimmer.

Overflow: We don't really get that much rain, and with drains in the decking around the pool, excess runoff into the pool should be minimized.

Equipment Light: Great idea!

Easytouch: I did consider the 8, but I have other Home Automation devices that I will be leveraging so I decided to stick to the 4.

Steps: I've been mulling this one over. I like your reasoning about placing the steps on the other side. I'm convinced! Also, I've never heard of the 7" riser rule before. I'm going to have to visualize that, because otherwise they will be closer to 10"!

Thanks again,
Kyle
 
Seems as if you have it covered for most of it.

The risers at 7" is what most steps are set at. They are not to exceed 7 3/4" per building codes. This is for steps in buildings. To me it should also be for pool steps also. It makes life easier for all but especially those with injuries, health or age issues (young and old).

Kim:kim:
 
Looks like you are going to have a great pool!!

You may be interested in looking at our build thread because it is so similar, including the autocover. Ours is a little deeper but with no ledge.

I will point out our deep end benches/swimouts (whatever you want to call them). I’ve only seen them (the deep parts of those benches) in a few pools but we love that part.

The link is in my signature.

Thanks for sharing your build - it was definitely one of the many that inspired me! I totally missed the two tiers and now I think I'm going to try to sneak a last minute change on the PB before the dig starts.

Searching through your thread, I couldn't for the life of me find the dimensions of your deep end swimouts. Would you might sharing the approximate length, width, and height to water?

-Kyle
 
I’m not sure the measurements are in there. But I wrote them down so I could remember them. My regular steps are 11, 20, 30 and 40 from the deck level. The deep-end steps are 20 and 40” from the deck. Subtract 5” from all measurements for step to waterline.

Length of shallower deep-end step is 4’ and length of deep deep-end step is 2 1/2 or 3’. Width is about 16”.

For my taste, the deep step could be up to 6” deeper. But it’s fine as is.
 
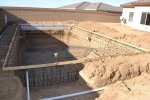
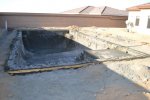
Progress! Gunite scheduled for Thursday.

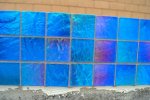
For tile, I'm going with the NPT Lightwaves Blue - 2x2 along the border and 1x1 to line the edges of steps and ledges. I want a darker finish, so I'm thinking about the Pebble Tec Midnight Blue, but haven't been able to find a picture with the Lightwaves tile. Anybody run across a picture of this combination?

DSC_0224.jpg
 

Enjoying this content?

Support TFP with a donation.

Give Support
Moving fast! Now it is time for you "job". Go out and measure the pool. Is it deep, long, wide, etc enough? Add about 6" for the gunite and plaster.

Try to be there when they shot the gunite. They might have some ideas or concerns and it is best you are there to answer them.

Kim:kim:
 
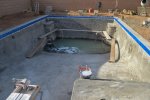
Gunite was shot last Thursday and I've been frantically watering the pool. Most of the tile was installed today. Since I'm probably going with a Midnight Blue pebble, I think a "delorean gray" grout color will make the tiles pop.

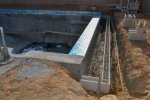
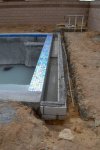
Box for the autocover was also started today. The PB doesn't trust the accuracy of the gunite crew and opts to build the box out of cinder block.

Next on the shopping list - a test kit!

DSC_0274.jpgDSC_0307.jpgDSC_0302.jpg
 
It looks like a pool and it is even holding water! LOL

LOVE the tile!!! BLING!!! That d. gray will look good on them!

It is time for YOUR own set of links!

Print these out:
Pool School - Basic Pool Care Schedule

Pool School - Recommended Levels

Bookmark these:
Pool School - Recommended Pool Chemicals

Pool School - ABCs of Pool Water Chemistry

TFP also has a Pool Math App! Here is the link: Pool Math It is so neat and easy to use!

Make sure to ask any and all questions you might have no matter how small! We have all been where you are at one point.

Don't forget to use your discount code for your test kit!!

Kim:kim:
 
The PB doesn't trust the accuracy of the gunite crew and opts to build the box out of cinder block.

That's amusing but also not surprising. I'm sure he got burned once or twice on that. I can easily see how. For example, our cover box, I feel, is a bit too shallow (though perhaps built to spec). There is plenty of room for the cover on the reel. However, the middle of the cover will sag in the box. And a sagging cover can easily drag on the bottom of the box. And with the bottom of the box being concrete, it will get scratches in the same area. Ours did a bit.

My solution was to install rubber mats like these in the bottom of it. Rubber Drainage Mats It's a great solution, because if pebbles or other debris gets in there, the openings in the mat protect the cover because the pebbles will be against the concrete and the cover won't be down that low. Knowing what I know now, I'd be tempted to install it regardless. The saggage may not occur when first installed, but after an opening with the water high, the cover pulls water with it into the rolled up cover.
 
Looking good. Can you share dimensions and depth?

The pool is 18ft x 36ft with a 3.5ft to 7ft depth. The tanning ledge is 7ft x 7ft.

It looks like a pool and it is even holding water! LOL

LOVE the tile!!! BLING!!! That d. gray will look good on them!

It is time for YOUR own set of links!
Kim:kim:

Thanks Kim!

Good work on keeping the water up to the shell. Love the tile! It’s so pretty.

I'm very pleased with the tile selection. It looks different every time I go outside to look at it!

That's amusing but also not surprising. I'm sure he got burned once or twice on that. I can easily see how. For example, our cover box, I feel, is a bit too shallow (though perhaps built to spec). There is plenty of room for the cover on the reel. However, the middle of the cover will sag in the box. And a sagging cover can easily drag on the bottom of the box. And with the bottom of the box being concrete, it will get scratches in the same area. Ours did a bit.

My solution was to install rubber mats like these in the bottom of it. Rubber Drainage Mats It's a great solution, because if pebbles or other debris gets in there, the openings in the mat protect the cover because the pebbles will be against the concrete and the cover won't be down that low. Knowing what I know now, I'd be tempted to install it regardless. The saggage may not occur when first installed, but after an opening with the water high, the cover pulls water with it into the rolled up cover.

Thanks for sharing, your solution is brilliant! I'll definitely keep on eye on the sagging.
 
Tile was finished and grouted today. Of course, on the one spot I decided to take a picture, one of the tiles is slightly crooked. It'll bug me the rest of my life.
DSC_0332.jpg

The steps turned out nice with the border.

DSC_0330.jpg

And here's the current progress on the cover box. Not sure if they are done, but I do like the drainage gravel in the middle.
DSC_0319.jpg
 

Enjoying this content?

Support TFP with a donation.

Give Support
Thread Status
Hello , This thread has been inactive for over 60 days. New postings here are unlikely to be seen or responded to by other members. For better visibility, consider Starting A New Thread.