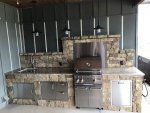
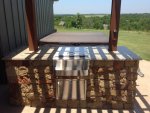
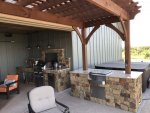
Osage Hills Outdoor Kitchen Build

bpricedo

0
Silver Supporter
May 20, 2012
336
Hey everyone! I haven't been around here much after getting the pool built. You just end up getting busy. Anyway, I built an outdoor kitchen with two islands and it turned out great. I used this and other forums, plus an e-book I bought that was very helpful.Symphony BBQ Custom Design Outdoor Kitchens DIY BBQ Island Manual DIY BBQ Island Plans BBQ Plans DIY BBQ Manual

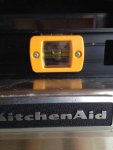
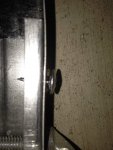
I completed it last year but haven't gotten around to posting on the build. But finding threads like this was very helpful to my build so I need to get mine posted in case it can help anyone too. I went to a building supply place and bought my studs and CBB (cement backer board). I used the heavier gauge studs (I think 20g instead of 25 if I remember correctly). I ended up using rivets instead of screws because I couldn't get the screws to flush out. I have a picture of that:
IMG_2356.jpg

When the self tapping screws went in, it formed a "collar" of metal that would not allow the screw to flush. I could remove the screw and file this little raised collar down but I decided to use rivets. I had done some riveting of small aircraft with my dad in the past and had a pop rivet "gun" (hand powered) already. Bought steel rivets from Ace Hardware. All Lowes and HD had were aluminum.

I found that this only happened when screwing a stud and channel together, probably due to the heavier gauge of the stud. When screwing two channel pieces together, it did not happen.
 
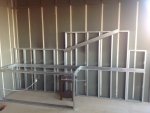
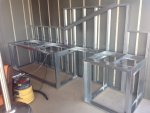
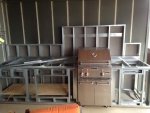
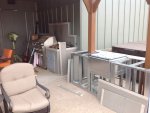
As I said, I built two islands and each one was built differently. The biggest one was built more like you would build walls and floors. I used studs for the upright parts with the channel capping the studs. I fastened channel to the inside of these stud walls and used studs like floor joists to go across the top. This worked well for my back splash so I could wire for outlets. However I built the second island using the symphonybbq method of just using channel and building "ribs" that are connected by channel with cutouts for each rib. I could have built my first island this way and just attached the backsplash to it. But I didn't. The symphonybbq way is actually simpler, uses less material, and is plenty strong. Anyway you will see as I go through the pictures. Here is the first island under construction:

IMG_0943.jpg

I wanted the tall backsplash for the look and to have a place for receptacles without cutting into my home's exterior wall or mortaring rock to it. This way it is all a separate piece. It just sits in place against the house. I used an existing outdoor receptacle for the power supply to the island.
 
I meant to sit here and upload all of my pictures but photo bucket is no longer a free service so I donated to TFP (something I should have already done) to increase my attachment quota. Once that has gone through I will continue to post pictures.

And I also don't understand why one image is embedded in the post but the other is a link you have to click. I attached both the same way. Edit: This seems to have fixed itself, all images showing up now.
 
Okay, supposedly I can post more pictures now.
My patio has a significant drop or slope to it as you move away from the house. I used a laser level and measured the length of each of my studs so that the top would be level sitting on the concrete without shimming. I deducted for the ChoiceDek feet and CBB that made up the bottom of the island.

IMG_0945.jpg
 
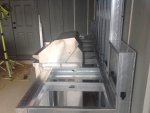
I have a high end cart grill that I wanted to keep. One, because it is still in great shape. Two, a comparable grill is about $3000 and I had other things to put the cash into. So this island has a space to slide the cart grill into. It has plenty of air circulation space all around. Here is the island on its back so I can attach the bottom CBB and ChoiceDek "feet".

IMG_0950.jpg

- - - Updated - - -

Here it is back upright after the bottom was installed. Door openings are framed out too.

IMG_0951.jpg
 
The slope of the slab also affected the grill. To resolve this, I removed the two downhill casters, cut shims of the correct thickness to level the grill out of the ChoiceDek, drilled holes, and remounted casters with shims between them and grill. Voila!
IMG_2430.jpg

Grill in place in its cubby. This photo also has CBB on the back of the island. In retrospect, I really didn't need to do this since it was going up against the house.

IMG_2431.jpg

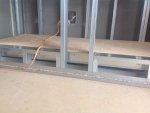
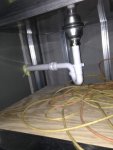
You can also see in this last picture I put a plywood floor in the area under the sink. I did it for a couple of reasons, one so I had a decent surface to lay on while connecting plumbing. Two, its just a nicer area for storage with the floor level to the bottom of the door openings. To make this floor level, I just measured down from the top. The bottom of the framed door openings are also level so now you can see the slope of the slab.

IMG_0980.jpg

Here's a view from the side to show the space between the backsplash and grill.

IMG_0979.jpg
 
Another lucky aspect of my design is that right inside the house at the end of the island is my washer and dryer. So I was able to tap into hot and cold water and the septic line for my sink drain. I used a couple of freeze proof silcocks, one for hot and one for cold, and all I have to do in the winter is disconnect the hose and let the water drain from the faucet. I usually blow some air through as well. A little RV antifreeze into the drain and I'm good to go.

IMG_2440.jpg

- - - Updated - - -

Blaine, it’s looking good so far. Keep the pics coming with the progress.

Rick,
The project is already complete. I finished it about a year ago and enjoyed it all of last summer. I just never got around to posting pictures of it. So I'm going to just keep posting until I get through.

- - - Updated - - -

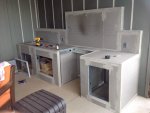
Here I'm putting the CBB over the frame. Sink is in. Receptacles are in place and wiring ran. I covered the counter surface with CBB for some reason I thought was necessary at the time. In retrospect it was not, the granite counters would sit just fine on the metal framing without it. Live and learn I guess.

ONE IMPORTANT NOTE: You have to have metal everywhere there is a CBB seam so you can screw along both sides of the seam and support the CBB. It is very hard to screw close enough to the edge of the CBB without breaking it out if you are trying to hit the edge of a stud. So most everywhere I had a seam fall I tried to have two studs side by side, or a channel laid flat so I had plenty of area to screw into without getting too close to the edges. The CBB I am using, PermaBase, Has a reinforced edge along two sides that helps but when you cut it or are screwing along the other two edges, it will break out easy and it might as well not be screwed at all. It is best to be 3/4 or 1" away from the edge.

IMG_0988.jpg

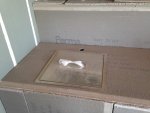
Closer view of sink. This is a Sunstone outdoor sink with a cover. Cover is nice. You can see the screws in the CBB and how far from the edge they are spaced.

IMG_2591.jpg
 
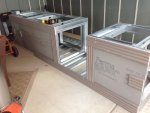
Here it is covered in CBB and some of the doors in place. I purchased all of my stainless steel from Affordable Outdoor Kitchens aokitchens.com.
Nice folks, was able to call and talk to real people to help with some of my choices. In looking at many websites to order from, certain pieces were cheaper on one site but then other pieces would be more expensive compared to others. AOK gave me the lowest overall price on my entire order, free shipping, good customer service. Other than my sink, which I said before was Sunstone which is a lower end, I think Chinese-made product. The other pieces were Pacific Coast Manufacturing, made in California, reasonably priced and from what I understand, make several other brands products. I am happy with it all.

IMG_2589.jpg

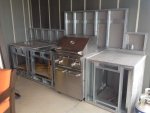
The far left door that is not in place is just a horizontal door to allow access under the sink. The middle piece is a door on the left that also allows access to the same space, and has two drawers on the right. Then the piece to the right of the grill is a pull out trash and recycle bin. It has two Rubbermaid trash bins in it.

I think that's it for the night. I should be able to continue posting pictures tomorrow.
 
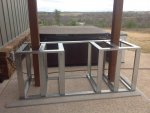
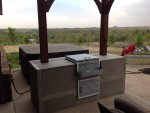
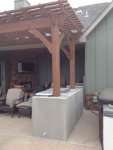
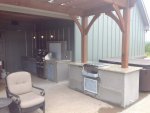
Okay, on to the second island. This one is out from under the cover of the back porch and at one end of a pergola. It has an ice bin in it with an access door under. I store my hot tub stuff inside. This is the one built with the symphony bbq method of using mostly channel for construction. At this point I had mostly channel left after building the first island. I had plans drawn when I bought all of my material but as I got into the construction I made some changes which used more of the studs initially. Plus this other method actually made it easier to build around the pergola. Initially I was going to build it in sections, a center and two ends, and then join it together but I was able to just build around it. This method went much faster and probably I was just more experienced after the first island as well, it just seemed less of a pain but it is also a much simpler design.

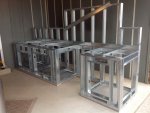
You can see the ribs are numbered 1 through 6. As I did on the other island, I used a laser level to determine the height of the ribs so the top would be level while sitting on a sloped deck. So they get progressively taller from left to right.

IMG_1070.jpg

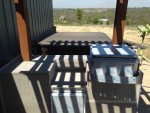
Here it is with the ice bin sitting in place. I will put CBB over all of the framing in an attempt to keep water out of the inside but it still leaks a little. I even made the bottom under the ice bin slope toward the front so water would drain out of the front.

IMG_1071.jpg

I guess time has healed all wounds but I did forget one area that was a pain on this one. To attach the CBB and ChoiceDek feet to this I actually lifted the island up and placed it on jack stands and then got the CBB under it and screwed it in place, then screwed the feet on. I don't have any pictures of that process, but I remember now it wasn't much fun. In that aspect, building it in sections and being able to attach the CBB and feet first, and then assembling it around the pergola would have been easier. Maybe. You always run into something I guess.

Here it is with all of the CBB attached and the bin ready to go in place. I did really well on measurements and friction just holds the bin in place. After the granite counters went in, I did place some butyl tape around the flange of the bin that sits on top of the granite. This flange holds all the weight, there is actually a space between the bottom of the bin and the CBB when finished.

I can see now I was marking a circle to cut through the CBB for the ice bin drain. I used PVC and my drain exits out of the end over my deck drain.

IMG_2592.jpg
 

Enjoying this content?

Support TFP with a donation.

Give Support
Next step was taping the seams of the CBB where rock was going to be applied. I didn't worry about it where granite was going. I used the proper mesh tape for CBB and a polymer modified thinset mortar per manufacturer recommendations. The corners were the hardest but still a fairly easy process.

IMG_1076.jpg

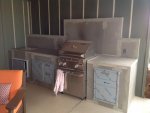
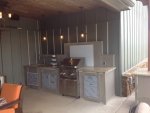
Doors and grill in place.

IMG_1079.jpg

Ice bin island.

IMG_1081.jpg

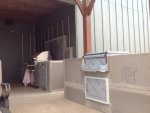
Another perspective looking into the back porch area. You can see the ice bin drain exiting over the deck drain. I meant to trim this once rock was in and paint it brown to blend in but I still haven't done that.

IMG_1078.jpg

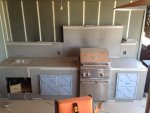
Both together, ready for counters and then rock.

IMG_1082.jpg
 
Next step was granite counters. Was advised against "fancy" granite with a lot of veining in it. Contractor states that there is a lot of resin in the veining to get the polished look and it will degrade in the sun and become rough and unpolished. I know they have a lot of different finishes, we just got some in the kitchen that is "leather" instead of polished so maybe that would be possible outside. In our case we just went with a builder's grade of granite called Santa Cecilia, pretty common.

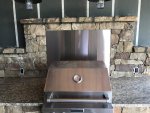
One thing I did was come up with an idea for behind the grill. If you notice, theres a couple of smoke stains on the CBB already in the previous pictures. I worried that rock back there would get smoke stained and look bad so I wanted something I could clean. I saw a picture of an outdoor kitchen with stainless steel behind the grill so I added a sheet of plywood with CBB covering it and glued a stainless steel sheet to it. Its a little thinner than what the rock veneer will be so it will frame it out nicely. Also got the lights hung, I really like them.

IMG_1094.jpg

IMG_1095.jpg
 
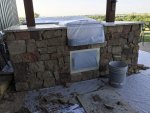
My house has rock wainscot around the outside and my two fireplaces are rock. All was harvested off of my land, appropriately called Osage Sandstone. They cut it into blocks on site and dry stacked it. The company that did it now has a process where they take real rock and saw a 1 1/2" veneer off and can lay it similar to cultured stone. I had hoped to get more of my rock and do this with it so it would match but the bid was drastically high because that process is not done on site so the rock would need to be transported back to their facility, cut, and then brought back. I found a contractor that said they would cut it on site but they did not show when they said they would. In the end I bought sandstone veneer from the original company, it does not match exactly but still looks great. I found an awesome contractor who's crew did a great job.

IMG_0082.jpg
 
And that is pretty much it!

IMG_0084.jpg

IMG_0090.jpg

IMG_1136.jpg

IMG_0222.jpg

IMG_0223.jpg

If I had to do it all over again right now the only things I would change would be to not worry about CBB under the counters or on the back of the island that goes against the house. I would also put a couple of upright doors on the ice bin island on either side of the ice bin. There's a lot of storage in there that is hard to access with the little horizontal door. But that's about it. Feel free to ask questions! Positive or negative comments also accepted!
 
Blaine,
That looks great. I am planning a similar build later this year...can you tell me the length and depth of the cabinets with the grill? I need to decide on how much counter space I need for a small sink, gas grill, and big green egg. I have heard 18" on each side of sink, 12" on one side and 24" on the other side of a grill, but I would imagine more is better.

Thanks

The island with the grill is 12' long, counters are 31" deep (front edge of counter to backsplash). Cabinets are 36" deep, front edge back to wall of house, this includes thickness of rock. My cabinet depth was determined by what I needed to get the double trash can pull out to fit. It is a fairly deep piece.

There's 11" of counter between sink and wall of house, 50" between sink and grill, and then 37" from grill to end of counter. Grill is a 27".

I decided what type of doors I wanted in the island and then evenly spaced those. I think there is 8-10" on either side of each. Then I centered the sink over its corresponding door.
 
Thread Status
Hello , This thread has been inactive for over 60 days. New postings here are unlikely to be seen or responded to by other members. For better visibility, consider Starting A New Thread.