
It’s one of the parts of pool ownership that makes most new pool owners a bit nervous. Pool plumbing repairs, installation or replacement of Polyvinyl Chloride (PVC) piping is much easier than it sounds. Pool repair tools, equipment, pvc glue (commonly called pvc cement) and materials are very simple to use as well. Making your own repairs can be done as a simple weekend project, saving you hundreds of dollars. Despite your worst fears, most leaks in pool pipes occur above ground or are easily accessible.
PVC Repair
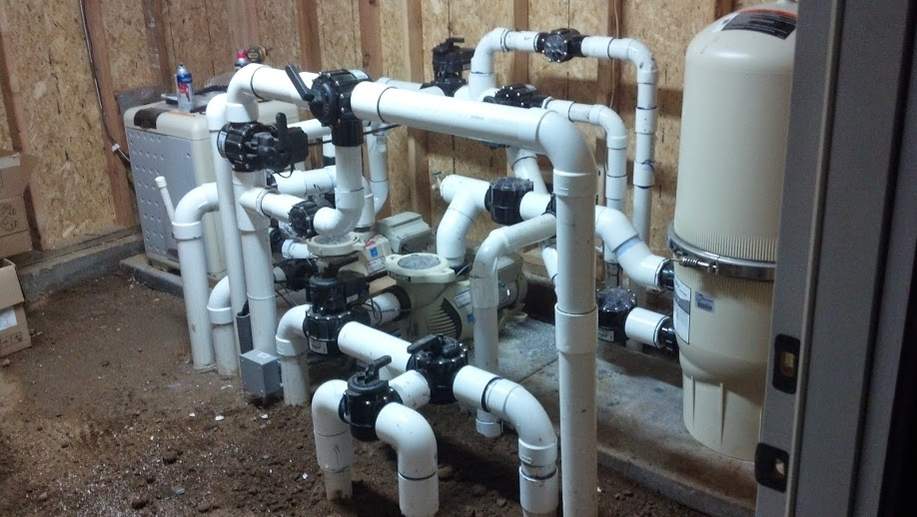
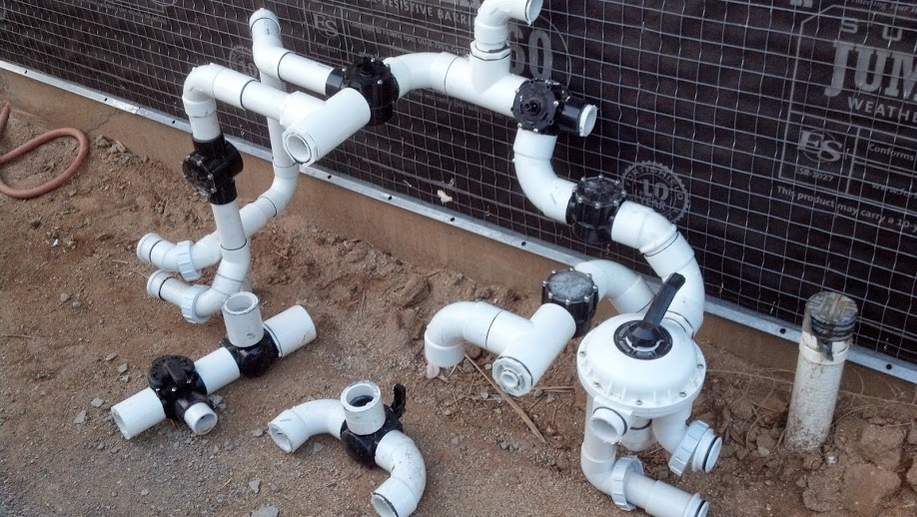
Your pool circulation system parts are mostly permanently attached to each other with PVC cement. This is so your pools plumbing can withstand harsh conditions for a long time. The flip side to this is that it will need to be cut when fixtures in your piping system require replacement.
To replace the parts properly, you will need to use the right pvc glue. There are many to choose from and for good reason, the good ones form a strong bond and are very reliable. The most important consideration is that the PVC cement or glue you use is purpose-built for your pools plumbing. Water, chlorine, salt and other chemicals can easily breakdown other adhesives quickly.
Gluing fixtures together
Once you’ve got the best glue for the job chosen, you will need to get all the tools assembled that you will need. Below are a few tips that will assist you in repairing your pools plumbing.
- A saw with a sharp blade suitable for use on PVC (a specialized PVC cutting tool works great but is not necessary if you don’t do this often)
- A fine file or fine sandpaper to smooth the edges of the cut pipe
- A clean lint free cloth
- While some brands don’t require the use of a PVC primer we feel it’s in the users best interest to do so.
- Purple PVC primer chemically cleans the surface of the pipes. Primer also softens the pipe surface, so they bond together tightly. Primer should be used before PVC cement.
- Purple primer is only colored so inspectors or anyone else can tell primer was used. It can be messy looking so be careful. You can use clear primer.
- Always use schedule 40 parts, deep socket fittings, for pressure applications.
- When measuring pipes include the socket depth as part of the measurement. Your pipe must go deep enough into the fitting to form a tight seal or leaks may occur.
Cutting the pipe
- Before replacing the fixture, your first step is to remove the old piece from your pool plumbing. While you can use a power saw, it works just as well using a hand saw or PVC cutting tool.
- Most important is that the cut is straight and as smooth as possible. One tip a user can do when making cuts is to first wrap your pipe with masking tape where your cut is to occur. This helps give you a guide to follow to help make straight cuts.
- If you choose the saw as your tool, ensure the blade is sharp and avoid forcing the cut as too much pressure on the pipe may bend it or force it off center. If you’re finding yourself having to make multiple cuts using a Miter Saw will help speed up the process and help make straight cuts.
- When cutting pipe leave extra pipe and straight runs between joints. This allows space for future cuts in the PVC to be made for repairs or additional equipment.
- Always test fit your work before gluing. Before glue is applied the pipes are able to be pulled apart and fixed. Once you start to glue the pipes together pulling them apart is very difficult.
Smoothing the edges
- Smooth and clean both the outside and inside edges of the freshly cut pipes. This is important for the same reason that the straight cut was: attaching a new fixture to even-cut straight pipes is much easier than if the pipes were angled wrong from a bad cut.
- Metal files work great to smooth the edges, but sandpaper will do just as well if you do not have a file handy.
Cleaning the fixture and pipe
- Use your clean lint free rag for the inside of the fixture and outside of the PVC pipes. By doing this, you will help the glue adhere better and protect the fixture from any harmful contaminants that may cause the fixture not to function.
Gluing it all together
- Apply a thin, even coat of the primer (if recommended) on each of the surfaces that need to be joined (outside the pipe and inside the fixture). Now wait for it to dry.
- Now that the primer is dry, apply a thin, even coat of the glue on both surfaces now and push the pipe all the way into the fixture right away. Immediately turn the pipe about a quarter turn (25%). This spreads the glue evenly around the pipe edge.
- Hold it in place for about 30 seconds (one minute if you really want to be sure) until the glue is set in place. Do not twist it or move it while you are holding it in place to set.
- Now wait about 2hrs minimum prior to turning on the water pressure. This wait time allows the pvc cement to dry completely.
- It’s time to follow-up now that the water is on by monitoring the new fixture to check for leaks and to ensure it is operating properly.
Common issues / Tips
Pumps and skimmers:
These are generally the most common parts that need replacing as they can be damaged from a range of potential issues. If not an issue, then time itself will wear them down. While it is always good to contact and consult your pool professional, if you know what the issue is and you can get the parts required for a good price, then it’s much easier to do it yourself if you are comfortable with it.
Leaks:
Leaks in the pool plumbing are some of the most common issues that necessitate the replacement of fixtures. Finding the leak is not always easy but in this article we’ll give you some assistance. When you do come across a small leak, keep a special eye out when picking up repair kits as they may not come with glue included. Double check the package and the store associate to see if pvc cement is a part of the kit. Keep the list above in mind of the parts needed as you may also need an extension of pipe as well for your leak repair job.
Painting PVC:
Prolonged exposure to UV rays (the sun) can degrade PVC and make it prone to cracking. In sunny climates PVC is often painted to protect it from UV degradation.
Temporary Hole Repair:
If you ever need an emergency fix buy a coupling, then cut down the middle. Then using PVC cement glue, it on top of the hole and use a hose clamp until it dries.
Unions
Unions are beneficial when installed before or after pool equipment. Once installed it takes only a few minutes to unscrew the unions and disconnect the plumbing.
Use of 2″ Sweeps:
Most sweeps are DWV pipe which has a narrower glue area. The view is sweeps are a waste of money and “space”. The amount of head loss change is not going to be that much and the extra space they take up could end up requiring more bends. A sweep of 45° basically cuts the head loss of a 90° in half but the head loss of a single 90° isn’t all that bad to begin with. A 2″ 90° is worth about 6′ of straight pipe.
CPVC to PVC bonding:
For pool use, regular pvc glue or cpvc glue works just fine as long as you allow plenty of time for it to dry. If it’s a critical, high pressure application, then you probably can’t (or shouldn’t) join pvc to cpvc.


