Pool Remodel in Northern California

Feb 25, 2015
100
Davis, CA
Hello Everyone,

I have been reading this site for a couple of months now. There's been a lot of great and useful information on here. I am in the process of getting my pool remodel. The pool is a 15K (guessimate) pool built back in the early 70's. When I bought the house, it had a very old pump and filter. I upgrade those to a single spped pump and larger filter around 2004. The concrete around the pool was cracked. The tile was cracked. The pool had been patched a few times. Drain at the bottom of the pool didn't work. It was in really bad shape. I was planning on getting rid of the pool. But this past year, I got married. The household CEO and CFO (which I am neither of) wanted to remodel the pool since she was raised around water. In addition, with our first child arriving at the end of the month, she thought it would be good for our daughter. So we're remodeling the pool.

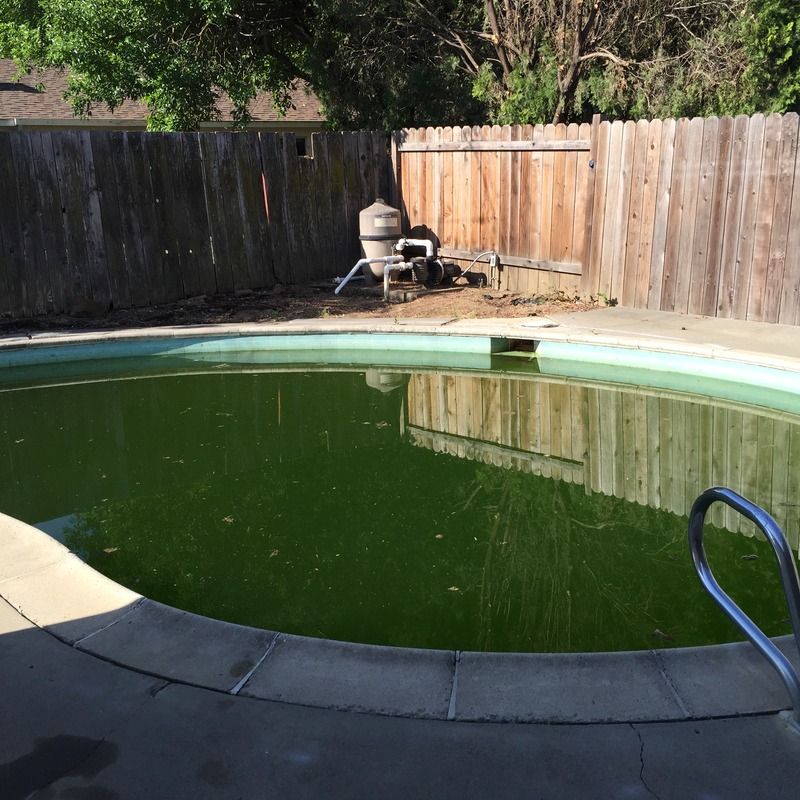
Please note that the pool is really green because we have known for about 3 months now that we were going to remodel the pool. So I decided not to add any chemical or run the pump for the last three months.

Remodel consists of:
New Pebble Stone finish
New tile
New pool pump (Jandy ePump 2HP)
New Pool Automation (Jandy Aqualink RS6 with iAqualink). I picked up a brand new Aqualink RS6 on eBay for $240. Still need to purchas the iAqualink
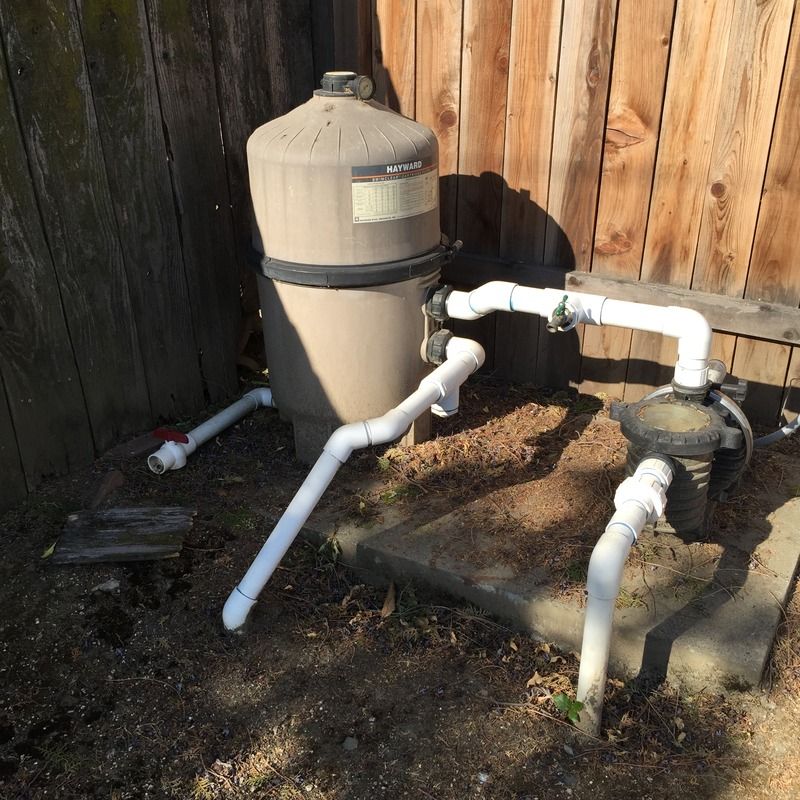
Using my old filter (Hayward Swim ClearC2025)
Solar heater (to be put in later)
Stamped concrete
Goldline SWCG (got it free from a neighbor, but need a new salt cell)


Minh

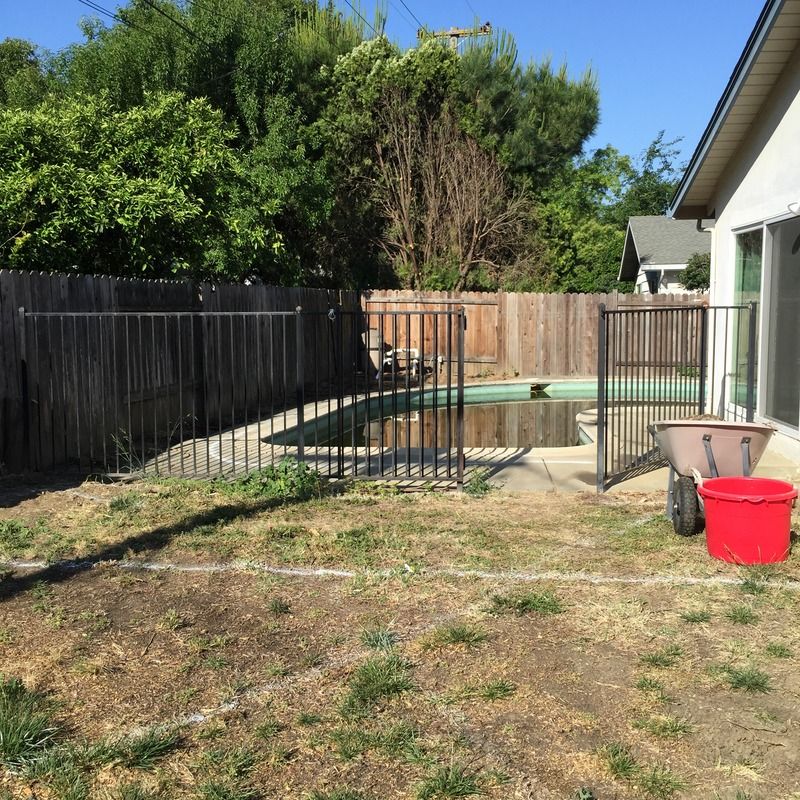
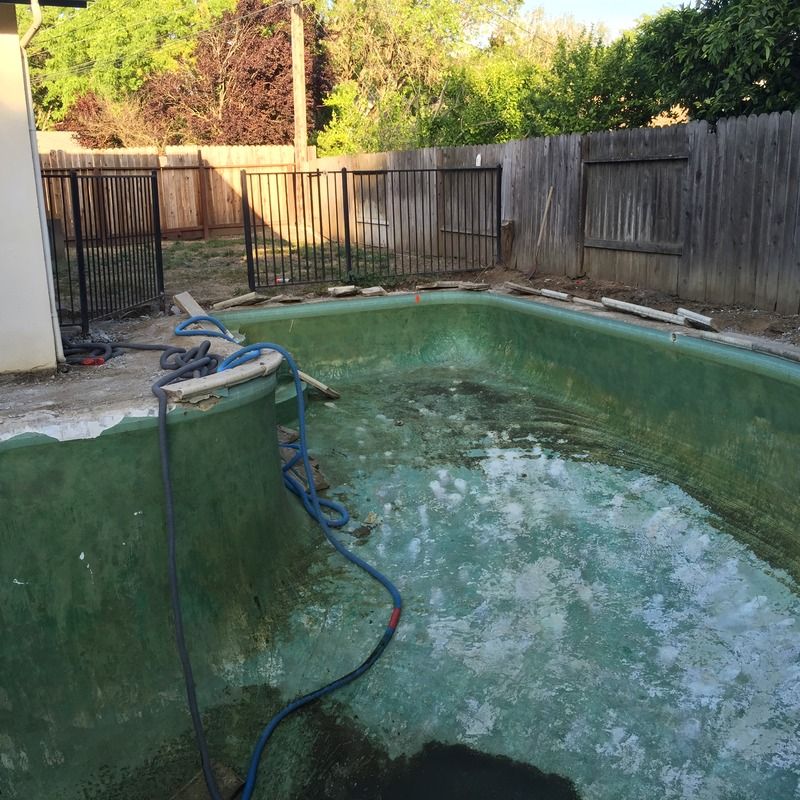
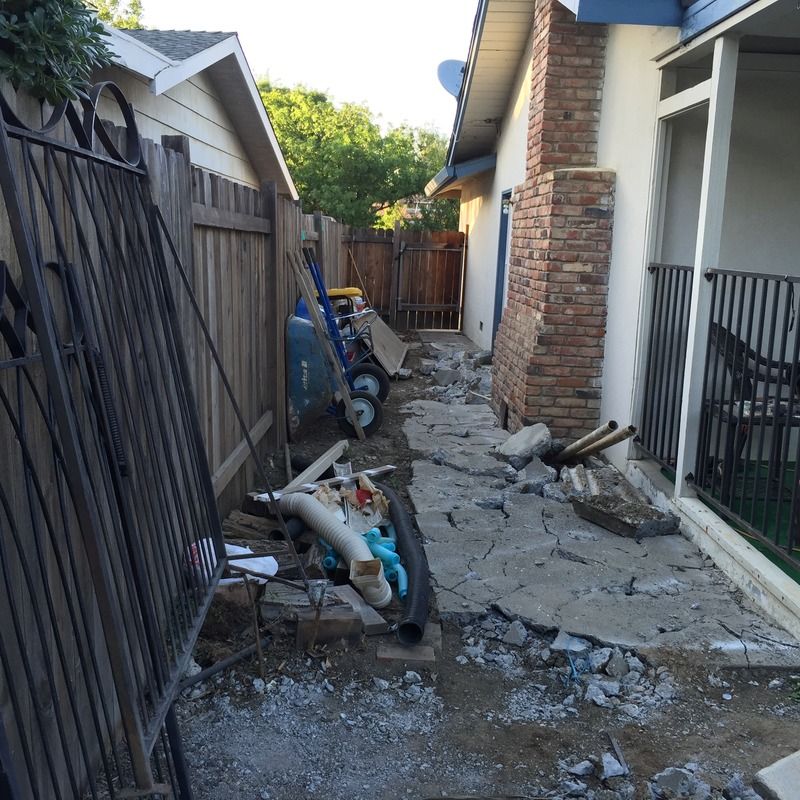
Below are pictures of Day 1 (May 4, 2015) of the remodel:


FUN! We get to watch and enjoy without any of the pain LOL THANKS!

Have you are already looked into door locks for the slider? Being a Kindergarten teacher the first thing I think of is the safety of the kids so.....

I see white paint outside the fence. What is that for?

I guess you do not need us to help spend your money LOL Your CEO has that covered!

Kim
 
Some more updated pictures...

Plumbing is lai. I didn't realize how much plumbing was being installed. I had six spa jets installed. 4 returns. One pool sweep line. One main drain/skimmer line. They had to replace the main drain because my previous main drain didn't work.


Deck being laid.

I didn't realize this, but they normally do not put rebar under the pool deck. They wanted about $1 per square foot to install rebar in a 30x30 grid. I have 1150 sq ft of decking. The amount of concrete was larger than the orginal estimate, so I was already over budget. Asked the concrete guy if I can install my own rebar, and he was fine. Spent about $350 in rebar. The spacing of the rebar is roughly 18x18. It took my brother and me about a day to install the rebar.


Here's the deck being laid and the final product.


Finished product:


The decking turned out nice. My only complain was that when they installed the pool ladder handrails, the hand rails are not parallel. It bugs me (because I am OCD when it comes to constructions), but I am sure over time, I won't even notice.

Next step is pre-plaster inspection. Pool builder didn't tell me that the gates and pool alarms had to be installed to pass the pre-plaster inspection. So I am going to be working on that the next couple of days so that I can get the pre-plaster inspection. Hopefully next week is the plastering.
 
Wow that's turning out really good.

My pool was built in 1973 and is nearly the exact same shape, except my shallow end is narrower
and the steps are the full width instead of wedding cake.

I see the shallow to deep end falls rapidly too...love it!
 
I decided to contact the project manager to discuss the problem with the step handle bar. The two handle bars are not parallel with each other. One is 4 inches off. I know it's going to bug me every time I see it. Even my wife who's much more forgiving of minor mistakes thought it looked bad. I don't know what can be done to fix it, but I want to explore all options. If they dig it out and pour new concrete at the the handle bar base, it will look like a patched job. Any suggestion on best way to correct this so it doesn't look like a patch job? The project manager is coming out tomorrow to take a look at the handle bar.


The picture below shows that the top of the back of the bar is 23.5" apart. The top front of the bar is 19.5". (These are approximate measurements.)


I will check for plumb later tonight.
 
Here is my thought----------they do need to make it even. To do so they will have to take out the decking that is there. It will look like a patch job no matter what sooooooooooooooooooooo make a pretty patch. Have them redo the decking in a whole different color so that it looks like you meant it to be there to "mark" the bars. Tiles? contrast color? stamped with design?

Just throwing it out there.

Kim
 
Thanks Kim. I was thinking the same thing. Talking to the pool builder and have them install tile in the area they dig out so that it looks like it was intention and not a patch job. The project manager is coming out tomorrow, so we'll see what he has to say.
 
Here is my thought----------they do need to make it even. To do so they will have to take out the decking that is there. It will look like a patch job no matter what sooooooooooooooooooooo make a pretty patch. Have them redo the decking in a whole different color so that it looks like you meant it to be there to "mark" the bars. Tiles? contrast color? stamped with design?

Just throwing it out there.

Kim

Great ideas Kim!!
 

Enjoying this content?

Support TFP with a donation.

Give Support
Can they cut between two seams of concrete (I noticed you have seams running out from the pool every so many feet. If you cut right along one of those seams and fixed the problem and repoured that concrete it should match won't it?
 
Deck looks great! Agree with you on the handles, I am OCD beyond crazy, that would drive me insane! That's why I would suggest trying to be there when stuff like this is done, I know it's hard with work. You must have had the same blind installer that replaced my wood stairway in my house last month. WTH are they thinking? The problem with correcting issue like this is the cure may be worse than the disease. Collateral damage sucks and some times you to fix the more glaring problem you will create another issue that is less noticable. The hand rails are VERY much off so that need to get fixed, I would have them replace that section of decking and PRAY the can get the color exact or really close. 100% avoidable issue like this really **** me off, sorry you are dealiing with it. I plan to be at home working when my pool starts getting to the the finishing stages to ensure this does not happen.
 
I really don't know anything about stainless steel, but I almost wonder if they could take a jack and put on the front that is narrow (using wet rags on the contact so it doesn't scratch). Then use a torch to heat the rear side enough to anneal it so that the jack can spread the front apart?

I mean, if they're going to have to cut the concrete and rip it all up, might be worth a shot to see if it will bend a little?
 
I think cutting out the whole section between the seams will be a worse fix than the problem. The chance of matching the same color is very very slim. The chance of the stamp looking correct is zero. The way they do stamped concrete is they pour the whole slab as one. Then when the concrete is dry enough, they cut in the expansion joints. When the slab dries some more, they use a texture pad to stamp the texture. The stamp may cross over the expansion joints. So they won't be able to match it if they redo just the section of the slab.

I am pretty reasonable. Mistakes happens. It's just a matter of fixing the problem. I don't expect them to tear out the whole deck to correct that mistake. I can see two solutions:

1. Kim's idea. Chisel out the bad anchor. Then put it in properly. The use tile to help hide the defect. I think this could be done very nicely by the right person. Maybe cut part of it and lay flagstone or river rock at the hand rail section.

2. Chisel out all four anchors. Then cover up the defect with a decorative tile so that it looks like it was meant to be that way. Then drill four new anchor points for new handrails.

I was supposed to meet with the pool builder today. But as luck has it, a major leak sprung at 1AM. Wife's water broke, so we had to head off to the hospital. :) Waiting for baby girl to introduce herself....

Minh
 
Are the rails permanently embedded in the concrete, or do they slid into sleeves and held in place with wedge anchors? If the latter, you should be able to loosen the wedge anchors and move the narrow ends apart to match the back end.

My stair handrail is just like that. When I install it in the spring I just slide it in the sleeves, adjust it to my liking, then tighten the wedge anchors.

Now if the sleeves closest to the pool are much closer together than the back sleeves, my "fix" won't likely work.

Congratulations on the new addition to your family! :)
 
The anchors are permanently embedded in the concrete. It look like
74430_1_2010419102641.jpg
.

Baby still hasn't arrived yet.
 
Looks to me like the rails were intentionally installed that way, to follow the curve of the lip of the pool in front of them. If they were exactly parallel, it wouldn't look right, IMO. It also likely makes it easier for someone in the water to reach up and grab the rails from a position of lesser leverage.
 
I wasn't able to talk to the foreman yesterday because someone decided to make an early entry into this world. However, I did go home today and saw the equipment guy. He told me that the 4" difference is not a big deal. Like Deepwater said - the anchor was installed to follow the curve of the lip of the pool. However, he said that when I tighten it down - there is actually some play so that I can make it parallel. So it sounds like it's ok. He said that it's common for home owner to freak out about this. (The equipment guy has been pretty upfront with me, so I don't think he's trying to BS me.)

I also noticed that they were chipping out the old plaster down to the gunite. When they were doing the preparation for the new plaster/Pebble Tec, they noticed some soft spots and decided it was better to strip out the old plaster. This is costing me an addition $1K. They had warned me that that was a possibility before I signed the contract, so it wasn't a total surprise. I am glad they went ahead and did it.

Please note that they still have more stripping to do.


http://s16.photobucket.com/user/mn9...ay 1/IMG_2145_zpsibumnazr.jpg.html?sort=3&o=5

Getting ready to set in the steps:


Here's some sneak peak of the equipment pad. It's not done yet. The big upside down U is where future chlorine and acid injection will happen. The pool will also be stubbed out for solar.


Enjoying this content?

Support TFP with a donation.

Give Support
Thread Status
Hello , This thread has been inactive for over 60 days. New postings here are unlikely to be seen or responded to by other members. For better visibility, consider Starting A New Thread.