Hi all,
Long time lurker, new TFP member. After much searching last year I purchased a house down in Southern Florida on an ocean access canal, which had a newly resurfaced/retiled 16x32 almost rectangular pool (apparently adding a pool canalside is often economically infeasible due to the need to put it on piles/beams). They were just finishing the tile as we got to closing and had the water level low and a weighted hose coming from the skimmer, which if I had researched remodeling a pool, I would have known was the wrong order of operations, but at the time I had only worried about how to maintain clear water!
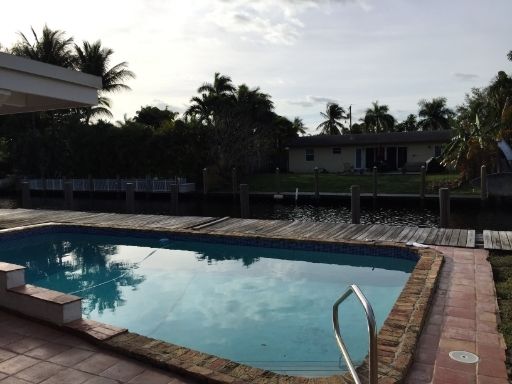
During the final walkthrough the water was still a bit cloudy, but they had filled it, and even though I noticed that they had left the hose in the skimmer, the water was well over the tile, and I didn't think twice about it. I really hated the coping, this weird wall on the house side of the pool, and wasn't a huge fan of the seen-better-days mexican tile deck, but that was such a low priority that I would address it in down the road when I'd gotten some life out of the new surface and hadn't just purchased a house!
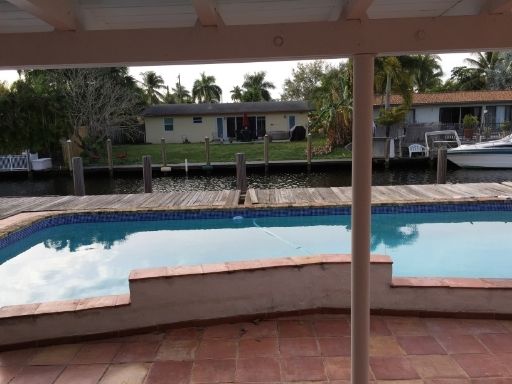
#Winning
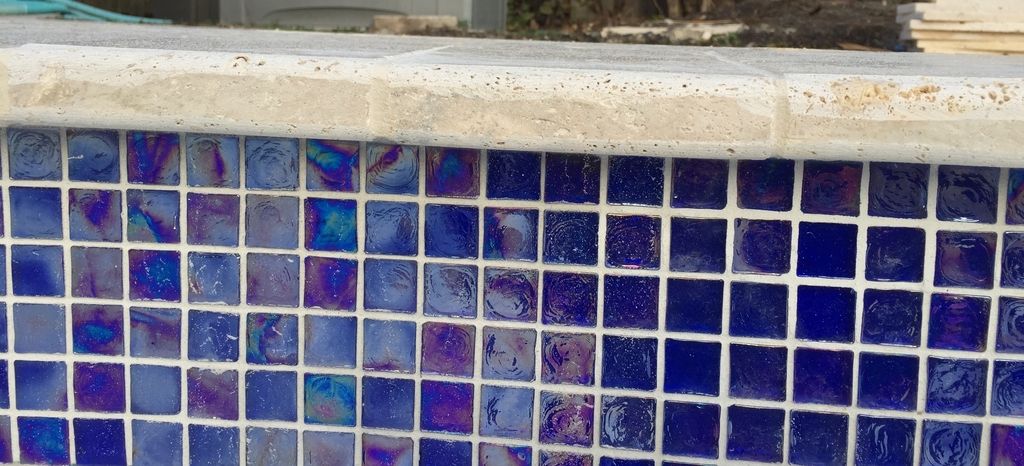
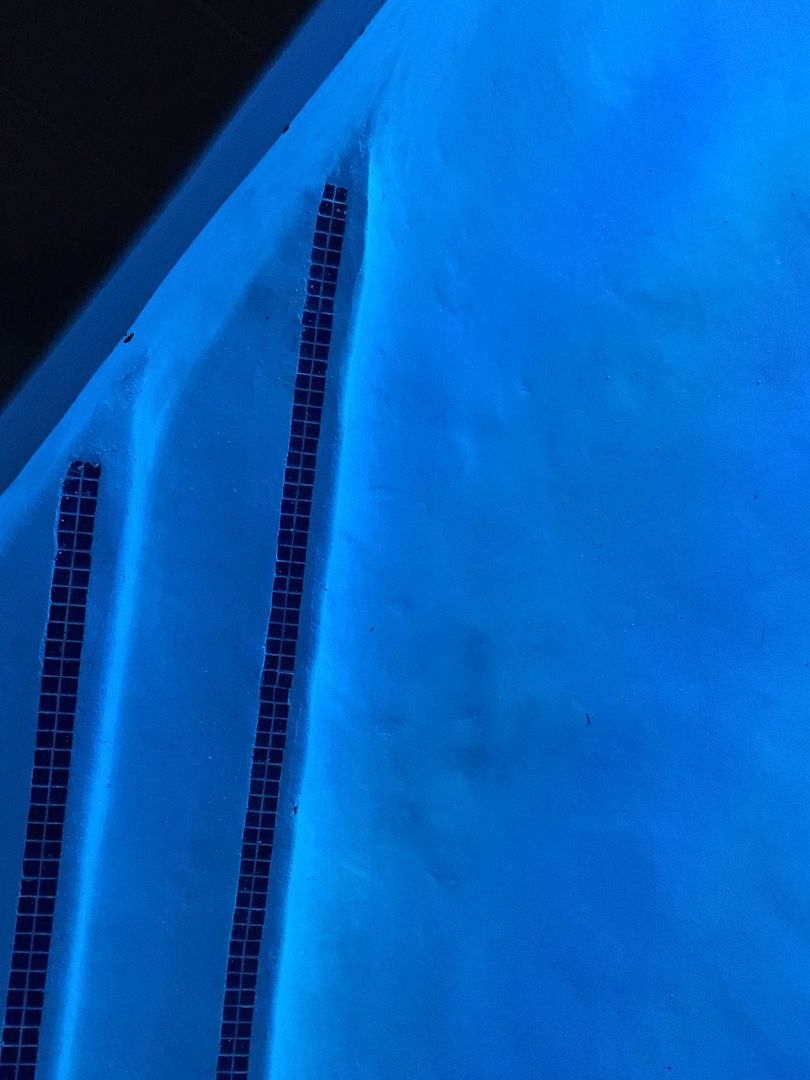
Lovely coping
It turns out the water level was just below the skimmer lip, and if you filled it up, it would drain back down to that level in an hour or two.
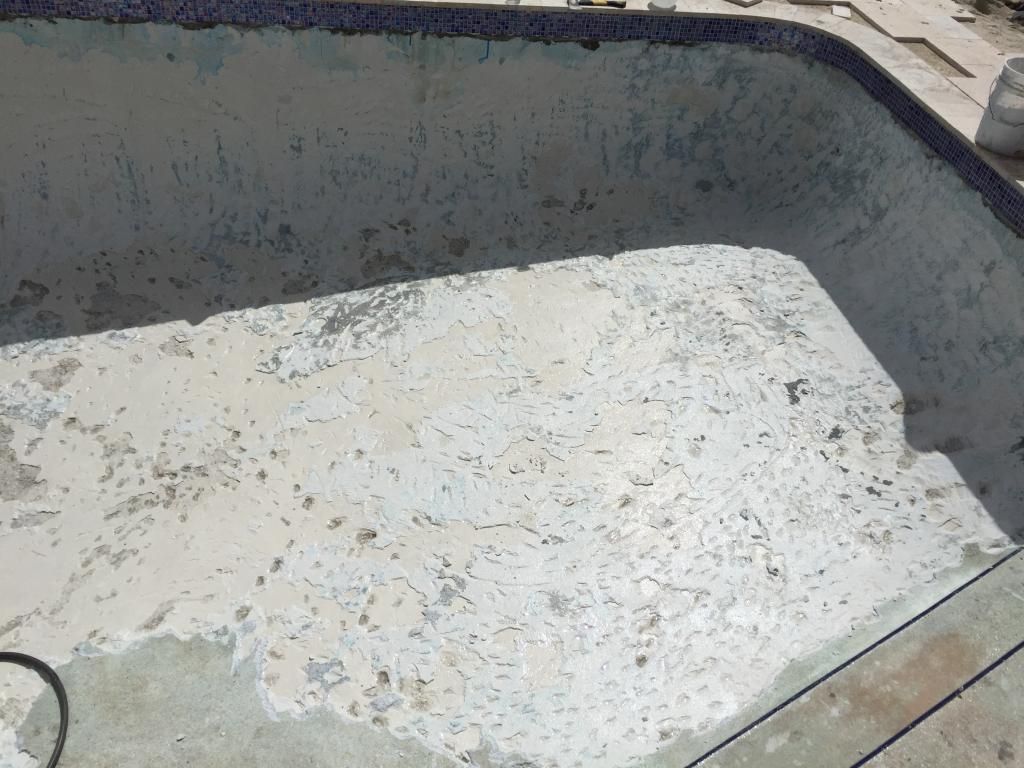
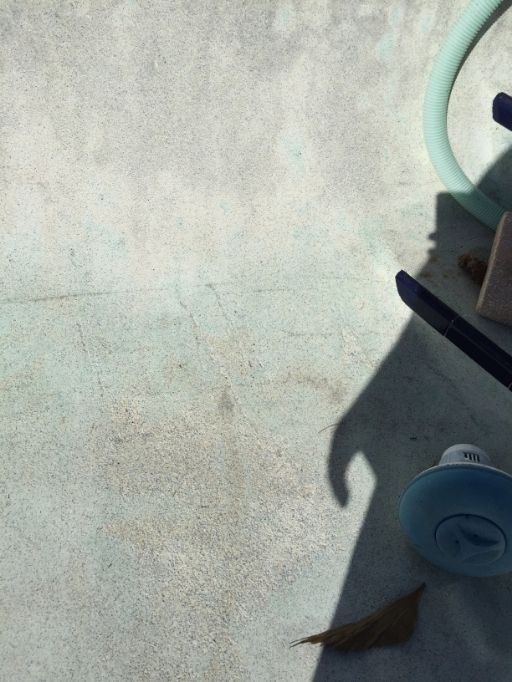
Can anyone see where this is going? Yep, I had been scammed. They didn't resurface the pool, only re-tile, and the tile job was only so they could put an extra few rows of tile on and hide the water leak from cursory inspection! The skimmer was totally shot, and the surface wasn't so great either. (Cracks in the shallow end floor, pock marks, mottling, gouges, and a lot of rust stains from what looked like discarded ?staples?)
Bleh

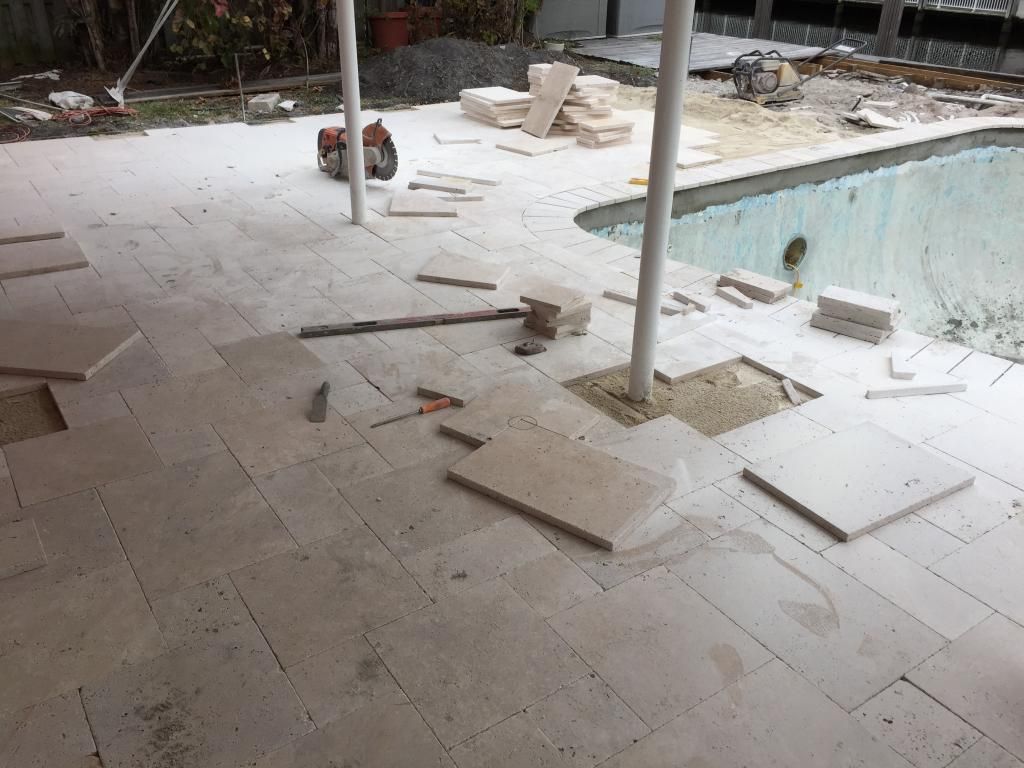
It gets really old being the skimmer, so I reprioritized and saved up and have had a crew out here working on and off for about a month now. Since the existing deck needed to be broken up to replace the skimmer, I'm replacing it with ivory "french pattern" (do NOT say Versailles down here) travertine pavers, replaced the coping with matching travertine, and I'm redoing the mechanicals and surface. I know this is modest by the standards around here, but I thought I would share. (If it helps, an outdoor kitchen under tiki/chikee hut or ramada are a project for, hopefully, next year)
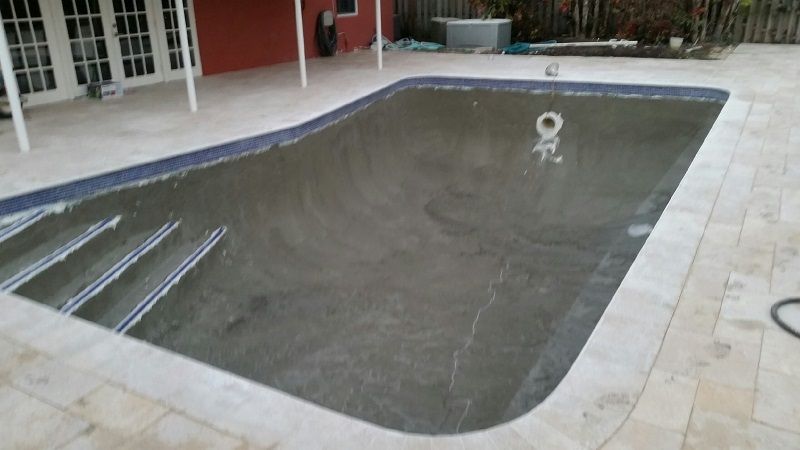
Looking better...
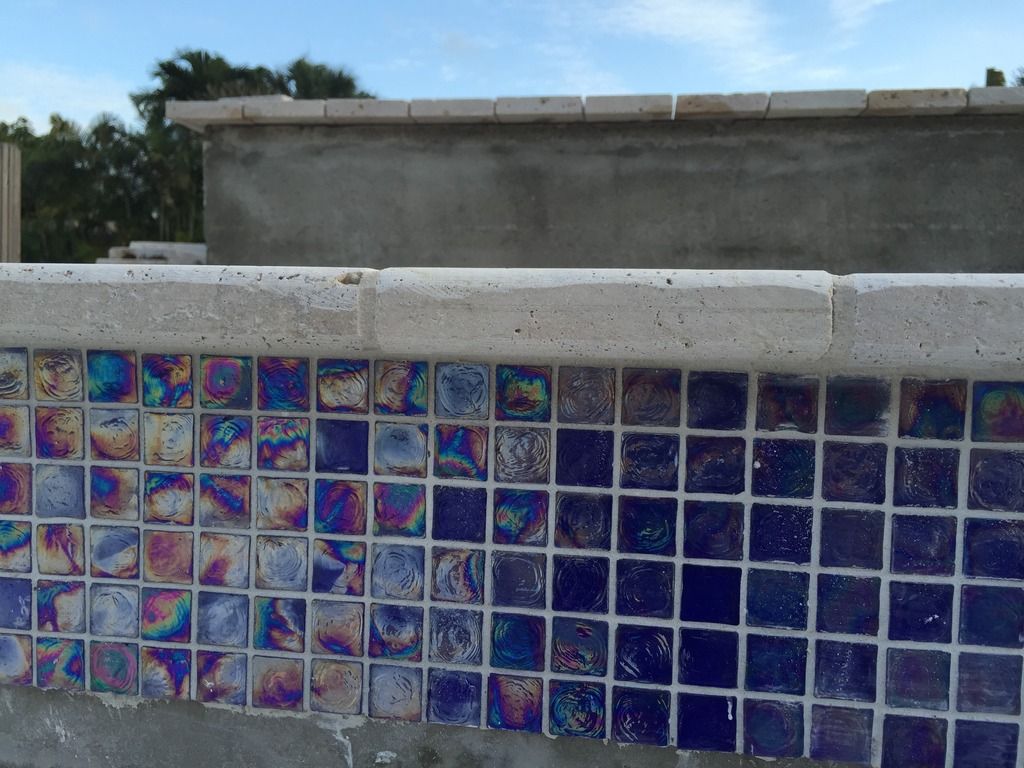
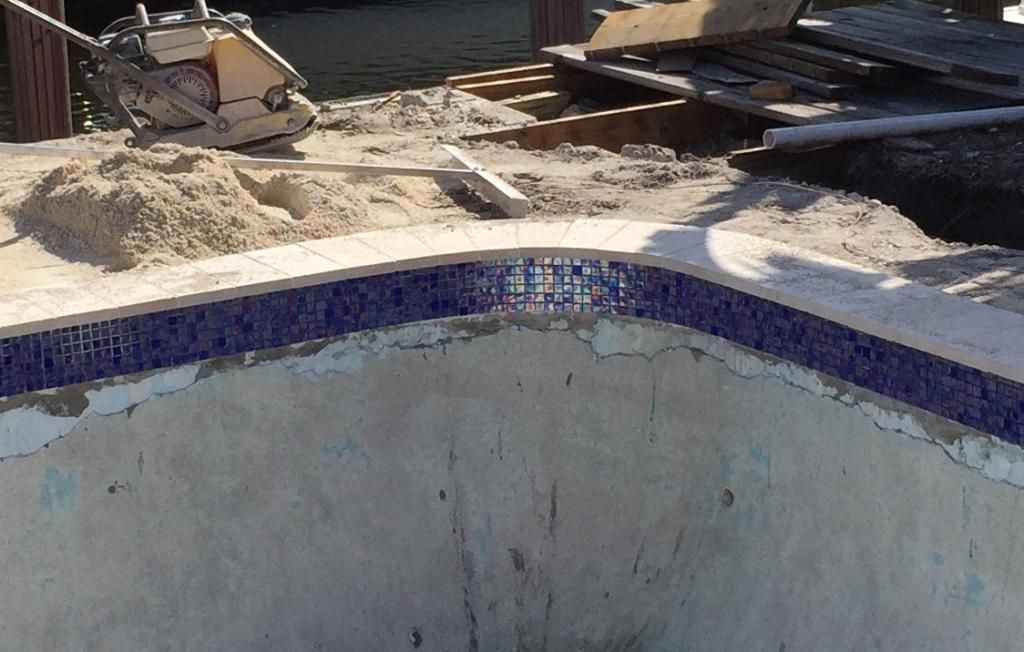
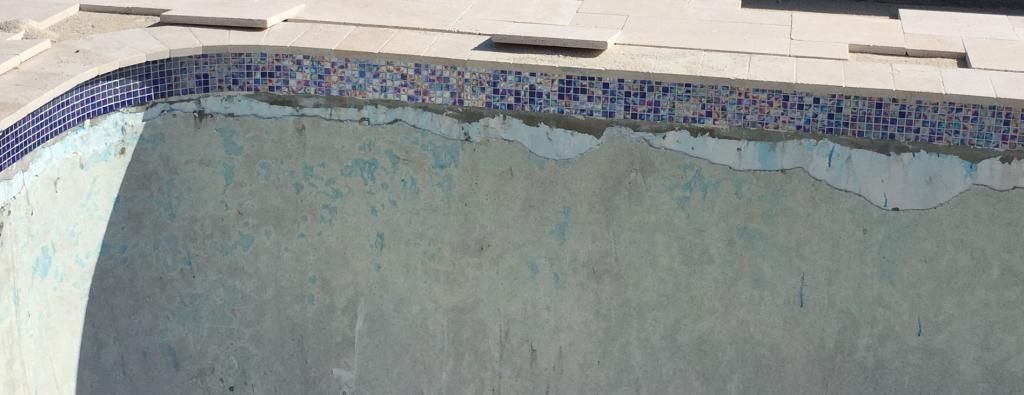
Tile
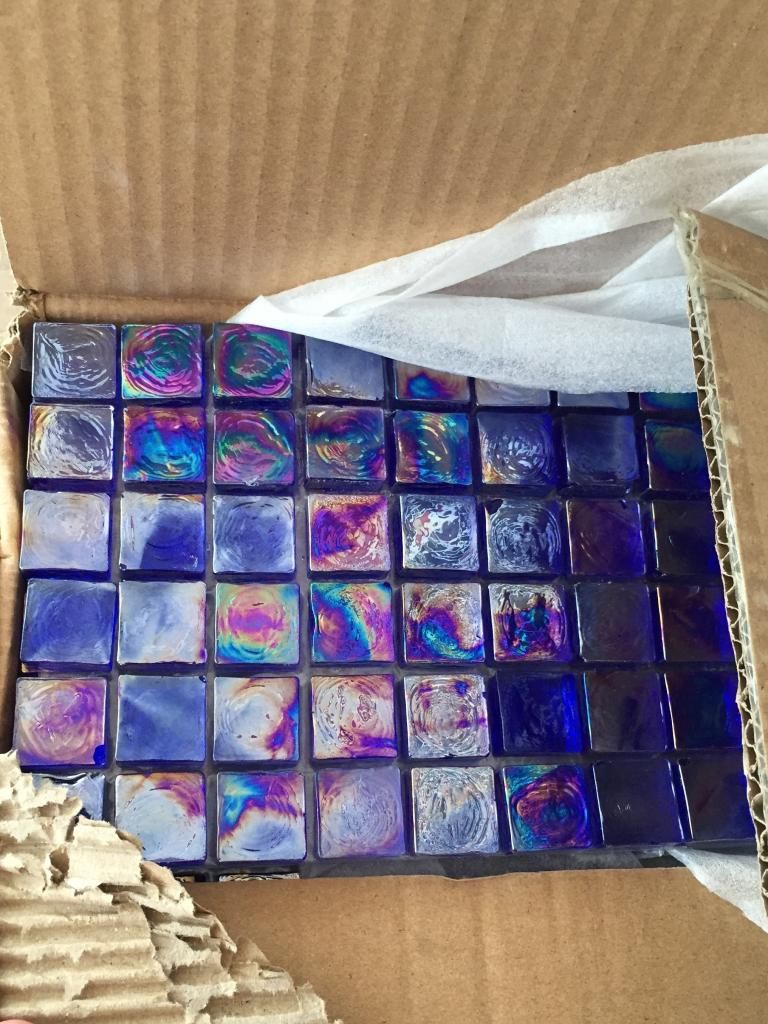
Tile on the pool and grouted
The mechanical/electrical sub just did my new pool pad. Previously the equipment was sitting on the dirt and both returns were on a single 1.5" line. I added the pad, had that split into two lines, and had a third stubbed in for a future water feature. I also replaced the pump and filter, and added a SWG, because hey, this wasn't costing enough as it was!
Pad
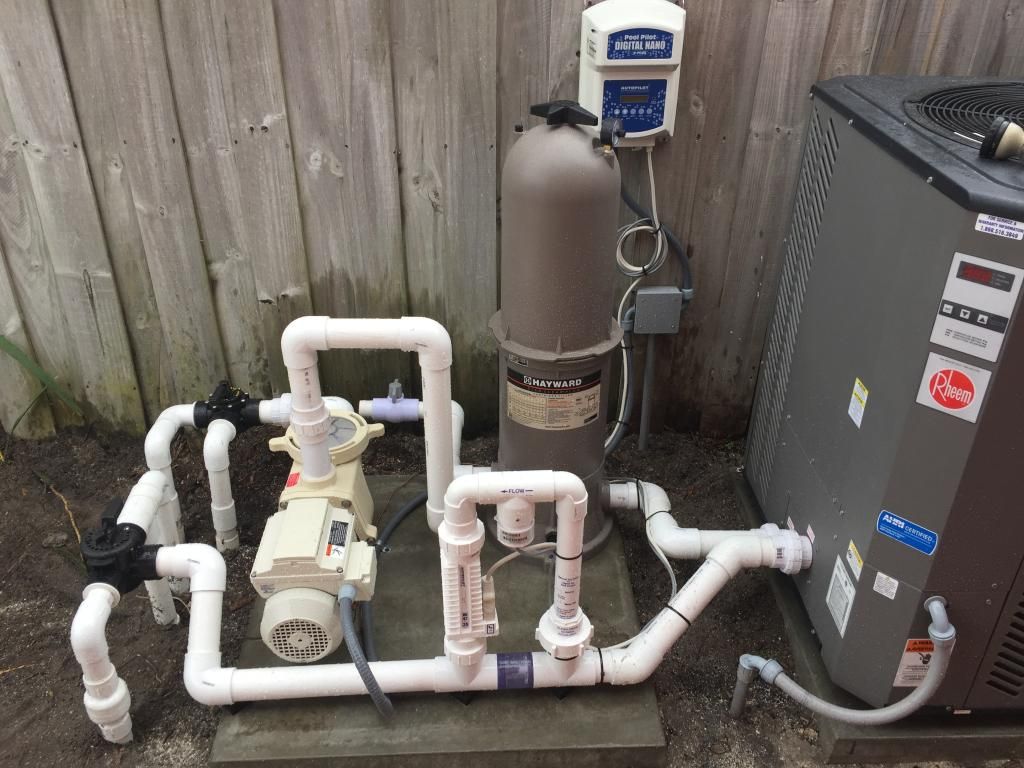
(BTW If anyone has any input, I've got a regarding how the pump and swg should be wired.)
Tomorrow they're supposed to bullnose the coping and chip out the old surface (lack of bond coat between it and previous). I'm going with Florida Stucco's "Double Sky Blue" which is an exposed aggregate like Diamond Brite. Not doing DB because PB (and another whom I didn't hire) reported some issues recently with DB and them not standing behind the warranty. Florida stucco carries the equivalent warranty. I do wish I was getting more of a lagoon look, but I don't want to worry about / deal with fading of the plaster die, and a glass bead pebble finish is entirely out of the budget!
Everyone warns you how eye-roll worthy contractors are down in S Fla, and PB's are notorious anywhere in the country. I went with someone with a very good reputation, but this was a 2.5 week remodel :lol: we should be done in another 3 weeks or so, though to be fair, somehow entirely too much travertine was delivered so I'm having them do more paving than originally contracted.
This is definitely an area of construction where you need to be knowledgable and your own on-site supervisor! Lots of little and not so little things that get done or fall through the cracks. From the little stuff like turning a sharp corner into an uneven curve in the coping, adjacent sheets of pool tile not lining up properly, to much more serious things like not bothering to replace the equipotent bond you lost when you broke up and removed all the concrete with it's rebar in it... (And I'm reasonable, like I'm now getting a Hayward LED light instead of the Pentair, because nobody wants to try to get the new bond wire down to the niche, and I'm not willing to just trust that the bond that is there is still attached.)
I'm still quite confident I'll end up with a stellar back yard/pool, it just requires patience and diligence.
Long time lurker, new TFP member. After much searching last year I purchased a house down in Southern Florida on an ocean access canal, which had a newly resurfaced/retiled 16x32 almost rectangular pool (apparently adding a pool canalside is often economically infeasible due to the need to put it on piles/beams). They were just finishing the tile as we got to closing and had the water level low and a weighted hose coming from the skimmer, which if I had researched remodeling a pool, I would have known was the wrong order of operations, but at the time I had only worried about how to maintain clear water!
During the final walkthrough the water was still a bit cloudy, but they had filled it, and even though I noticed that they had left the hose in the skimmer, the water was well over the tile, and I didn't think twice about it. I really hated the coping, this weird wall on the house side of the pool, and wasn't a huge fan of the seen-better-days mexican tile deck, but that was such a low priority that I would address it in down the road when I'd gotten some life out of the new surface and hadn't just purchased a house!
#Winning
Lovely coping
It turns out the water level was just below the skimmer lip, and if you filled it up, it would drain back down to that level in an hour or two.
Can anyone see where this is going? Yep, I had been scammed. They didn't resurface the pool, only re-tile, and the tile job was only so they could put an extra few rows of tile on and hide the water leak from cursory inspection! The skimmer was totally shot, and the surface wasn't so great either. (Cracks in the shallow end floor, pock marks, mottling, gouges, and a lot of rust stains from what looked like discarded ?staples?)
Bleh
It gets really old being the skimmer, so I reprioritized and saved up and have had a crew out here working on and off for about a month now. Since the existing deck needed to be broken up to replace the skimmer, I'm replacing it with ivory "french pattern" (do NOT say Versailles down here) travertine pavers, replaced the coping with matching travertine, and I'm redoing the mechanicals and surface. I know this is modest by the standards around here, but I thought I would share. (If it helps, an outdoor kitchen under tiki/chikee hut or ramada are a project for, hopefully, next year)
Looking better...
Tile
Tile on the pool and grouted
The mechanical/electrical sub just did my new pool pad. Previously the equipment was sitting on the dirt and both returns were on a single 1.5" line. I added the pad, had that split into two lines, and had a third stubbed in for a future water feature. I also replaced the pump and filter, and added a SWG, because hey, this wasn't costing enough as it was!
Pad
(BTW If anyone has any input, I've got a
regarding how the pump and swg should be wired.)Tomorrow they're supposed to bullnose the coping and chip out the old surface (lack of bond coat between it and previous). I'm going with Florida Stucco's "Double Sky Blue" which is an exposed aggregate like Diamond Brite. Not doing DB because PB (and another whom I didn't hire) reported some issues recently with DB and them not standing behind the warranty. Florida stucco carries the equivalent warranty. I do wish I was getting more of a lagoon look, but I don't want to worry about / deal with fading of the plaster die, and a glass bead pebble finish is entirely out of the budget!
Everyone warns you how eye-roll worthy contractors are down in S Fla, and PB's are notorious anywhere in the country. I went with someone with a very good reputation, but this was a 2.5 week remodel :lol: we should be done in another 3 weeks or so, though to be fair, somehow entirely too much travertine was delivered so I'm having them do more paving than originally contracted.
This is definitely an area of construction where you need to be knowledgable and your own on-site supervisor! Lots of little and not so little things that get done or fall through the cracks. From the little stuff like turning a sharp corner into an uneven curve in the coping, adjacent sheets of pool tile not lining up properly, to much more serious things like not bothering to replace the equipotent bond you lost when you broke up and removed all the concrete with it's rebar in it... (And I'm reasonable, like I'm now getting a Hayward LED light instead of the Pentair, because nobody wants to try to get the new bond wire down to the niche, and I'm not willing to just trust that the bond that is there is still attached.)
I'm still quite confident I'll end up with a stellar back yard/pool, it just requires patience and diligence.
Last edited:
 .
.