Northeast Ohio AG Pool Install/Build

PPrince

LifeTime Supporter
Jul 25, 2013
56
North Coast of Ohio
I have been hanging around for almost a year now and over the last three years have moved from an 8' Intex pool with a blow up ring to a 12' Intex pool with metal supports which we used for two years. This year the grandchildren are 8 and 5 1/2 and I wanted a bigger pool. Found one on Craigslist last fall and bought it. The newer filter and pump were worth about what I paid for the whole kit and caboodle. Took it down and found several problems that I worked over the winter and spring to resolve. Basicall keep the pump and filter, hoses and poles and assorted misc stuff., steel wall and framing, albeit, I bought new feet and bottom rail.

I replaced the overlap liner with a beaded liner, and of course new bead receivers. Also bought a new wide mouth skimmer to replace the one I dropped and cracked! :sad: Got one inch foam for the floor and a liner for the inside of the wall as well as cove molding. And a bunch of other things, naturally! But you don't want to hear about that, you want pictures of the build!!

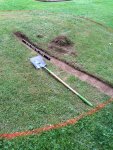
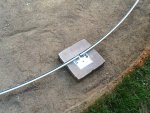
OKAY. Here goes. Scouting out the right location in March.
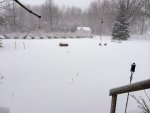
IMG_4249.jpg

I'm thinking right out about there should be good!

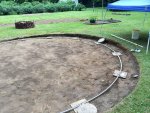
Weather is improving and you can see where the 12' pool sat last year.
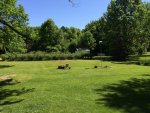
IMG_5769.jpg

I've got the location finally figured out, the building permit in hand and starting to find the low spot.
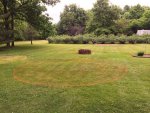
IMG_5857.jpg

Not too close, not too far away from the house.
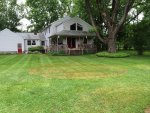
IMG_5860.jpg

More to follow.....
 
Thanks starsfan, continuing with the build...

Worked to figure out the low spot and see how much leveling was needed. I was shocked at what I thought was somewhat level ground.

IMG_5864.jpg

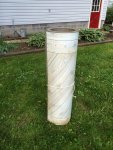
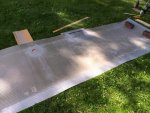
Meanwhile I got the steel wall out to figure out how far the skimmer was from the "end" of the wall so I could place the skimmer where I wanted it.

IMG_5867.jpg

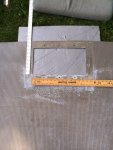
Since I needed to replace the skimmer, I took some measurements.

IMG_5868.jpg

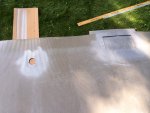
Also did some rust removal and generally spray painted edges to prevent future rust.

IMG_5875.jpg

Figured out what I needed to know, made repairs and tried to do some rust prevention and rolled the wall back up.

IMG_5876.jpg

Time to get back to leveling.....
 
The eyes are deceiving when looking the ground which looks level! The joke is on your back as in back pain! Its hard work!!! Good luck and keep us posted!
 
Casey - that is so true!!

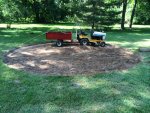
Started working on removing the sod.

IMG_5908.jpg

At this point much easier than the trench I dug by hand.

IMG_5909.jpg

Steady progress, but some of those rolls of sod are darn heavy!

IMG_5916.jpg

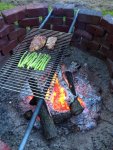
Sod gone but still lots of work ahead. Now it's time for dinner and a drink or two.

IMG_5920.jpg
 
You need to wrap some taters in foil and throw them in the coals... OMG! You haven't had a tater til you had one like that! :mrgreen:
 
Blacklisted - I don't mind the white stuff but it does tend to cut into our pool time! :laughblue:

With the sod gone I can dig down in the higher areas and cart it away.

IMG_5948.jpg

Got tired of trying to remember the areas that were already at the right height so I used the laser level and spray painted the ground. White for "just right" and red for too high, remove more dirt.

IMG_5949.jpg

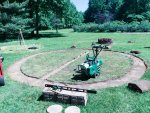
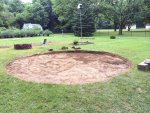
Getting close. I'm surprised at how much dirt I moved. Dumped a lot of it on the other side of the campfire ring in some low spots.

IMG_5959.jpg

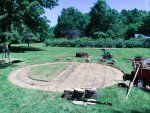
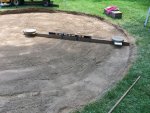
Finally close to level and time to fine tune. 10' 2x4 with eye bolt in one end, level taped to top and a couple of patio blocks to keep it weighed down and move dirt around.

IMG_5981.jpg
 
You can fill the low spots with the 2 inches of sand you will use as the base. As long as your outside perimeter has a solid foundation for the patio stone, you are good.

I remember these digs and they are the absolute worst parts of installation!
 

Enjoying this content?

Support TFP with a donation.

Give Support
You can fill the low spots with the 2 inches of sand you will use as the base. As long as your outside perimeter has a solid foundation for the patio stone, you are good.

I remember these digs and they are the absolute worst parts of installation!

Thanks Casey. I will go down without filling since I will be using 1" foam boards and cove molding instead of sand. It is challenging work!!
 
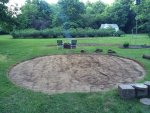
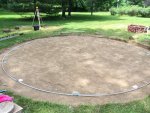
Got things level finally and working on figuring out exact placement. An eagle eye pool person will spot what I did wrong!! (Or somebody who has done it before.) LOL

Rough placement to start.

IMG_5997.jpg

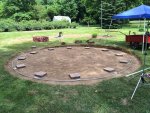
12 X 12 pavers for the feet and posts to sit on.

IMG_5999.jpg

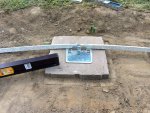
Digging them in so 1 inch is exposed to match up with the 1 inch foam board bottom.

IMG_6003.jpg

Making sure they are nice and level.


IMG_6010.jpg

Had 5 of the 12 pavers in place and feeling happy till I noticed what I was doing wrong! :brickwall: What a rookie mistake!!!! :hammer:

Did you spot it?
 
Casey - You are correct!! :smile: :laughblue: I'm going along and making slow but steady progress and suddenly realize the I have the bottom plates (and thus the support posts) on the inside of the pool wall. Duh!!!

IMG_6013.jpg

So I switched them all around and realigned the remaining pavers to accommodate the new configuration. I really didn't want to go back and dig up the 5 I already had in place, but it did require me to shift the others slightly and the frame was now a little out of center of where I cleared. But, I thought "What the heck" and moved on.

So I finally had them all in place and leveled off.

IMG_6039.jpg

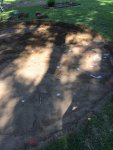
And then it rained!! But at least I got to see where I still needed to level off a little more! :wink:

IMG_6045.jpg

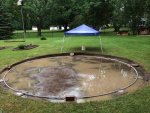
And then it rained MORE........

IMG_6119.jpg

Bummer!!
 
It looks level in that last pic! :mrgreen:

Oh wait... it's just deep! :D lol

The rain will get you every time! It rained, and rained, and rained every time I tried to work on mine last year til I could no longer work on it. I had to stop because hubby got hurt and once I got him out of the trauma center, I hired an excavator to finish mine off and my dad, son, friend and I put it together and hubby got to help a little too. I feel your pain on the rain!
 
Wow it must be nice to have a yard that anytime you do any digging you do not get rocks. :D But then again my house is built on a rock. Looks good so far.

We have so much fill and rocks in our yard it is ridiculous!
 
It looks level in that last pic! :mrgreen:

Oh wait... it's just deep! :D lol

The rain will get you every time! It rained, and rained, and rained every time I tried to work on mine last year til I could no longer work on it. I had to stop because hubby got hurt and once I got him out of the trauma center, I hired an excavator to finish mine off and my dad, son, friend and I put it together and hubby got to help a little too. I feel your pain on the rain!

When faced with a time deadline, the rain is a major pain in the behind!! Sorry to hear about your hubby. Hope he has recovered.

Wow it must be nice to have a yard that anytime you do any digging you do not get rocks. :grin: But then again my house is built on a rock. Looks good so far.

We are blessed with good soil plus things grow well in it!! But no time for a garden this year.

Ok, I really don't get something here...

Why, oh why, are you putting foam board UNDER the bottom support rails???

Foam board will not, I repeat, WILL NOT support the weight of the wall on a rail.

You should be putting the foam on the INSIDE of the bottom rails, not UNDER them.

Basically a big circle the size of the inside area of the bottom rails.

A permanent above ground pool is not anything like an intex pool. People do this stuff with intex pools because there is no support outside of the footings. The bottom rails support the wall just as much as the bottom plates. If you look at Casey's install she has pavers even under the middle area of the bottom rails. That is considered overkill, but by far only helps support them as much as possible, so there is no issue doing that, especially if you had to fill the area and the fill was not compacted or was compacted with sandy soil, then you most certainly have to do what Casey did.

My point is foam board is not able to support the rails. You really have to sink the pavers to ground level and put the foam board on the inside of the bottom rails. I am doing just that on my install, just that I will have a base of limestone so I don't need pavers, but I am going with 1.5" thick foam board and that will be a giant circle inside the bottom rails.

Even though it could be argued that the bases on the pavers will take all the weight, but it also creates singular points of stress on the wall as well. The rails having less "solid" support doesn't mean it doesn't get spread over a wider area.

I removed an all-resin pool that basically had a couple of lower rails broken because they didn't have enough support under them and you could tell the wall was buckled between where it happened on the support bases that had pavers.

- - - Updated - - -

Just wanted to say you are definitely doing everything else right and by the numbers though... Good work so far...


Dennis,
I asked in a few other threads and the conscientious seemed to be just set the rails on the rigid foam board as long as you have good support for the base plates. The insulation is pretty dense and doesn't look like it will compress very much and probably not as much as the soil. Not really sure of the pressure dynamics in a pool, but wouldn't suspect there is any more pressure pushing down on the rails than any other place across the pool bottom. We'll see. :wink:

A side conversation on supporting the side rails has been moved here. JasonLion
 
I used the extra pavers because I couldn't dig down to recess the pavers in time for my team of installers to get here. I was out of time with a sick hubby Dennis. :goodjob:
 
Rain Rain Go Away, Come Again After I'm Done Putting Up This Pool!!

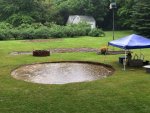
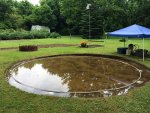
Not quite deep enough to enjoy, but it's kind of looking like a pool!!

IMG_6124.jpg


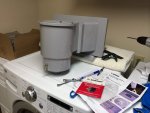
With the rain outside, time to work on things inside like installing the bonding plate in the new skimmer basket.

IMG_6126.jpg

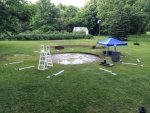
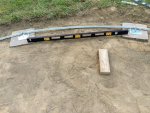
Rain has stopped, but it's still soggy outside. Might as well start laying out pieces and parts.

IMG_6133.jpg

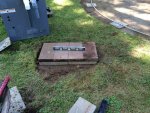
And setting up a temporary base for the pool heater to rest on.

IMG_6136.jpg
 

Enjoying this content?

Support TFP with a donation.

Give Support
Thread Status
Hello , This thread has been inactive for over 60 days. New postings here are unlikely to be seen or responded to by other members. For better visibility, consider Starting A New Thread.