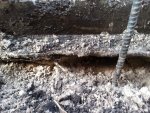
Water Level Drops

Compstuff

0
LifeTime Supporter
Jun 18, 2014
64
Miami Florida
Split by moderator out of this sticky. Best to start your own thread. Thanks, jblizzle

Thankfully found your forum today as I am desperately trying to learn how to maintain my pool and get rid of the pretty neon green that has started within the last few weeks... but I will read read read before I start asking ;)
 
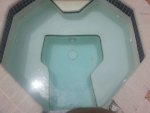
Well this is my first question on the forum but it relates to a problem I have had since I bought this house three years ago. The house came with a pool and attached spa and every night after the the pump turns off the spa will drain water down to just below the inlet jets and in the morning when the pump turns on it will fill up again and start falling over the wall as designed.

20140623_144648.jpg

Here are my questions:

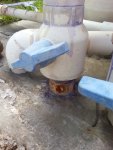
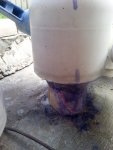
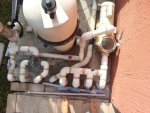
1) The spa drain valve has a small leak on the bottom of the valve (which the previous home owner obviously tried to fix with epoxy), I want to replace the valve but its so close to the concrete pad that I'm not sure how, so any help would be appreciated
20130513_111529B.jpg20140622_101452.jpg

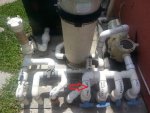
2) The spa feed comes out of the chlorinator and then go to a J valve whch splits into 2 actual feeds that control separate jets in the spa. I already replaced the check valve on the one feed line but I don't understand why their isn't a 2nd check valve on the other feed line, shouldn't their be one? For that matter I don't quite understand why they even have separate controls for the spa inlets.
20130513_111529C.jpg

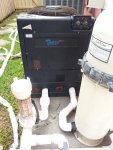
3) The pool heater has never worked since I moved in. It turns on (the light goes on) but nothing seems to actually happen. At this point I'm not sure if I should try and get it repaired of if I should just remove it from my entire system. Even though it would be nice to have a hot tub, I'm not sure I will ever actually use it in Miami and I imagine it would probably be pretty costly to actually run. I would appreciate any thoughts on this. Additionally if it is actually dead should I remove it and if so how would you suggest I plump the lines.

20140618_104629.jpg

Thanks in advance
 
Last edited:
OH MAN!!! I just noticed that the spa drain valve has developed a crack in the small pipe that feeds the valve. Its so close to the concrete I'm not sure how to replace it. If I do it or call a plumber can anyone tell me if I should reuse the same valve or buy a new one/better one?

20140622_101512B.jpg
 
Last edited:
OK so after reading a bunch of threads regarding different valves it seems pretty clear that the recommendation is to go with better quality valves like the Jandy or Pentair. I definitely need to replace the Spa valve that is leaking but I am wondering if I should just do all 4 valves and re-plumb the whole "manifold". I also have a main drain valve with a broken handle and an extremely sticky ball so I really need to replace that at well.

Any suggestions and advice would be really appreciated.
 
Just wondering if anyone can help me at all with my questions or make any suggestions based on my system problems??? I continue to research, read, watch youtube videos etc but still not sure whats right and whats wrong.
 
Hopefully this bump will get you a little more visibility.

The only one I can start to help with is the heater. Do you have a manual for it? See if you can find a troubleshooting section with a decision tree or something. There are lots of things that could be wrong, and they could run the gamut from easy and cheap to really hard and really expensive. You'll have to start with gas vs. electric, is the pilot light on or does it auto ignite, and you'll have to individually test the switches in the circuit.
 
Man that leak is in a bad spot! Actually I wouldn't want any of my plumbing encased in concrete like that. I know your in Miami but concrete flexes a bit with temp changes. Not good for the PVC - as you know! I would probably plan to cut out that 6 inch patch of concrete and redo all the valves... In the meantime, you could try some JB Weld on that leak and see if that fixes the water level problem.
 
Its an Electric Heat Pump but I am going to track down the manual and info today... I can do a good deal of troubleshooting but fall short in on the AC side of things... thanks I will report back

Hopefully this bump will get you a little more visibility.

The only one I can start to help with is the heater. Do you have a manual for it? See if you can find a troubleshooting section with a decision tree or something. There are lots of things that could be wrong, and they could run the gamut from easy and cheap to really hard and really expensive. You'll have to start with gas vs. electric, is the pilot light on or does it auto ignite, and you'll have to individually test the switches in the circuit.

- - - Updated - - -

The fact that they did this in concrete this way kills me... I have nothing really to work with so I am seriously considering what you suggest and just open up the concrete. Can you or anyone help me with ideas for changing out the valves and or redesigning the manifold? Thanks

Man that leak is in a bad spot! Actually I wouldn't want any of my plumbing encased in concrete like that. I know your in Miami but concrete flexes a bit with temp changes. Not good for the PVC - as you know! I would probably plan to cut out that 6 inch patch of concrete and redo all the valves... In the meantime, you could try some JB Weld on that leak and see if that fixes the water level problem.
 
That's a tough one. I would imagine you'll need to get a concrete saw and cut from behind the valves all the way across the pad one both sides, and then cut the pipes off at ground level under the concrete. Assuming of course there is room... if not you might have to get a jack hammer and score the crete first. Not going to be an easy job or one for the weak of heart (ie. not handy). I consider myself pretty handy and that is something I would dread for sure. Crazy that they concreted those pipes in, that would have been my fear from the beginning. The only other option I could think of would be some kind of plumbers tape that will seal around the pipe as a stop gap measure until you can come up with a better solution or bite the bullet and go the hard way on this. Best of luck!!!
 

Enjoying this content?

Support TFP with a donation.

Give Support
How far out does the concrete pad extend? Could you post a picture of the whole pad? Personally I would like a little more elbow room in my pad plumbing. It looks nice to have everything all compact but it can be a pain to work with when a problem pops up, as you have found. If you have time to re-plumb the pad I would go with paver blocks and gravel for a foundation, with the gravel surrounding the area where the pipes exit the ground. I would add the better quality valves as you indicated earlier, and place unions between the pieces of equipment to make it easier to swap out in the future. If you are not using the inline chlorinator I would remove it as well.
I would raise the height of the pipes coming out of the ground so there is more space to work on pipes in the future. Try sketching out a couple of re-plumbing plans and post them here and we can help you tweak your plans.
 
Were definitely on the same page... I am handy for sure and not "afraid" of this but I truly dread how big a job this will turn out to be. I am trying to think this through very carefully before I jump... and if I go that route I will probably wind up replacing a bunch of items so it's not just the hard work its going to add up quickly. I checked yesterday and I can rent a concrete saw for a day for only $40.00 which isn't bad at all.

That's a tough one. I would imagine you'll need to get a concrete saw and cut from behind the valves all the way across the pad one both sides, and then cut the pipes off at ground level under the concrete. Assuming of course there is room... if not you might have to get a jack hammer and score the crete first. Not going to be an easy job or one for the weak of heart (ie. not handy). I consider myself pretty handy and that is something I would dread for sure. Crazy that they concreted those pipes in, that would have been my fear from the beginning. The only other option I could think of would be some kind of plumbers tape that will seal around the pipe as a stop gap measure until you can come up with a better solution or bite the bullet and go the hard way on this. Best of luck!!!
 
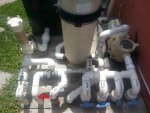
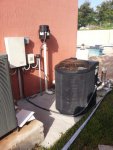
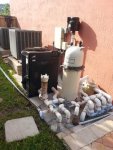
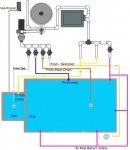
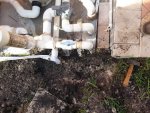
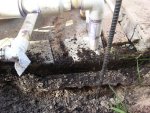
The pad is 4 ft x 8 1/2 ft but I have no idea how deep. I will try a few things tomorrow to see if I can determine that. Here are some pics and a mechanical drawing, that is not exact regarding orientation but mechanically correct, except I left out the chlorinator.
20140703_090018.jpg20140703_090104.jpg20140703_090119.jpg
valve_settings_3.jpg
How far out does the concrete pad extend? Could you post a picture of the whole pad? Personally I would like a little more elbow room in my pad plumbing. It looks nice to have everything all compact but it can be a pain to work with when a problem pops up, as you have found. If you have time to re-plumb the pad I would go with paver blocks and gravel for a foundation, with the gravel surrounding the area where the pipes exit the ground. I would add the better quality valves as you indicated earlier, and place unions between the pieces of equipment to make it easier to swap out in the future. If you are not using the inline chlorinator I would remove it as well.
I would raise the height of the pipes coming out of the ground so there is more space to work on pipes in the future. Try sketching out a couple of re-plumbing plans and post them here and we can help you tweak your plans.
 
Haven't had a chance until today to check up further on this, plus its been raining like crazy every day but I finally checked this morning. I dug on the side of the pad and can see that it is a 4" extension pad. I was able to dig under the pad and actually touch the first PVC pipe so this isn't as bad as it could have been. I am going to plan on renting a saw and cut the concrete pad for a redesign. Before I make the plan, which I will report here, my wife has asked me to see about the heater because she would like it for the spa. Based on that I decided to call Aqua-Cal and I will have them come out and determine if the heater is salvageable and at what cost.... I figured with all the projects I have going on that was the most effective thing to do.

20140709_092026.jpg20140709_092046.jpg20140709_092052.jpg
 
The tech from Aqua-Cal came over and was IMHO very sincere and honest. He told me that he could repair the unit but he recommended not doing it. The unit is 13 years old and was plumbed with copper and he said the copper starts thinning out and weakening at the 11 year mark. Based on the age and condition he said it could burst anytime after being put back in use which would be a waste of money.

He also said that if I was only interested in heating the spa I could go a much more economical way.

I am planning to cut the unit out this weekend and dispose of it properly next week.
 
I have not heard any complaints on the quality of the pentair valves, and it looks like a good price on sale. I would also add unions between your equipment, so you can undo the unions to pull a piece out for repair if needed.
 
When you say add unions do you mean at each end of the valves (PVC-UNION-VALVE-UNION-PVC)?

The current manifold has 4 valves; Spa Drain, Main Drain, Skimmer & Vacuum. Am I correct that I should add a separate Pentair Valve for each to maintain the individual control?

I am definitely removing the heater and the chlorinator, is their a "proper" way to make the new connection and feed the Main pool return and Spa jets so water pressure and flow are correct?

For the spa jets I will definitely be adding a second check valve and if I can't find new seals for the current j-valve I will replace it.

I will replace the main pool return valve with the same pentair referenced above.

That leaves me with my final item, an already broken drain valve which needs to be replaced... not sure if I will use the pentair on that.

Does this all sound about right?

I have not heard any complaints on the quality of the pentair valves, and it looks like a good price on sale. I would also add unions between your equipment, so you can undo the unions to pull a piece out for repair if needed.
 
Don't want to sound stupid but I'm not sure I understand about the pavers and the gravel. I visualize filling the cut area around the pipes with gravel and then laying pavers on top.

I am trying to figure out how to raise the pipes and valves and then connect to the pump

If you have time to re-plumb the pad I would go with paver blocks and gravel for a foundation, with the gravel surrounding the area where the pipes exit the ground.

I would raise the height of the pipes coming out of the ground so there is more space to work on pipes in the future.
 
I'll reply within your post in red

When you say add unions do you mean at each end of the valves (PVC-UNION-VALVE-UNION-PVC)? It doesn't have to be right after the valve, in fact I would put it closer to the piece of equipment if possible.

The current manifold has 4 valves; Spa Drain, Main Drain, Skimmer & Vacuum. Am I correct that I should add a separate Pentair Valve for each to maintain the individual control? Yes.

I am definitely removing the heater and the chlorinator, is their a "proper" way to make the new connection and feed the Main pool return and Spa jets so water pressure and flow are correct? If there is no more equipment between the filter and the pool just make the line as straight a shot to the pool return as possible.

For the spa jets I will definitely be adding a second check valve and if I can't find new seals for the current j-valve I will replace it.

I will replace the main pool return valve with the same pentair referenced above.

That leaves me with my final item, an already broken drain valve which needs to be replaced... not sure if I will use the pentair on that.

Does this all sound about right? sounds ok to me.
 

Enjoying this content?

Support TFP with a donation.

Give Support
Thread Status
Hello , This thread has been inactive for over 60 days. New postings here are unlikely to be seen or responded to by other members. For better visibility, consider Starting A New Thread.