
- May 7, 2014
- 429
- Pool Size
- 29980
- Surface
- Vinyl
- Chlorine
- Salt Water Generator
- SWG Type
- Hayward Aqua Rite (T-15)
Let me start by thanking everyone on this board. It's packed with great info and I learned a lot of good tips/tricks for this project.
I have put up two AG pools in the past and neither were level and neither had a good pump/filter combo. I hated both of them. I was very, very close to putting an IG pool in this year but decided to hold off for a couple of years and really put more thought in to exactly what I wanted and how I wanted it all laid out. So I bought a new Intex 18' x 48" to put up for my daughter to have something to swim in. I told myself that I was not going to waste my time putting up an pool that was not level again...so this is where all the work started. (the worst part!)
I choose an area of the yard that was as close to level as I could find. I have a commercial grade transit that I bought when I built my house and this made finding the most level spot I had to work with an easy task. I used marker paint to paint a 19' circle on the ground where I wanted the pool to go. This spot was pretty level North and South...but East and West was about 6" - 7" off. Oh well, that's what shovels are made for right? I used a level, both by itself and on a 10' 2x4 to start making a East/West level trench that would establish the grade that I wanted to follow.
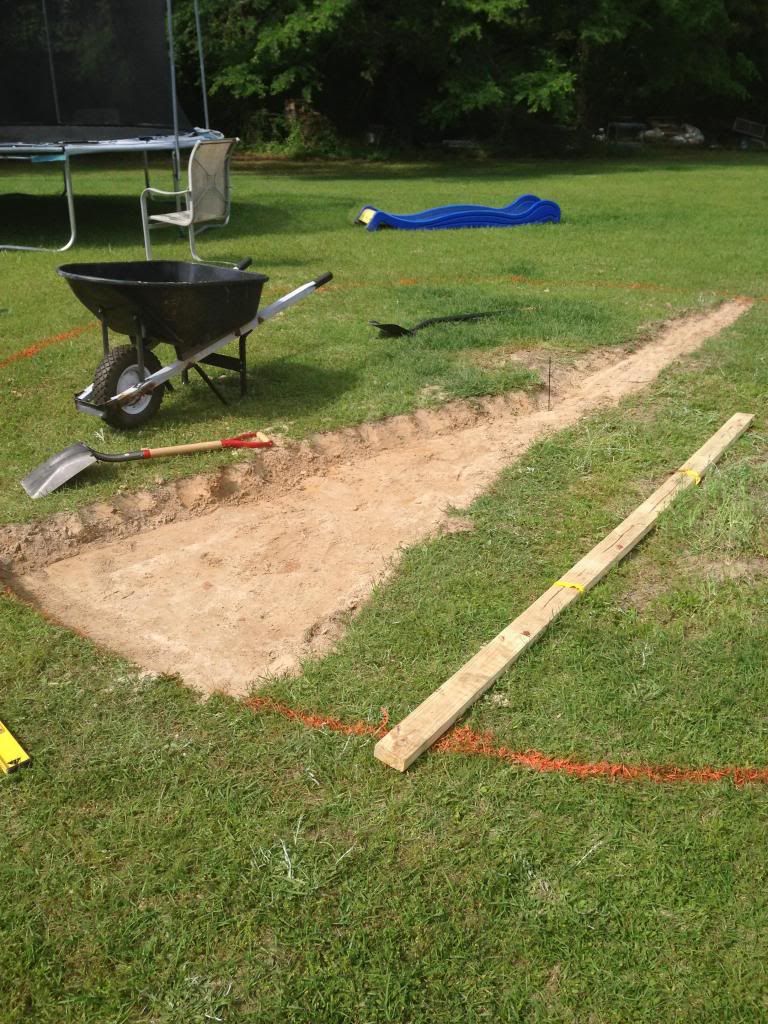
After creating that level trench, it was just a matter working my way around the circle. I must have checked level 1,000 times during this process. I think I moved about 4-5 yards of dirt in this process. It was many, many wheelbarrow loads. This was one of the worst things I have ever had to do. I don't like shovel work in the first place and to make matters worse it was the hottest days of the year that choose to show up while I was digging.
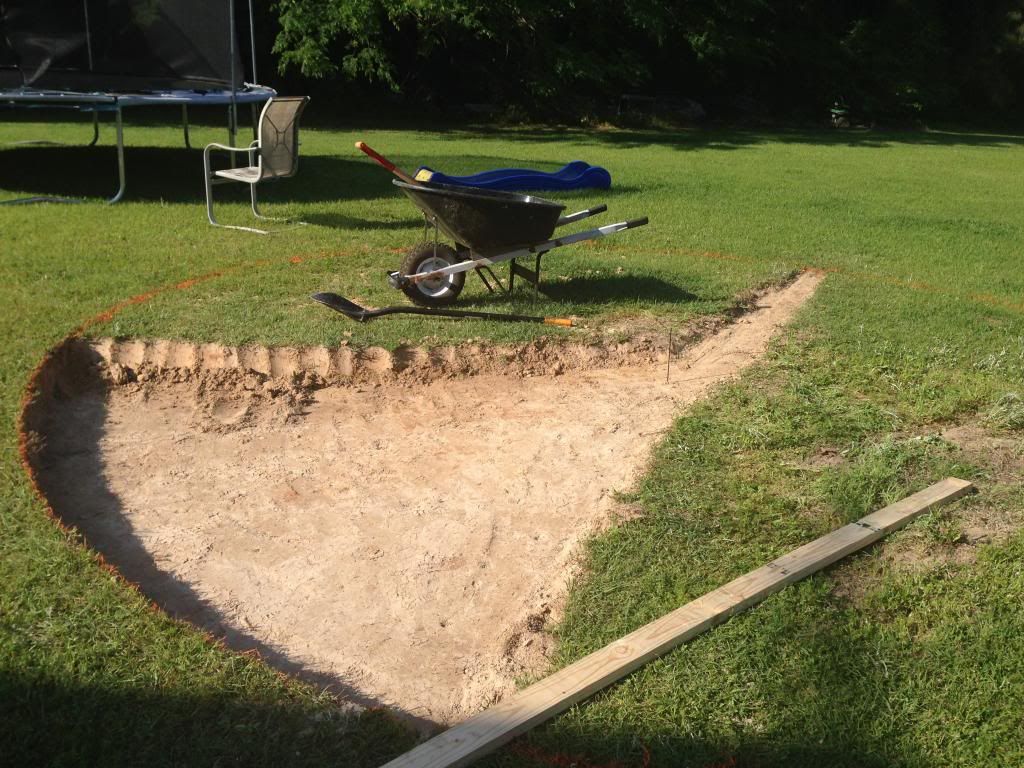
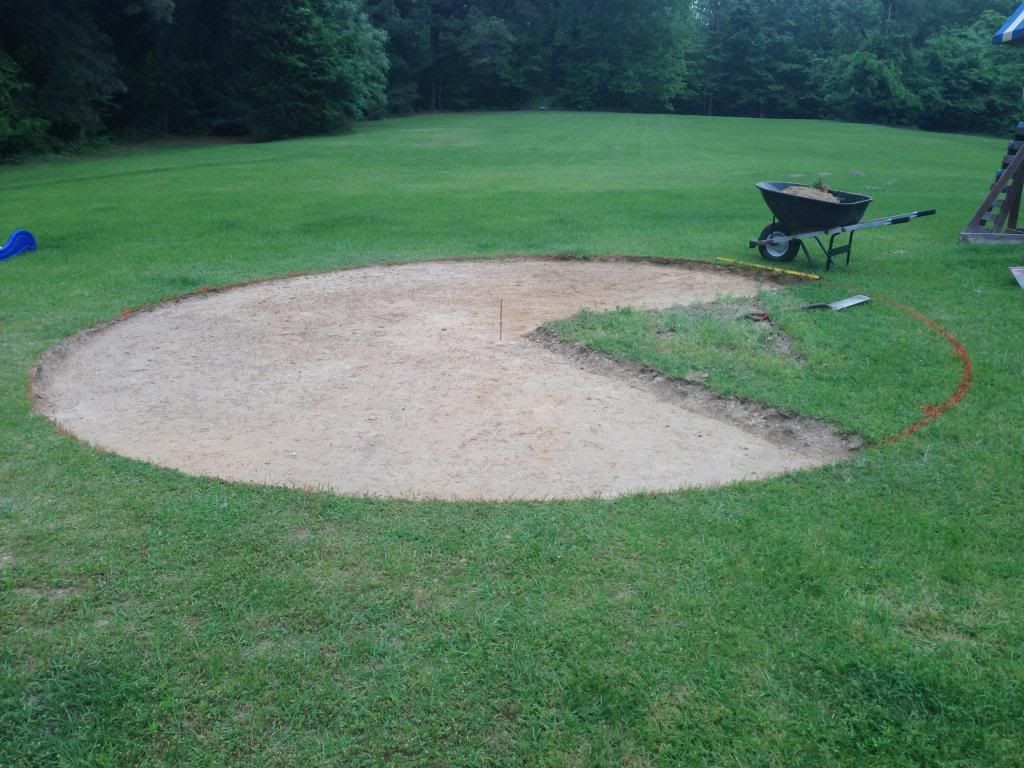
A few blisters, a sore back and a couple of days later....I have a level spot.
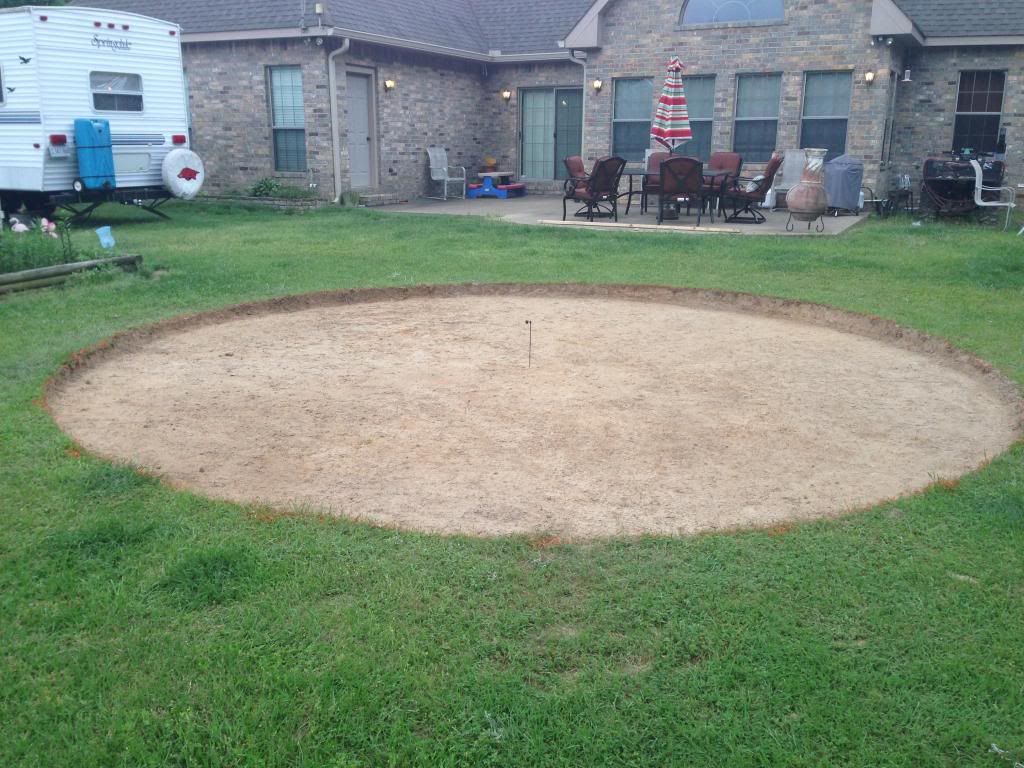
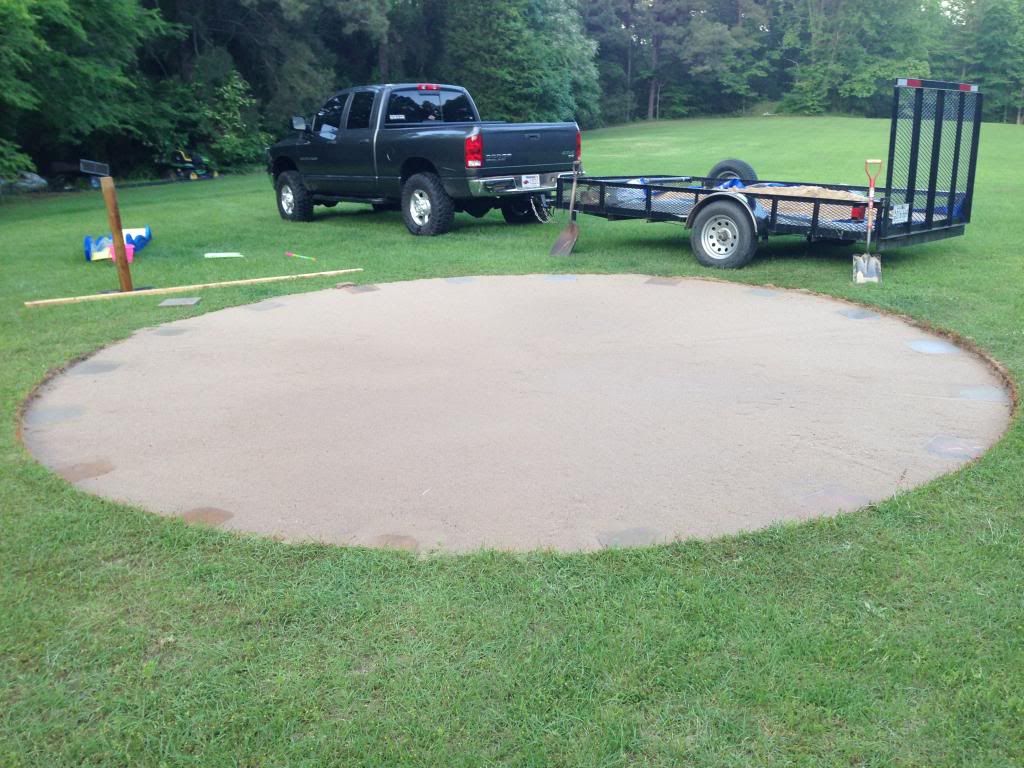
The next thing I did was set 12" x 12" pavers around the edge of the circle where the legs were going to rest. I started by once again painting a 18' circle centered in the 19' circle I leveled. I then spent some time with the calculator figuring out the spacing so I would know where to place them. As a double check I assembled the top rail of my pool with the T joints over my marks to make sure my spacing was right. Sorry I did not take pictures of this process. Once I knew the spacing was good I set the pavers in place checking level from one to the other and digging down where necessary. Once they were all in place I used my transit to double check each one. They were all less than 1/4" of one another. After that it was time for the sand. I used 2 yards of sand and spread it out making it level with all the pavers. I did this by setting a paver in the center o the circle that was level with the other pavers and used a 10' 2x4 to screed the sand. Getting the sand to pack was tough! Lots of water and hand tamping were required to make the sand firm. Here is the finished product ready for pool to be setup.
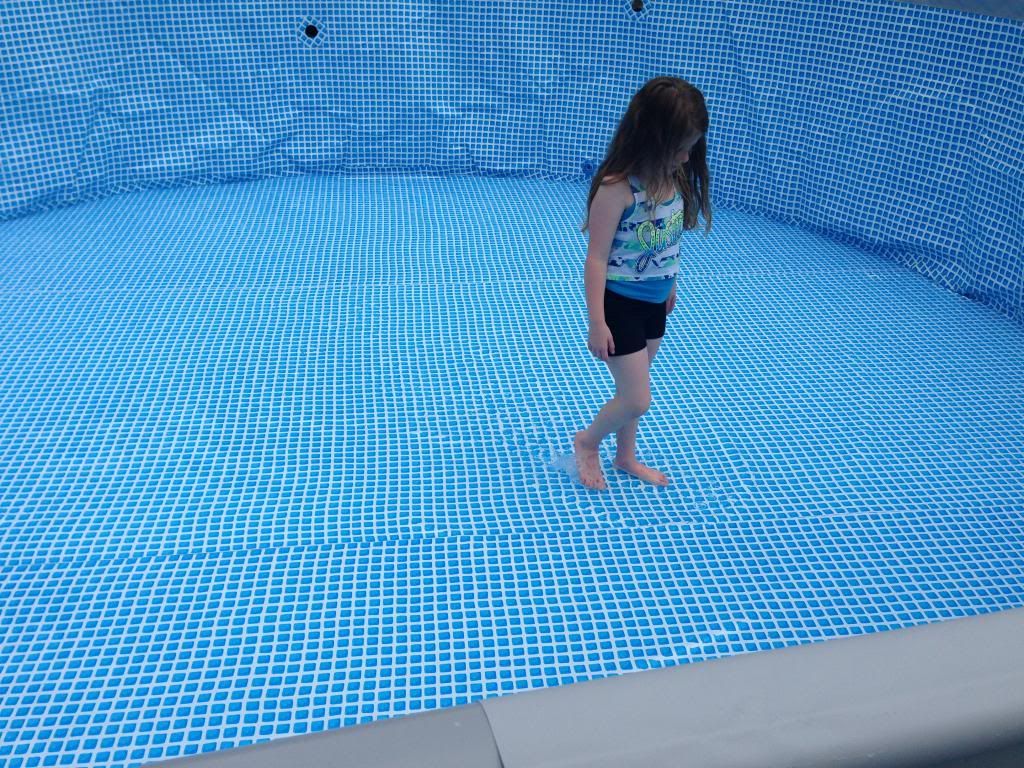
Ok...fast forward to the next day (mothers day if I recall), time to put up the pool. This went off without a hitch. I put the ground cloth down that came with the pool to add that tiny layer of protection and more so to help keep me from disturbing the sand while setting up the pool. After I got it setup I put 2" of water in and then pulled and tugged at the bottom to get rid of the wrinkles. My daughter wanted to help...so I put her in there and believe it or not....she was a big help! We ended up with only 2 tiny wrinkles in the whole pool floor, which is great considering that it looked like a leisure suit that had been stuffed in a ziplock baggie when we took it out of the box.
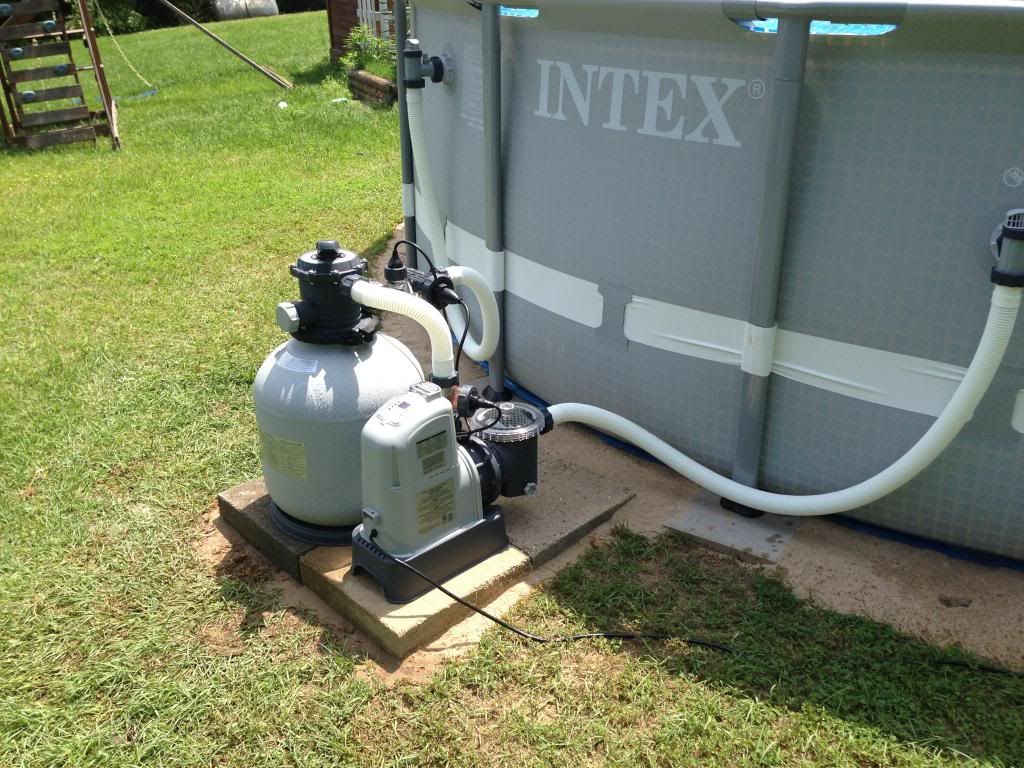
I used four 15" x 15" x 4" concrete blocks to make a level pad to install my Intex sand filter/SWG onto.
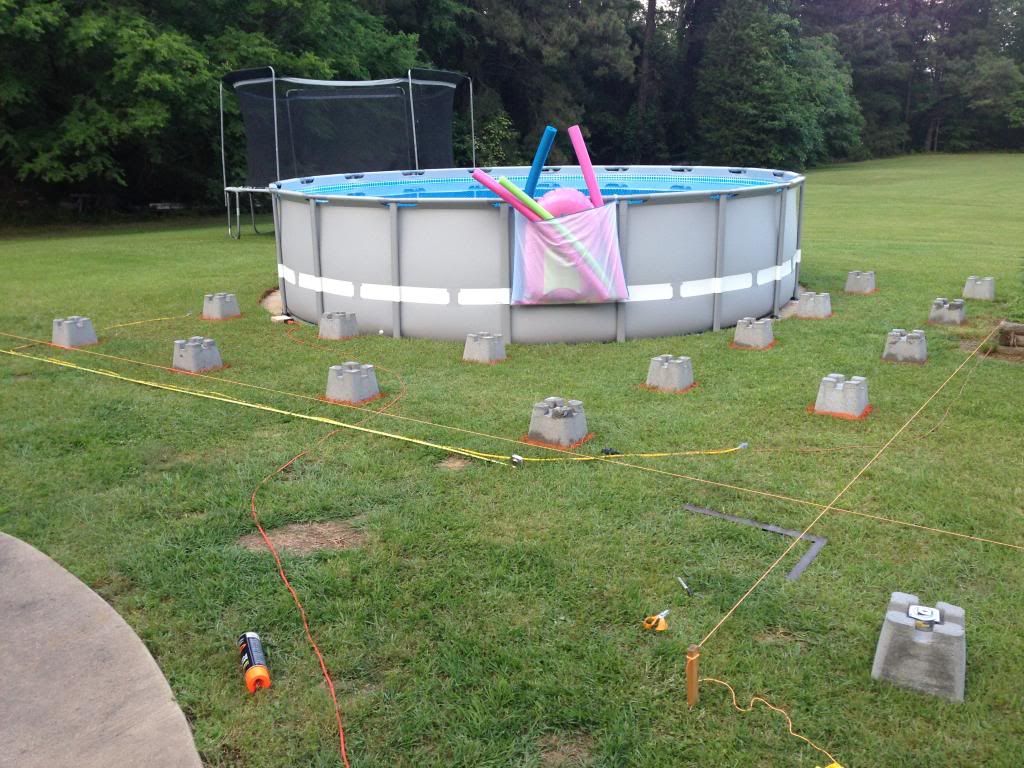
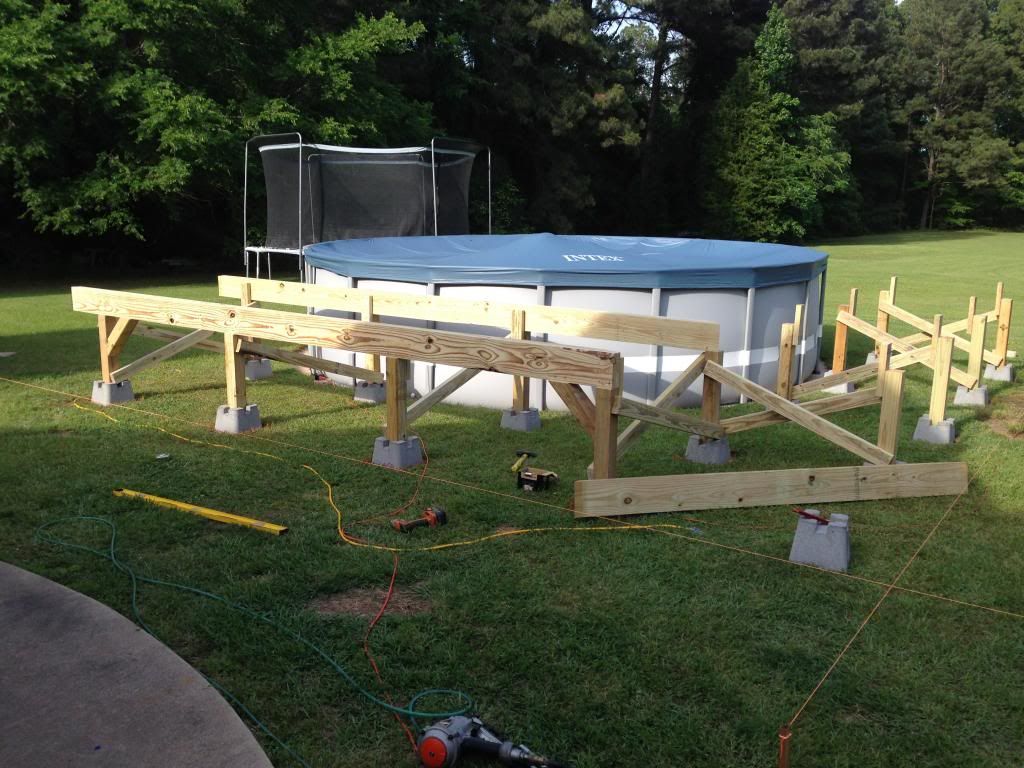
Ok...fast forward till the next weekend, time to build a deck. I had planned on making a small 6' x 8' on one side to make getting in and out easier. My wife took a couple of extension cords and laid them on the ground where she wanted the deck to be. Guess what....way bigger than what I was planning on. So here we go, it's about 340 sq. ft. of deck. I choose to use pier blocks for this build (first time) and I love them. I dug each block down about 2", just so it was setting on solid compacted soil.
Then I put up the 4x4's with their bracing and started the supports that will support the floor joists.
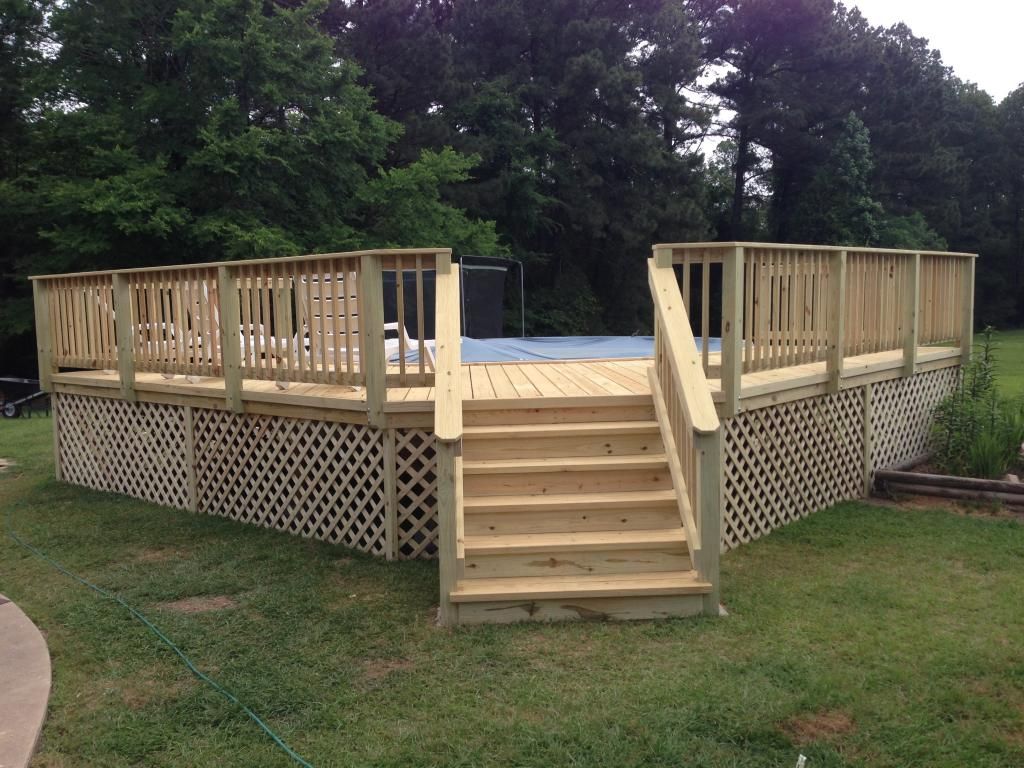
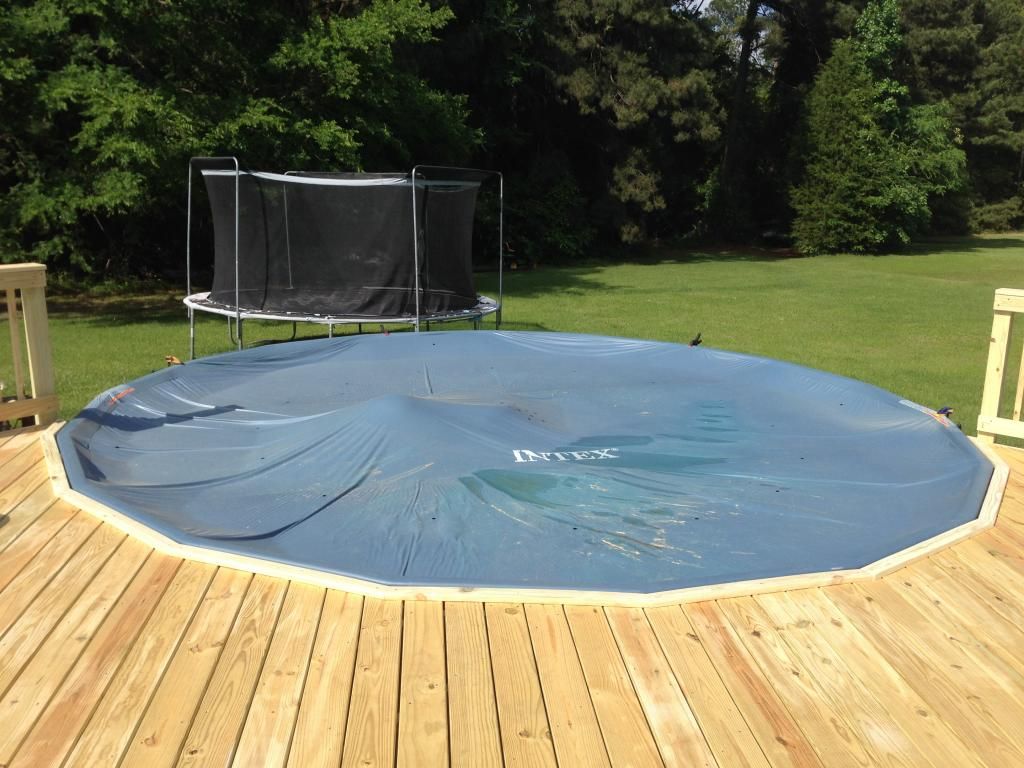
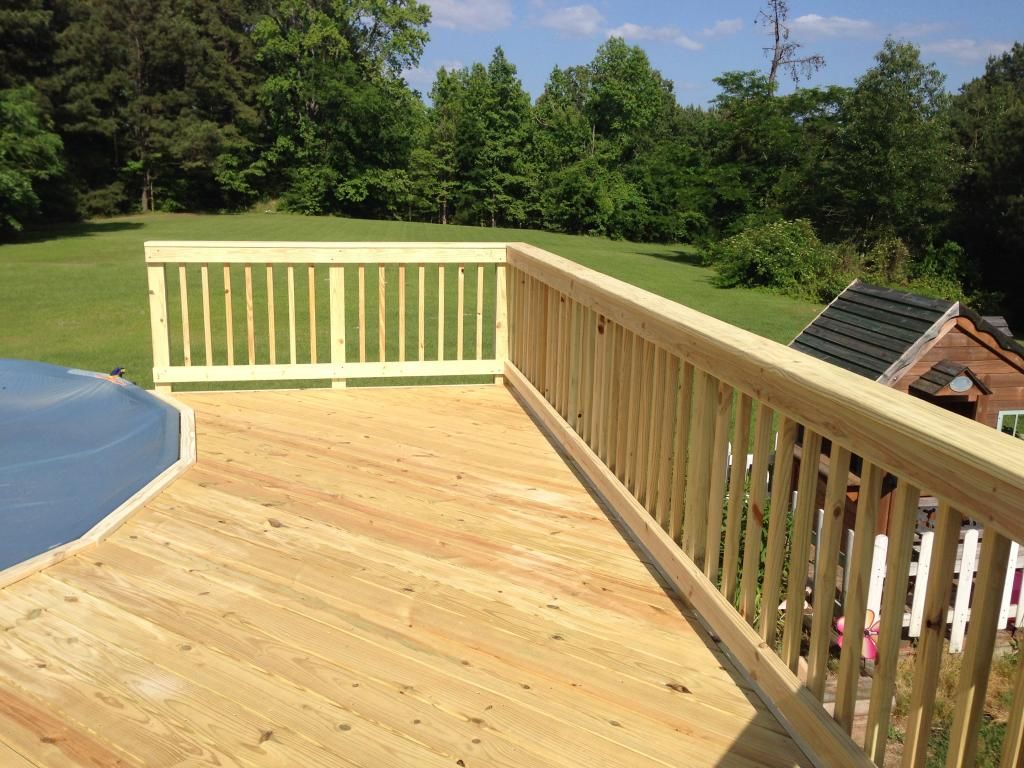
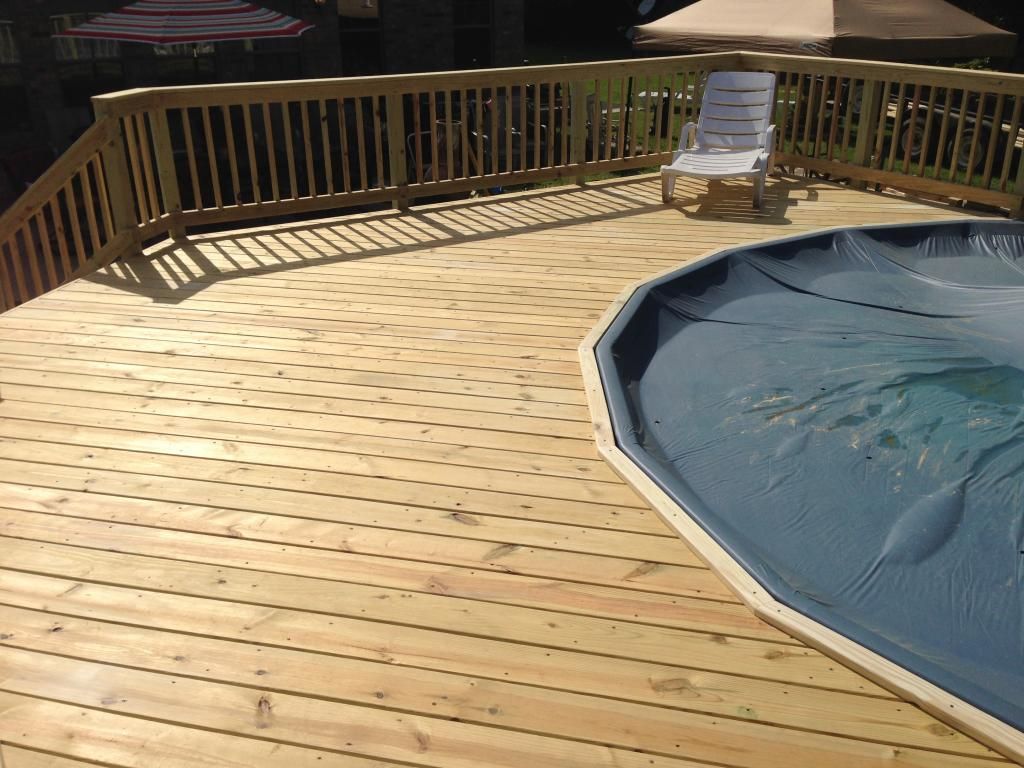
You will have to excuse the big jump in pictures....I got busy building and skipped a day or so of taking progress pics. So here is what it looks like after it's pretty much done.
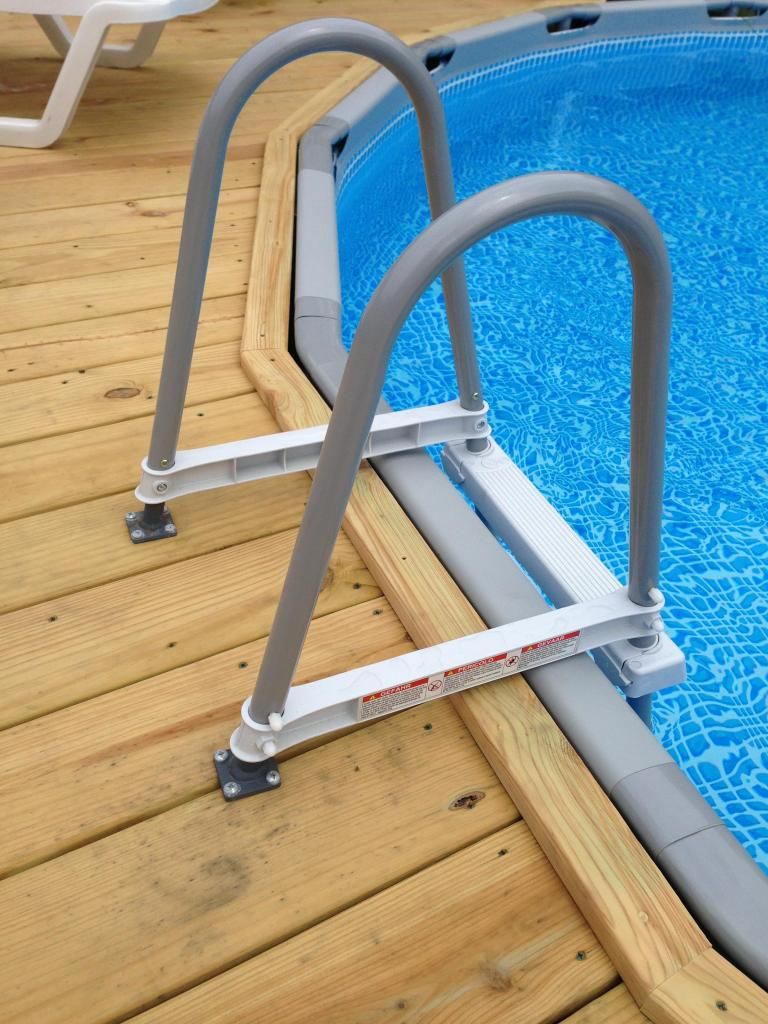
I built some metal brackets that I used to attach the ladder to the deck. This is actually pretty solid....I am pleased with the way it works.
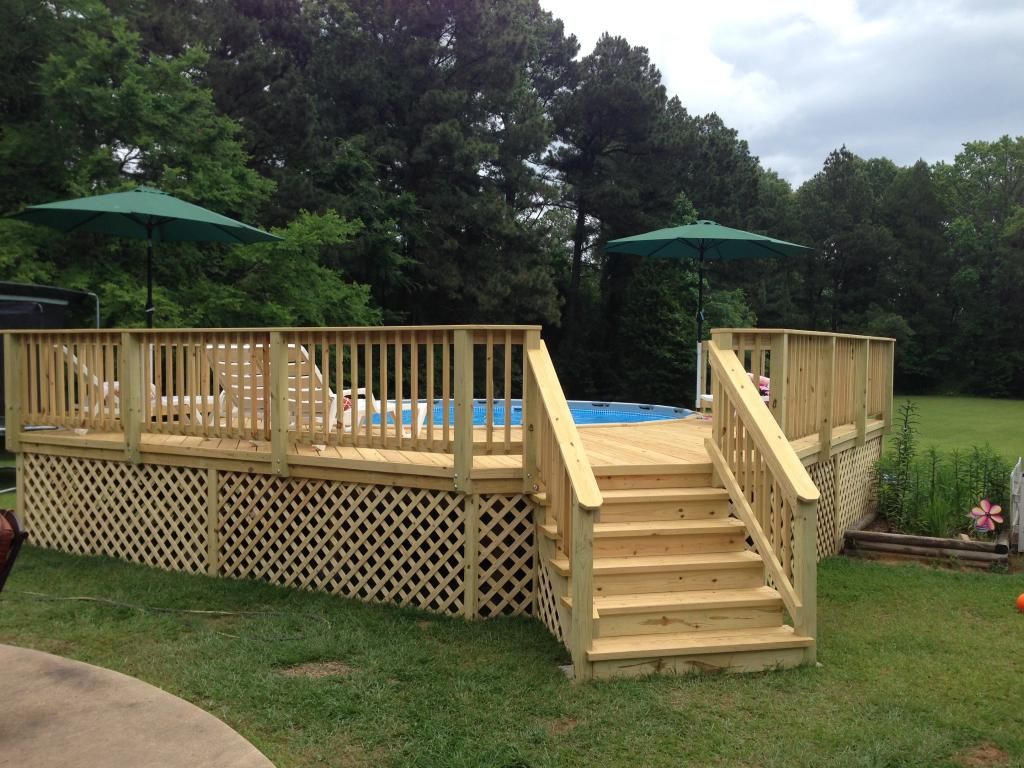
I bought a couple of 9' patio umbrellas and made some attachment points using some 1.5" schedule 40 PVC. There are 2 umbrellas and I can move them in 5 different places by just pulling a pin and dropping it into the other PVC. This will be handy with the sun in different positions.
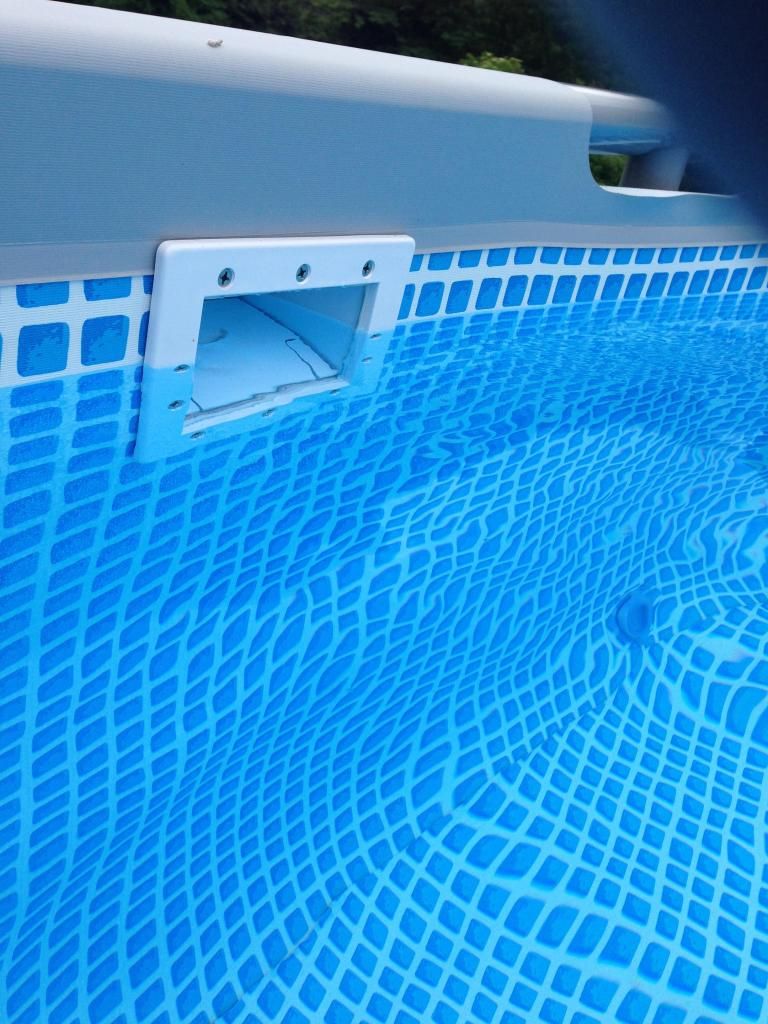
I installed the Hayward thru wall skimmer like everyone on here suggested. HUGE difference!!! I have not had to skim with the pole a single time since I put it on. Awesome upgrade! I installed it with the pool level right where you see it in this pic. I split the gasket and no leaks at all.
Well that's were I am to date. I have been working on getting the water perfectly balanced and I am 98% of the way there. (got the Taylor K-2006 kit with speedstir) I have all the stuff to hard plumb the pump and add a fountain...just have not had time. I also built a little "shade frame" over my pump/filter so it's not setting out in the broiling sun all summer long. It has a hinged roof so I can tip it up if need be. I don't have a pic of it just yet....I will wait till I get the hard plumb done. I also want to do some landscaping around the areas I can't mow right up to, I have not decided on that. I want to use river rock I believe....I am afraid that mulch might have some sharp pieces in it if it were up next to the pool...anyone use mulch up next to their pool?
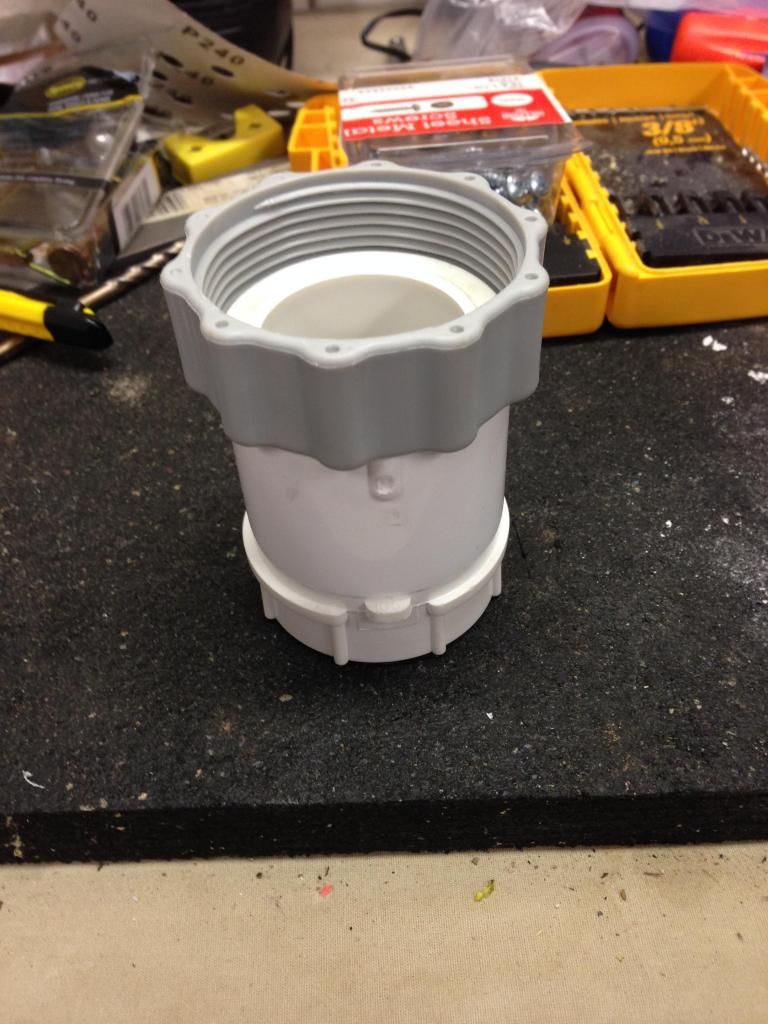
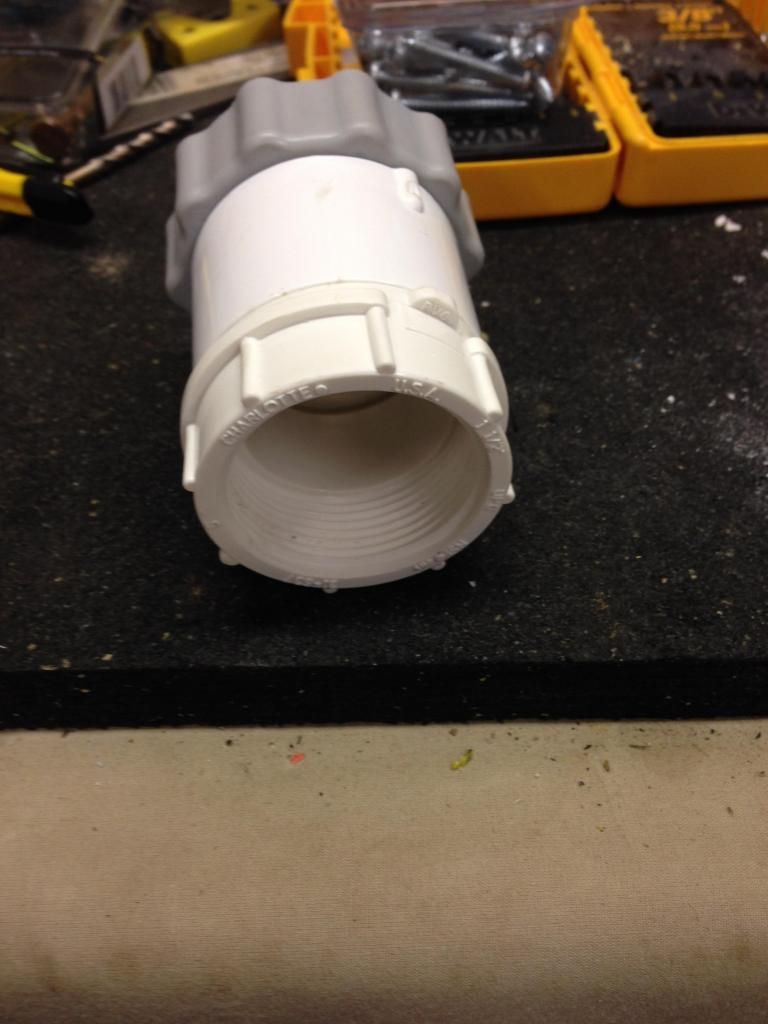
Here is my take on making Intex to 1.5" PVC. This is the nut from the Intex hose and a 1.5" male threaded adaptor that I cut the threads off of. I then glued on a female threaded part so if I change up my plumbing...I can simply unscrew and reuse this hard to build piece.
I have put up two AG pools in the past and neither were level and neither had a good pump/filter combo. I hated both of them. I was very, very close to putting an IG pool in this year but decided to hold off for a couple of years and really put more thought in to exactly what I wanted and how I wanted it all laid out. So I bought a new Intex 18' x 48" to put up for my daughter to have something to swim in. I told myself that I was not going to waste my time putting up an pool that was not level again...so this is where all the work started. (the worst part!)
I choose an area of the yard that was as close to level as I could find. I have a commercial grade transit that I bought when I built my house and this made finding the most level spot I had to work with an easy task. I used marker paint to paint a 19' circle on the ground where I wanted the pool to go. This spot was pretty level North and South...but East and West was about 6" - 7" off. Oh well, that's what shovels are made for right? I used a level, both by itself and on a 10' 2x4 to start making a East/West level trench that would establish the grade that I wanted to follow.

After creating that level trench, it was just a matter working my way around the circle. I must have checked level 1,000 times during this process. I think I moved about 4-5 yards of dirt in this process. It was many, many wheelbarrow loads. This was one of the worst things I have ever had to do. I don't like shovel work in the first place and to make matters worse it was the hottest days of the year that choose to show up while I was digging.


A few blisters, a sore back and a couple of days later....I have a level spot.

The next thing I did was set 12" x 12" pavers around the edge of the circle where the legs were going to rest. I started by once again painting a 18' circle centered in the 19' circle I leveled. I then spent some time with the calculator figuring out the spacing so I would know where to place them. As a double check I assembled the top rail of my pool with the T joints over my marks to make sure my spacing was right. Sorry I did not take pictures of this process. Once I knew the spacing was good I set the pavers in place checking level from one to the other and digging down where necessary. Once they were all in place I used my transit to double check each one. They were all less than 1/4" of one another. After that it was time for the sand. I used 2 yards of sand and spread it out making it level with all the pavers. I did this by setting a paver in the center o the circle that was level with the other pavers and used a 10' 2x4 to screed the sand. Getting the sand to pack was tough! Lots of water and hand tamping were required to make the sand firm. Here is the finished product ready for pool to be setup.

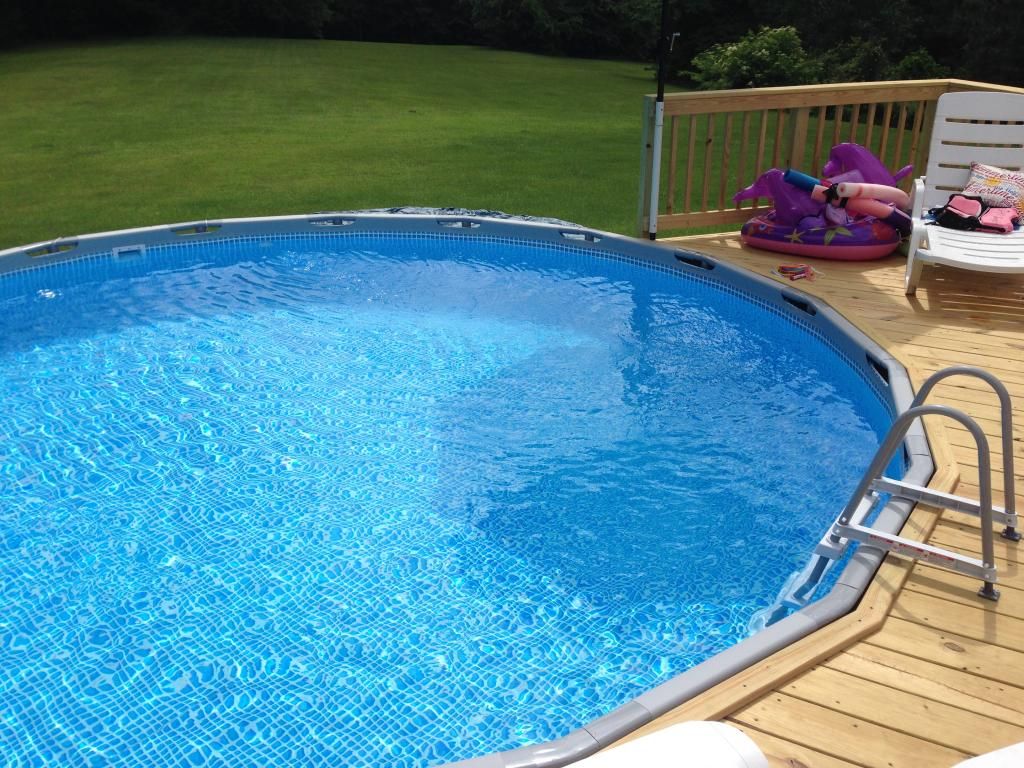
Ok...fast forward to the next day (mothers day if I recall), time to put up the pool. This went off without a hitch. I put the ground cloth down that came with the pool to add that tiny layer of protection and more so to help keep me from disturbing the sand while setting up the pool. After I got it setup I put 2" of water in and then pulled and tugged at the bottom to get rid of the wrinkles. My daughter wanted to help...so I put her in there and believe it or not....she was a big help! We ended up with only 2 tiny wrinkles in the whole pool floor, which is great considering that it looked like a leisure suit that had been stuffed in a ziplock baggie when we took it out of the box.

I used four 15" x 15" x 4" concrete blocks to make a level pad to install my Intex sand filter/SWG onto.

Ok...fast forward till the next weekend, time to build a deck. I had planned on making a small 6' x 8' on one side to make getting in and out easier. My wife took a couple of extension cords and laid them on the ground where she wanted the deck to be. Guess what....way bigger than what I was planning on. So here we go, it's about 340 sq. ft. of deck. I choose to use pier blocks for this build (first time) and I love them. I dug each block down about 2", just so it was setting on solid compacted soil.

Then I put up the 4x4's with their bracing and started the supports that will support the floor joists.

You will have to excuse the big jump in pictures....I got busy building and skipped a day or so of taking progress pics. So here is what it looks like after it's pretty much done.


I built some metal brackets that I used to attach the ladder to the deck. This is actually pretty solid....I am pleased with the way it works.


I bought a couple of 9' patio umbrellas and made some attachment points using some 1.5" schedule 40 PVC. There are 2 umbrellas and I can move them in 5 different places by just pulling a pin and dropping it into the other PVC. This will be handy with the sun in different positions.

I installed the Hayward thru wall skimmer like everyone on here suggested. HUGE difference!!! I have not had to skim with the pole a single time since I put it on. Awesome upgrade! I installed it with the pool level right where you see it in this pic. I split the gasket and no leaks at all.

Well that's were I am to date. I have been working on getting the water perfectly balanced and I am 98% of the way there. (got the Taylor K-2006 kit with speedstir) I have all the stuff to hard plumb the pump and add a fountain...just have not had time. I also built a little "shade frame" over my pump/filter so it's not setting out in the broiling sun all summer long. It has a hinged roof so I can tip it up if need be. I don't have a pic of it just yet....I will wait till I get the hard plumb done. I also want to do some landscaping around the areas I can't mow right up to, I have not decided on that. I want to use river rock I believe....I am afraid that mulch might have some sharp pieces in it if it were up next to the pool...anyone use mulch up next to their pool?
Here is my take on making Intex to 1.5" PVC. This is the nut from the Intex hose and a 1.5" male threaded adaptor that I cut the threads off of. I then glued on a female threaded part so if I change up my plumbing...I can simply unscrew and reuse this hard to build piece.


")
