Alrighty Cooks, here you go. Hope this isn't too long...
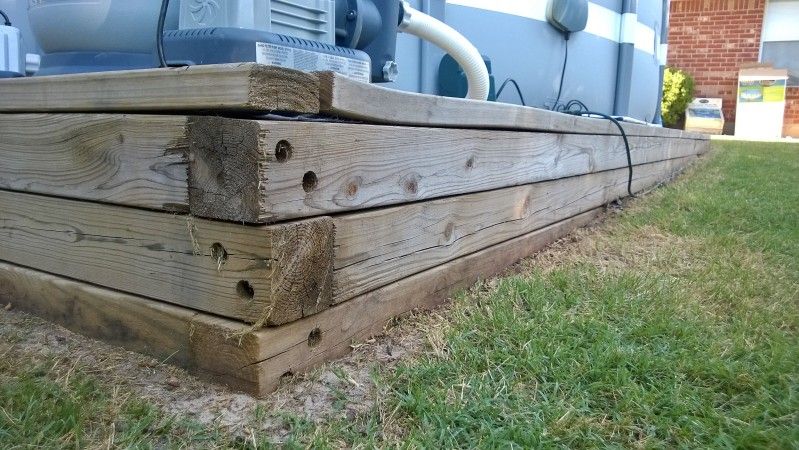
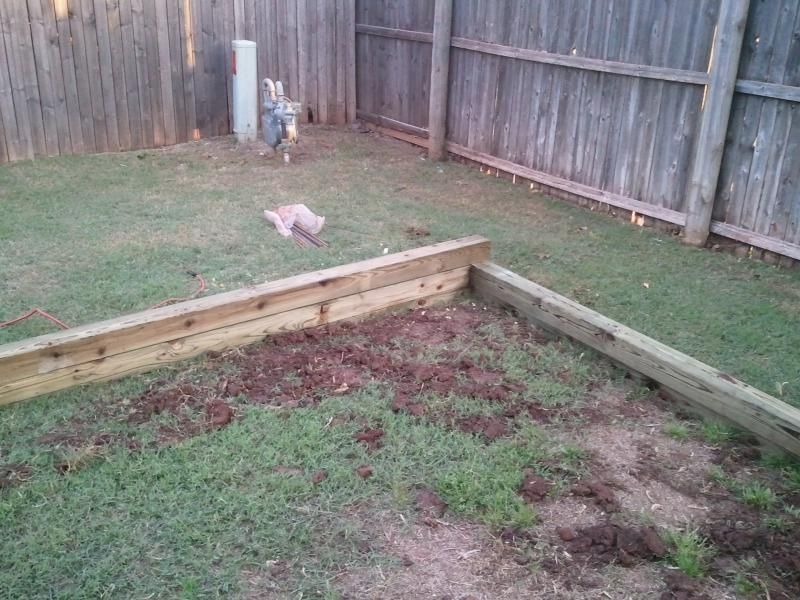
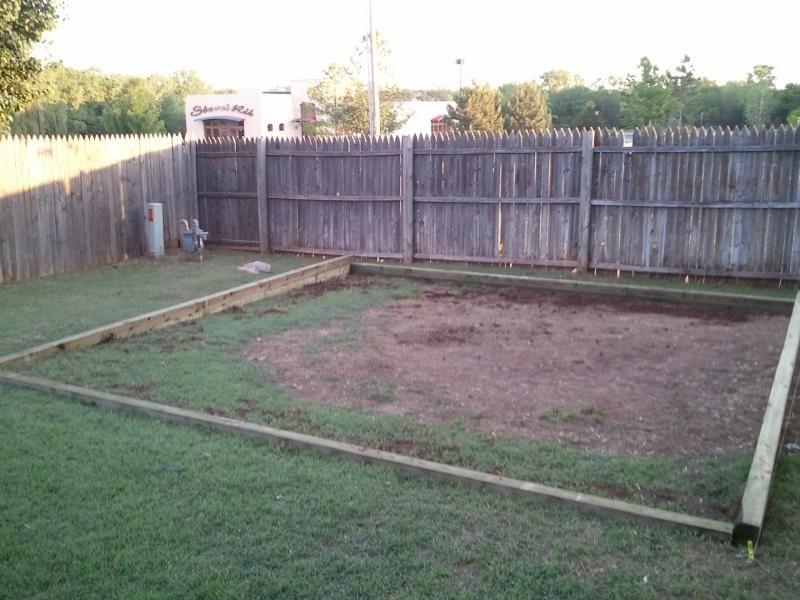
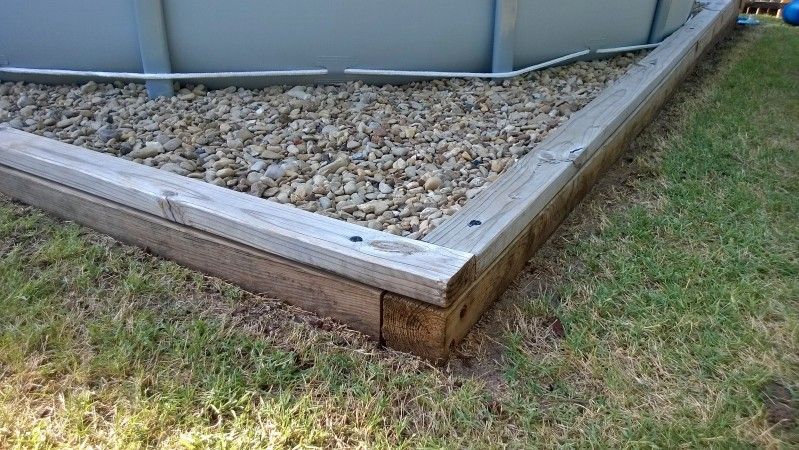
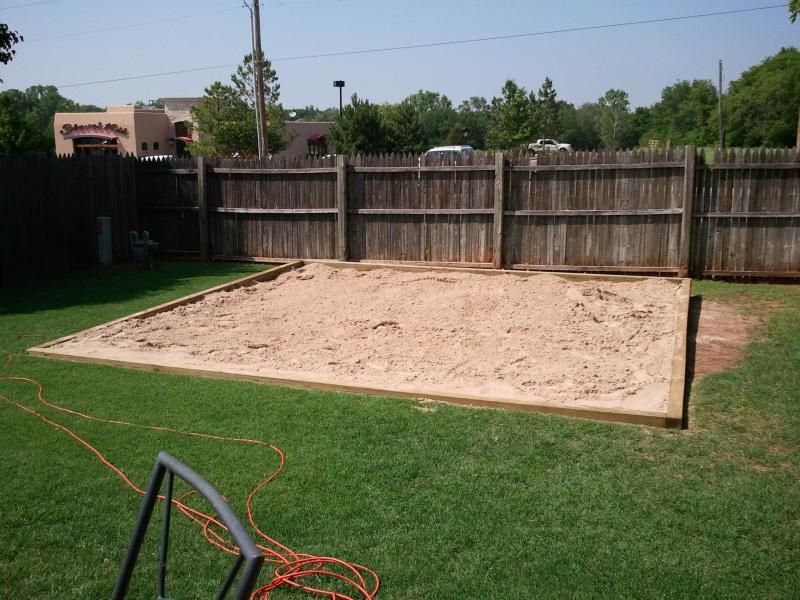
The box is constructed of 16 foot long 4x4’s, a few of which I cut to shorter lengths which I will explain below. My yard has a good 8” or more drop from the front to the back of the box, so at the front it is only one board tall, whereas at the back it is stacked 3 boards tall. I dug a trench with a spade shovel to a minimum depth of about 2 inches, into which the lowest board on each side is lain. Along the sides, the trench got deeper as I dug into the slope toward the front. I didn’t see any need to dig out a trench 8” deep for the entire 16 feet, so when the trench got 6” deep, probably halfway to the front, I cut that board (let’s call it layer 1) off and stopped there. Then I continued digging again for the next board (layer 2) on top of that until it was 6” deep. Then I cut that off, at about 12 feet long. The top layer (#3) is the only one that runs the full 16 feet length of the box on the sides.
So looking at it from the side, it basically looks like this:
|------------------------------------------------------------|
|--------------------------Layer 3--------------------------|
|------------------------------------------------------------|
|---------------Layer 2------------------|
|-----------------------------------------|
|-------- Layer 1---------|
|--------------------------|
If your yard doesn’t drop as much as mine, you might be able to get away with fewer levels, maybe even just one. A steeper drop might require more.
Each board is screwed into the one below it with 6” screws, evenly spaced a couple of feet apart. I overlapped the corners for stability and screwed them together, countersunk just for appearance.
The box was just roughly leveled at this point. It doesn’t have to be perfect, because the sand inside will be where you really need to get it level. If the sand is slightly lower on one side, you can just fill in with some extra rocks or mulch on top and no one will ever know.
Once the box was constructed, I drilled three ½” holes along each side vertically down through the entire thing all the way into the ground. Then I pounded about a 2 ½’ long piece of rebar down through each hole and into the ground to keep it from bowing out once it was filled.
Now comes the fun part.
YOU CANNOT SPEND TOO MUCH TIME ON THIS STEP, so learn from me and do it right and do it only once! It took 4 tons of sand to fill my box. I dumped it in and leveled it out as best as I could with a rake. Then I sprayed it heavily with water to get it to settle. I struggled with a way to determine if it was really level. I tried laying down boards and putting a level on top, checking at different angles. But it was difficult to determine if it was really flat until I hit upon the idea of using water. I just kept spraying water into the box until it started pooling on top of the sand. At that point, it was easy to see where the low spots were, so I just raked it from the peaks into the valleys and then sprayed it down again. Repeat this until the water pools evenly across the entire surface. This has the added benefit of really compacting the sand so that it should not settle any more once you begin filling the pool. I considered renting a roller from Home Depot to further compact it, but ended up not doing so. But that’s just an idea some might want to consider.
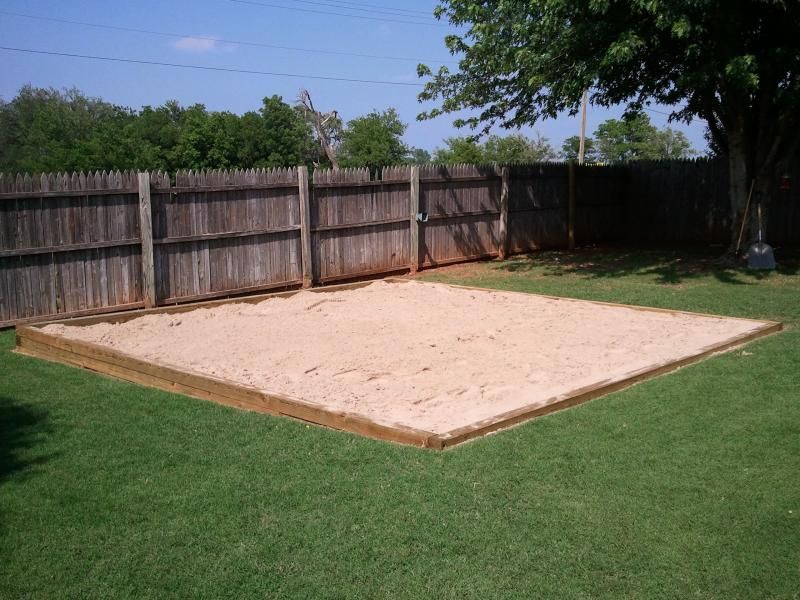
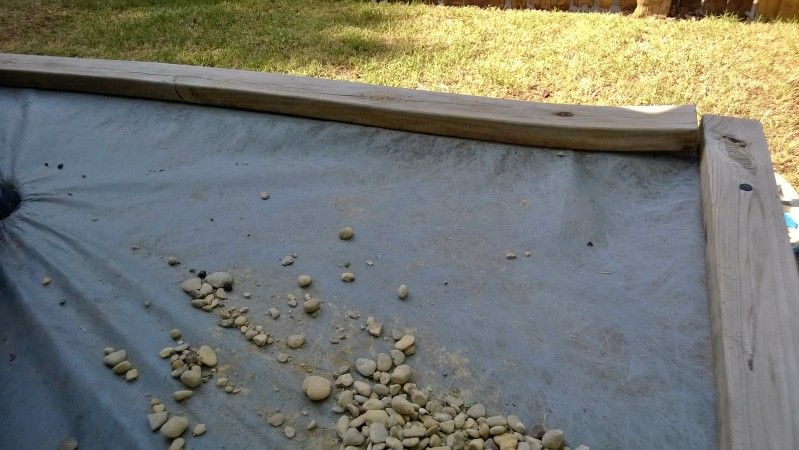
Once the sand was leveled, I put down a layer of landscaping fabric (
http://www.homedepot.com/p/Landmast...-Control-Fabric-2519RP/203065747?N=5yc1vZbx4q) over the entire area and attached it to the top of the box with roofing nails. This is to keep animals and kids from digging in the sand and tracking it into the pool, and also to keep grass from growing up through the sand. Leave a little bit of slack in this layer so that it doesn’t rip once you begin to fill the pool, but not so much that you have wrinkles. Important - use a water permeable material. I used a waterproof tarp the first time, and rainwater pooled up in it and became stagnant. To clean up the appearance, I screwed a top layer of 16 foot 2x4’s to cover the fabric and nails.
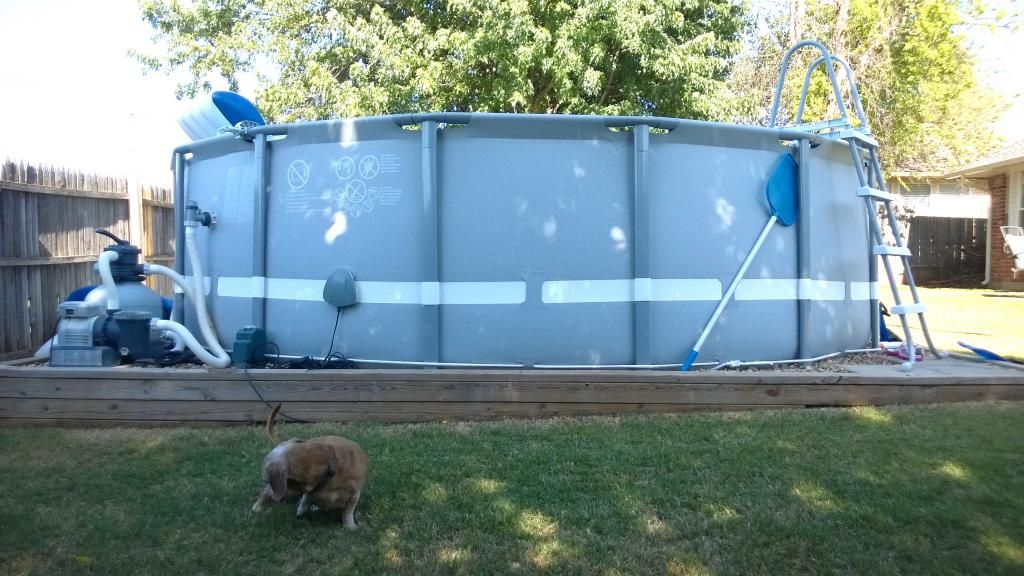
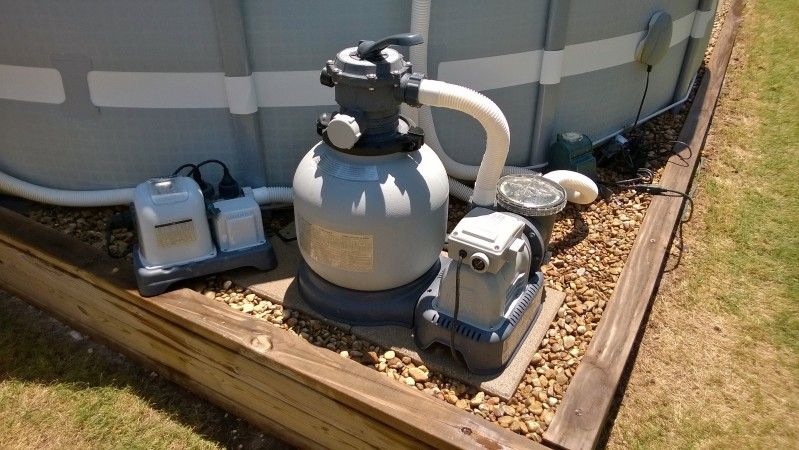
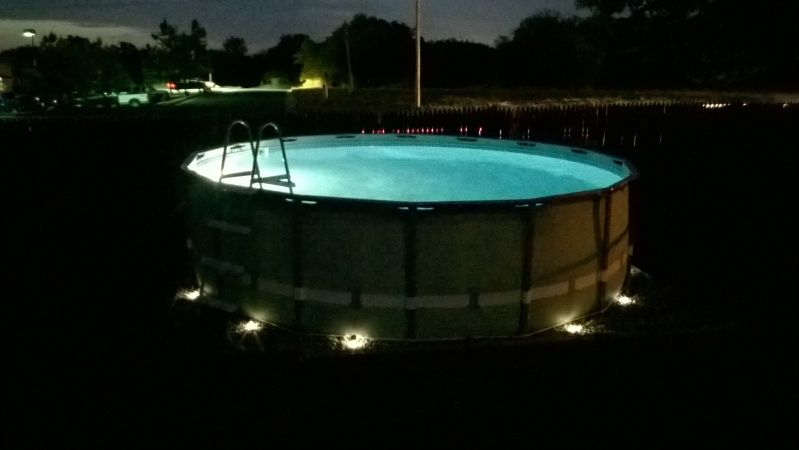
That’s pretty much all there was to it. After the pool was filled, I covered the landscaping liner with a dozen or so 50 lb bags of river pebbles available from Home Depot for $2.50/bag. Then I put in some paving stones to set the pump, filter, SWG, and ladder on. I’m also going to put in some solar power lights on stakes and just push them into the sand.
In retrospect, I wish I had built a hexagon instead of a square. I think it would look a little fancier, but it would’ve taken more work cutting the angles off at each of the corners and getting them screwed together securely. I was in a hurry to get the pool up at the time, so I went the easy route. But I think I could have built a larger box for about the same price in lumber, because IIRC, a 16 foot 4x4 was roughly twice the price of a 12 foot 4x4. And I haven’t done the math, but I’m pretty sure a hexagon 12 feet on a side would accommodate a larger diameter box than a 16 foot square.