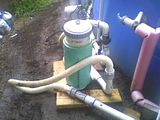
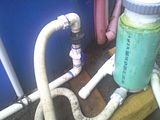
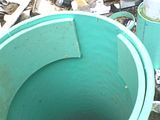
almost triple intex filter

What I have been doing a little at a time is getting older pump & filter units from people who upgrade to better Intex filters, and broken units. I take the filter canisters from these units, and I've been making a hard plumbed triple filter set. Each filter canister is being modified to hold 2 filter elements, joined with a short piece of PVC pipe. So far I have one double filter set, and am almost done with a second set. As I get them done, I've been hard plumbing them into my pool circulation system.

It makes a world of difference, believe me!

By adding more filter area, the flow rate per sq ft of media drops, so I get less "blow through" of the finer particles.

The 2500 gph pump delivers just over 40 gpm in ideal conditions. Putting that rate through a 15 sq ft filter means that I'm pushing almost 3 gpm through each sq ft of filter. By doubling the area, I've dropped the rate to 1.4 gpm. When I get the second unit plumbed in parallel to this one, I'll have dropped that to 0.7 gpm/sq ft.

Added benefit to this is better circulation through the pool.
 
Gluing together PVC without the substantial overlap you get on a pipe fitting isn't the best idea. A filter is a pressure vessel, subject to quite a bit of stress. If the joint isn't perfect it can explode during use.

I took the warning seriously, and have about 5" of overlap at each joint. The piece of PVC pipe I'm using for this is cut twice the length I needed, and surfaces are roughed up before epoxy is applied.
 
As requested:


The original canister is 7-1/4" outside diameter, and the closest I can find in PVC is 8".

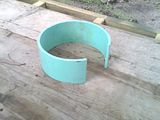
I've cut rings from the 8", and sliced a section out of each ring to fit as a filler between the PVC and the canister. Using quick set liquid epoxy I glued it all together.

I suspect that the original is made from medium density polyethylene (MDPE), so PVC and ABS glues don't work on it. Surface MUST be clean, and roughened up with 36 grit sandpaper or the epoxy bond is weak.

I have pressurized this one to 50 psi to ensure integrity.
 
Thanks for the pics! That filler ring with the section sliced out scares me (as far as trying this with our filter canister of the same type) -- seems difficult to get that slice precise enough to ensure no leaks there. I hoped there was some PVC stock out there which happened to have just the right dimensions :)

Inside, do you just have a piece of PVC pipe joining the two cartridges? Or how did you handle that junction?

What about the height of the assembly -- do you get the impression, looking at the cartridges after they've been in use for a while, that the filter area gets used evenly, top to bottom?

Lots of food for thought in your projects, as usual -- thanks!
 
The spacer rings are 4" tall, and I cut a small section out of each ring then test fitted. I cut mine down a little at a time. The largest gap I was happy with is 1/8". Liquid epoxy fills this quite well.

To set the height, I joined two filter carts with a 3" long piece of SDR26 1-1/2" PVC pipe joining the two. A side note about this: Sch 40, SCH 80, and SDR26 all have the same outside dimension, just different wall thickness, SDR26 being the thinnest. I have noted that the age of the C-5315 carts makes a bit if difference after they've been used for a while. the opening in the ends can get a bit loose. If this happens, just wrap a couple of layers of duct tape (you know that fixes everything!) around the joining pipe. With both of the carts together, I set the upper portion of the original canister with lid on and lock ring held to only 1 or 2 threads onto the carts, in place in the already epoxied lower section. I do this because I want just a small amount of "crush" to the set. This may not even be needed, as the lid has a partial tube cast into it.

When I have to remove for cleaning, the layer of dirt and dog hair is evenly distributed around the filters, with a little extra dog hair at the top, middle joint, and bottom.
 
Yes, a little distracted, and waiting for parts to complete the repairs. Then it will be time for a replumb to get this set into the system, including adding another return. Why let the extra flow go to waste?

Here's a few more pics showing what I mean. This ring is actually intended as the second ring, that's why the large gap. It still could be used as the first ring, by gluing a filler piece into the gap. I use a 4-1/2" angle grinder with a cut-off wheel to make my cuts.


This is how it fits. Again, a filler piece can be used to fill the gap if needed.


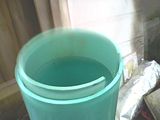
In it's final fit placement. Note that it sits just below the top of the pipe, to allow for an extra fillet of epoxy as insurance against leakage. The final ring would be placed another 1/4" lower than this.


Epoxy would be poured on the inside as well, to finish the joint.

- - - Updated - - -

One more note. If you talk to local plumbers and construction people, you may be able to source cut-offs of the proper size pipe for a lot less than buying a full 21' length.
 
Thread Status
Hello , This thread has been inactive for over 60 days. New postings here are unlikely to be seen or responded to by other members. For better visibility, consider Starting A New Thread.