Jandy Laars LT400N Pool heater ignitor replacement

danpik said:
petes914 said:
How do I jump out the Pressure switch? if I remember correctly, there are two spade terminals on the pressure switch, one NC and the other O.
Pull both wires and insert a jumper wire to connect them together. May or may not work as some boards now have logic to ensure you can't do this.


petes914 said:
Also, is the screw holding in the flame sensor the ground for it? I didn't make any effort to wire wheel any corrosion when I installed the new flame sensor.
No, that is why the ceramic insulator is there. The current flow (electricity) comes from the board, up the wire to the probe and grounds thru the flame to the burners.

I plagerized this from another site to hopefully help you understand how this works.

The method used to prove flame in most gas-fired products produced in the last seven or eight years is often misunderstood. This method is usually known as “flame rectification.”
Many servicers believe the flame sensor takes an active role in proving flame, and because of this, believe the sensors sometimes fail. Let’s look at what happens.

In order to verify flame, the ignition control must establish current flow using the flame as a conductor.


The mechanics of flame sensing
When everything is working right, the moment flame touches the sensor, the module establishes and monitors this current flow.
The voltage at the sensor is ac (alternating current), but because of the great difference in mass between the flame sensor and the furnace chassis, this voltage is “rectified” from ac to dc (direct current), usually less than 10 microamps.

As long as this current flow exists, the ignition control will power the gas valve.

The flame sensor is not sensing anything. The flame sensor’s only “claim to fame” is that it is resistant to the effects of being immersed in flame.

A flame sensor can become coated with a silica-type material. (Silica is a component of glass and glass is a great insulator.) When this happens, all that is required is a cleaning of the sensor with a light abrasive.

That’s the mechanical side. Now let’s look at what can go wrong electrically.


Electrical snafus
We know that 115 vac has one hot leg and one neutral. The black (or common) leg has the potential to ground. The neutral does not.
Apply this to what we just learned about flame sensing and think about what will happen if a furnace is installed with the neutral and common reversed.

The module must establish current flow through the flame to ground, right? So if the black and white are switched in the junction box or the receptacle, there is no flame sense because there is no voltage potential.

Everything else in the unit works fine, but a few seconds after the burners light . . . the module closes the gas valve because the power for the flame-proving circuit is not there.

What if the common and neutral are connected properly, but the flame still drops out for “no reason?”

Check the ground to the unit. Here’s how:

You have already measured between common (black) and ground and read 120 vac. Now measure between neutral (white) and ground to be sure you have no voltage (0.0 vac).

Remember, your flame-sense current is very small, usually less than 10 microamps dc. Think about what would happen to the flame-sense current if there were another voltage potential at the furnace chassis because of a poor ground.


The ignition control needs a clean, properly polarized voltage source to do its job.

Thanks Dan. I'm going to check this all out tonight.
 
danpik said:
petes914 said:
How do I jump out the Pressure switch? if I remember correctly, there are two spade terminals on the pressure switch, one NC and the other O.
Pull both wires and insert a jumper wire to connect them together. May or may not work as some boards now have logic to ensure you can't do this.


petes914 said:
Also, is the screw holding in the flame sensor the ground for it? I didn't make any effort to wire wheel any corrosion when I installed the new flame sensor.
No, that is why the ceramic insulator is there. The current flow (electricity) comes from the board, up the wire to the probe and grounds thru the flame to the burners.

I plagerized this from another site to hopefully help you understand how this works.

The method used to prove flame in most gas-fired products produced in the last seven or eight years is often misunderstood. This method is usually known as “flame rectification.”
Many servicers believe the flame sensor takes an active role in proving flame, and because of this, believe the sensors sometimes fail. Let’s look at what happens.

In order to verify flame, the ignition control must establish current flow using the flame as a conductor.


The mechanics of flame sensing
When everything is working right, the moment flame touches the sensor, the module establishes and monitors this current flow.
The voltage at the sensor is ac (alternating current), but because of the great difference in mass between the flame sensor and the furnace chassis, this voltage is “rectified” from ac to dc (direct current), usually less than 10 microamps.

As long as this current flow exists, the ignition control will power the gas valve.

The flame sensor is not sensing anything. The flame sensor’s only “claim to fame” is that it is resistant to the effects of being immersed in flame.

A flame sensor can become coated with a silica-type material. (Silica is a component of glass and glass is a great insulator.) When this happens, all that is required is a cleaning of the sensor with a light abrasive.

That’s the mechanical side. Now let’s look at what can go wrong electrically.


Electrical snafus
We know that 115 vac has one hot leg and one neutral. The black (or common) leg has the potential to ground. The neutral does not.
Apply this to what we just learned about flame sensing and think about what will happen if a furnace is installed with the neutral and common reversed.

The module must establish current flow through the flame to ground, right? So if the black and white are switched in the junction box or the receptacle, there is no flame sense because there is no voltage potential.

Everything else in the unit works fine, but a few seconds after the burners light . . . the module closes the gas valve because the power for the flame-proving circuit is not there.

What if the common and neutral are connected properly, but the flame still drops out for “no reason?”

Check the ground to the unit. Here’s how:

You have already measured between common (black) and ground and read 120 vac. Now measure between neutral (white) and ground to be sure you have no voltage (0.0 vac).

Remember, your flame-sense current is very small, usually less than 10 microamps dc. Think about what would happen to the flame-sense current if there were another voltage potential at the furnace chassis because of a poor ground.


The ignition control needs a clean, properly polarized voltage source to do its job.

Welp, I got the heater working. I tried jumping the pressure switch and immediately got a "pressure Switch" error light. So that didn't work. I pulled the flame sensor, checked continuity which was fine and held an open flame to the rod as the heater was trying to start, that didn't work either. After 3 tries to ignite it went into AGS mode. So I decided to thoroughly sand/clean the contact area around the flame sensor bracket as well as where it mounts to the heater before reinstalling it and VOILA! The heater fired up on the first try and is now working properly. So it appears that the mounting bracket/screw is a ground for the flame sensor.
 
petes914 said:
Welp, I got the heater working.
Good to hear. some good info is available in this thread for future users

petes914 said:
I tried jumping the pressure switch and immediately got a "pressure Switch" error light. So that didn't work.
Most new boards look for the pressure switch to be open before the fan starts and closed after the fan starts. This self check is so you can not jumper out the switch.
petes914 said:
I pulled the flame sensor, checked continuity which was fine and held an open flame to the rod as the heater was trying to start, that didn't work either.
This is because there was no ground circuit as you found out later.
petes914 said:
After 3 tries to ignite it went into AGS mode. So I decided to thoroughly sand/clean the contact area around the flame sensor bracket as well as where it mounts to the heater before reinstalling it and VOILA! The heater fired up on the first try and is now working properly. So it appears that the mounting bracket/screw is a ground for the flame sensor.
Interesting to note for this unit. The bracket actually completes the ground loop for the circuit. Just ran into this the other day...A flame sensor with two probes. One is insulated in the bracket and the other is the ground probe. The flame completes the circuit between the gap much like yours did to the bracket.
 
BTW. My heater isn't working again. I'm ready to throw in the towel. They told me it would only last 9-10 years max. It's nine years old. At first it wouldn't do anything. The fuseable link was bad. I jumped it. When it tried to start it spewed sooty water out of the vent. It hasn't rained lately. I'm assuming there is a leak somewhere in there. Having the same problems as above. It tries to start 3 x's and goes into AGS mode. I'm getting a LOT of blow back. Lots of flames blowing out of the burner openings when trying to start which immediately burned out the "fuseable link" which is a one time heat sensitive fuse positioned right above the burner openings. Its a one shot deal however, I found out you can just jump it. I use some 12ga wire I pulled out of some romex I had and jumped the two wires going into the fuse. I actually got it running for a night by doing this but in the morning it was dead again. 1st time trying to start it blows sooty water out of the vent, again we haven't had any rain. Condensation? Maybe, I don't know. LOTS of blow back while trying to start. Then it tries to start 2 more times and goes into AGS mode.
 
petes914 said:
BTW. My heater isn't working again. I'm ready to throw in the towel. They told me it would only last 9-10 years max. It's nine years old. At first it wouldn't do anything. The fuseable link was bad. I jumped it. When it tried to start it spewed sooty water out of the vent. It hasn't rained lately. I'm assuming there is a leak somewhere in there. Having the same problems as above. It tries to start 3 x's and goes into AGS mode. I'm getting a LOT of blow back. Lots of flames blowing out of the burner openings when trying to start which immediately burned out the "fuseable link" which is a one time heat sensitive fuse positioned right above the burner openings. Its a one shot deal however, I found out you can just jump it. I use some 12ga wire I pulled out of some romex I had and jumped the two wires going into the fuse. I actually got it running for a night by doing this but in the morning it was dead again. 1st time trying to start it blows sooty water out of the vent, again we haven't had any rain. Condensation? Maybe, I don't know. LOTS of blow back while trying to start. Then it tries to start 2 more times and goes into AGS mode.

Sounds like the heat exchanger has a leak
 
Leaking heat exchanger maybe and sooted up burners causing the flames to blow back out the front.

I'd say cut your loses and rip it out and replace it. I don't work on many of these but when I do, they are usually shot and the homeowner isn't happy. Jandy hasn't had a decent heater since the made the Laars Lite models. These new ones are a piece of garbage. However many are installed as part of the initial pool build along with other Jandy equipment so you can get a three year warranty.
 
Might be a good time to replace it. I have some staining on my 3M quartz plaster. I sampled Jacks Magic Stain remover #2 on a couple spots and the stains disappeared. however, it says you shouldn't do the whole pool and run Jacks through the heater. So I would need to separate the heater anyway.

Has anyone tried Jacks Magic #2? For my 27,000 gal. pool its going to cost me roughly $350. That's a lot of $ for only marginal results.
 
Paul, you have used Jacks before with good results? I'll need around 30lbs of it plus other additives. BIG $. I'm also guessing I should wait until next spring to do it? I'm in NJ and without a heater will probably close the pool this weekend.
 
No but others I know in the industry have used it with good results. Keep in mind though that the copper or rust is actually suspended in the water, from what I have been told.
 

Enjoying this content?

Support TFP with a donation.

Give Support
I removed the heater. I pulled out all the new parts I recently bought and put them up on Ebay. One thing I learned is you can JUMP the FUSIBLE LINK for all you do it your selfers. Mine kept burning out which can happen as soon as you plug it in making you think it must be something else. Also, the mounting location for the FLAME SENSOR needs to be CLEAN.

Oh well, I carefully cut off the heater pipes and reconnected the pool lines with some PVC connectors and Ferncos. I'll try Jacks Magic #2 in the spring to get rid of the copper staining and then look for a new heater. Any suggestions on a new heater? 27,000 gallon gunite/3M quartz plaster pool. The 400,000BTU I just removed heated it up fast! (when it was working)
 
If the fuse-able link keeps blowing and there is likely a short in the wiring somewhere. Lots of times that is a pain to track down.

When you are ready for a new heater consider the Raypak/Rheem line. They are probably the most dependable unit on the market today.
 
ps0303 said:
If the fuse-able link keeps blowing and there is likely a short in the wiring somewhere. Lots of times that is a pain to track down.

When you are ready for a new heater consider the Raypak/Rheem line. They are probably the most dependable unit on the market today.


I think that fusible link is heat sensitive. That's why it is mounted right above the burners as a safety. I was getting major blow back (flames were engulfing it) which is why I think it kept failing. Physically, it still looked new though. I'll look into the Rheem line. Thanks.
 
yeah I was thinking it was the fuse link that you were talking about. Did you ever look to see if the heat exchanger was sooted up? That can cause the flames to roll back out towards the front like that.
 
ps0303 said:
yeah I was thinking it was the fuse link that you were talking about. Did you ever look to see if the heat exchanger was sooted up? That can cause the flames to roll back out towards the front like that.

I didn't pull out the heat exchanger. I was getting so much sooty water blowing out of it when it tried to start that I have to assume it was leaking. And your right, all the blow back was probably from water leaking down on the burners. When I pulled the burners out to remove the new ignitor, they were 10x's worse looking then when i had them out only a few weeks before to replace the ignitor. Plus all the copper staining in the pool and filters, had to be leaking for a while. The heater only worked on and off this entire season. I learned a lot this season.

I was thinking about the Jacks Magic.....when I go to use it, it's going to release the copper from my pool walls which is then going to go through my cartridge filters. Is that going to ruin them? I just bought new ones in July.
 
I am having the same problem with my heater (AGS, shorted out HSI, replaced HSI, still doesn't work). I am done for today but will check the Fenwal for voltage and a short (and I will post with results). Heater is lt 400 low nox and was installed in late 2006 or so.

I suspect that the shorted out HSI caused the Fenwal to short out, too. Maybe it wasn't the spider?

I have a great deal of experience replacing my corroded and broken burner tubes and resulting sooted-up heat exchanger. I don't have the pool water leak but it does appear that rainwater makes its way to the burners under the exhaust vent.

To replace the HSI did you have to use the legacy bracket with a screw? I had :grrrr: severe :grrrr: difficulty using the supplied "self-tapping" screw.
 
I used a different stainless tapping screw. One of the wires for the ignitor was broken on mine, pretty obvious. Maybe the spider was sitting on the contact when it shorted....Wrong place at the wrong time LOL.

I have all the new parts I recently bought for the heater on Ebay. They were only installed for a few weeks and the heater used only a couple times before it was obvious the exchanger was leaking if your interested in saving some $.
 
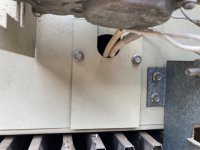
I have a LAAR Model LLD400N, I need to replace the ignitor but it is inside the front wall and has a screw that is all rusty out. How can I access the ignitor? It seems like I will have to take out the front panel to access it. Notice in the picture, the two wires are connected to the ignitor; if I remove the lid, the ignitor is screwed to the chassis but the screw is rusty out. Any suggestions, on how to remove it? Thanks.
 

Attachments

  • IMG_8281.jpg
    IMG_8281.jpg
    70.2 KB · Views: 2
I have a LAAR Model LLD400N, I need to replace the ignitor but it is inside the front wall and has a screw that is all rusty out. How can I access the ignitor? It seems like I will have to take out the front panel to access it. Notice in the picture, the two wires are connected to the ignitor; if I remove the lid, the ignitor is screwed to the chassis but the screw is rusty out. Any suggestions, on how to remove it? Thanks.
You will have to remove the entire burner tray to get access to that damaged screw.
 
Thread Status
Hello , This thread has been inactive for over 60 days. New postings here are unlikely to be seen or responded to by other members. For better visibility, consider Starting A New Thread.