New "big as it can be" pool.

MarkTTU

0
LifeTime Supporter
Jun 15, 2011
55
Lubbock, Texas
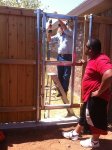
OK, we started this project back in March and I've learned a TON from reading this site since before then and I finally got some of the pictures together so I could post them for y'all.

A little background, we had a 12x24 Intex oval with the inflatable ring for about 5 years that finally sprung a leak last fall that we couldn't keep fixed (by the way, they're not really 12x24 when setup). I figured after 5 years of service I didn't have any room to complain so we limped through the end of swim season and then cut up the pool and threw it away. I figured this spring we'd buy a new one for a few hundred bucks and be back in business :roll:

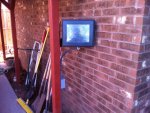
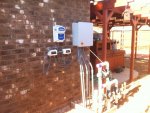
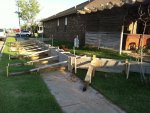
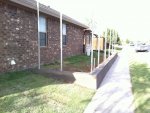
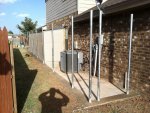
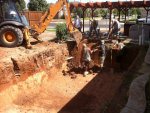
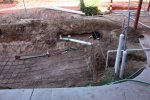
Long ago we'd put solar panels on top of the pergola and upgraded the pump and filter so this spring before we bought a new pool I had the bright idea of digging a few trenches and moving the pool equipment around the side of the house so we wouldn't have to listen to it anymore.... anyone ever read "If You Give a Mouse a Cookie"? :hammer:

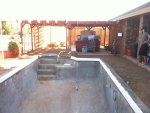
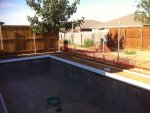
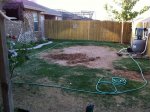
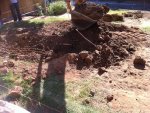
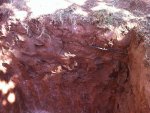
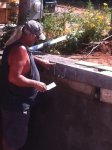
Anyway, we started with the hose on the ground and worked from there. To save money we are doing all the plumbing and electrical ourselves, but all the concrete work, digging, tile work, etc is left to our pool builder.
 

Attachments

  • 01.JPG
    01.JPG
    182.7 KB · Views: 844
  • 01a.jpg
    01a.jpg
    108.9 KB · Views: 845
So like I said before, if you give a mouse a cookie he'll want a glass of milk. Well while we're still in the planning stages, but well past committed, we realize we've never liked the sloped side yard and we're about to have a whole bunch of dirt. Hmm... well we could build a retaining wall and level the side yard then :-D of course that means tearing down the 5'6" fence and if you're going to do that why not put up a nice 7' fence in its place :party:
 

Attachments

  • 02.JPG
    02.JPG
    193.2 KB · Views: 828
  • 03.JPG
    03.JPG
    206.6 KB · Views: 828
  • 04.JPG
    04.JPG
    201.5 KB · Views: 828
Dig pictures!

The one of the fiber cut (black wire) is only significant because I host websites using that fiber and it getting cut was not part of the plan :shock: thankfully my ISP was quick to get it spliced back together closer to the fence where it was supposed to be to begin with :mrgreen:
 

Attachments

  • 07.JPG
    07.JPG
    203.9 KB · Views: 795
  • 08.JPG
    08.JPG
    208.8 KB · Views: 795
  • 09.JPG
    09.JPG
    231.4 KB · Views: 795
We knew we were likely to cut the water line to the house, but what we didn't know was the house was plumbed with PEX and the connectors they use on PEX don't hold up real well to being tugged on by a backhoe. So when we'd fixed the PVC water line all we'd done was move the water leak from at the pool wall to under the hot tub slab :grrrr: One night without water other than the neighbors hose and we'd dug under the slab far enough to call in a plumber who had the right tools to work with PEX. Thank God for good neighbors!
 

Attachments

  • 11.jpg
    11.jpg
    186.2 KB · Views: 792
  • 12.jpg
    12.jpg
    130.9 KB · Views: 792
Gunnite! Yes we finally have something that looks like a pool :shoot:

Oh, and when the digging was happening the PB decided we really should have a bench to sit on next to the steps for the waterfall to splash down on peoples' backs while they sit enjoying the pool. :goodjob: 
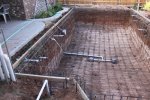
Even though we're not done yet I can HIGHLY recommend Chuck Burris at Classic Pools for anyone who needs a pool built in West Texas.
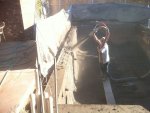
 

Attachments

  • 17.JPG
    17.JPG
    142.8 KB · Views: 792
  • 18.JPG
    18.JPG
    242.8 KB · Views: 792
Some of you probably saw my thread about using marble in the pool bottom. We decided to cut out a cotton boll for the bottom of the pool and based on the great info here we went with a porcelain tile instead of the marble... it might have had something to do with the new water jet we got at work and that we wanted to play with cutting something other than steel :-D
 

Attachments

  • 21.JPG
    21.JPG
    200.5 KB · Views: 788
  • 22.jpg
    22.jpg
    96.9 KB · Views: 788

Enjoying this content?

Support TFP with a donation.

Give Support
Yep saw that cotton bowl post. Good choice and I love the fence...very nice! Going to enjoy this post too, and cant wait for more. I see another benefit to your pool addition, as it appears you have just about eliminated future yard work out back! :lol:
 
Yep. Our twin boys are seniors this year so I figure I'm about to loose my lawn mowing crew; what better time than to get rid of the lawn all together :cool:

I've got some more pics on my camera I need to get off. The last fence posts went up today and concrete forming for the pool deck is supposed to be finished up today as well. They say we may have water in the pool by the end of the week :party: :whoot: :party: of course that means I'd better get my butt in gear on getting the pool equipment plumbed and wired :whip:
 
Yep. I ordered the TF-100 about a month ago and its been sitting on the kitchen table along with a bunch of other stuff that's just waiting for the pool to be ready for it. I haven't figured out if I know how to use the TF-100, but I figure I'll get to that pretty soon. In the past with our Intex I just watched CC and PH and was able to keep things pretty with only the cheap test kit, but now that I've got a significant investment I figure I'd like to be better informed.
 
MarkTTU said:
Yep. I ordered the TF-100 about a month ago and its been sitting on the kitchen table along with a bunch of other stuff that's just waiting for the pool to be ready for it. I haven't figured out if I know how to use the TF-100, but I figure I'll get to that pretty soon. In the past with our Intex I just watched CC and PH and was able to keep things pretty with only the cheap test kit, but now that I've got a significant investment I figure I'd like to be better informed.

Just follow the step by step directions on the underside of the top lid and you will be good to go. I even have to read the directions still when I do some test. Directions are very easy to follow and if you are still not getting it, you can ask here as well.
 
Yep it sure is. You could go.ahed and run on your fill water. It would be good to know your baseline, but more importantly, it would get you faniliar with the tests. You can do all but CYA, but use a 20 mil sample on the FC. Your city water will or should have some. If it doesn't, let it run for. bit to see. Glad you got the kit, and anxious for more pics.
 
OK, got a few more pics for y'all. The concrete deck got poured yesterday, but I didn't get pics of it yet. In the meantime here are some just before the deck got poured :-D
 

Attachments

  • 2.JPG
    2.JPG
    194.3 KB · Views: 540
  • 1.JPG
    1.JPG
    172.1 KB · Views: 540

Enjoying this content?

Support TFP with a donation.

Give Support
Thread Status
Hello , This thread has been inactive for over 60 days. New postings here are unlikely to be seen or responded to by other members. For better visibility, consider Starting A New Thread.