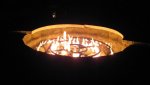
I uploaded a new video of the plaster work. For some reason I missed the end of the day.
http://youtu.be/93cyOsvftEk
Yes, they drained the spa.
http://youtu.be/93cyOsvftEk
Yes, they drained the spa.

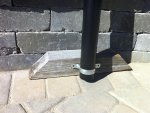
Nightmare said:Quick couple questions. The Tiki Torches arrived today and I'm still working on how I want to secure them to the pool. The torches are something like 90" tall and the tube is about 2.5" diameter. I was going to strap them to the back side of the pool (the raised bond beam) with some kind of metal strap and concrete anchor. I think I might try to get the pole off the side of the wall using something like a pressure treated 4x4 (strap around the pole and the 4x4 and pull them tight against the wall). Has anyone done anything like that?