
COMPLETED: DIY Travertine Pool/Patio/Waterfall Remodel in AZ
Hi, I was a serious lurker on this forum for a couple years…many thanks to posters on this forum and other forums which I referenced for this project. This is a DIY patio/pool remodel that my wife and I undertook a few years ago. We actually finished it almost two years ago July (2014, time flies when you redo your kitchen and have two kids getting married in that period), although finished is a subjective term as there is always more to do. This is late, but I am posting so that others who may attempt something similar might get some inspiration and/or decide to save themselves the trouble…it was a LOT of work.
It started out as a remodel which we got a number of bids for. One of our biggest issues with contracting out the project was that we had to temper our desires with the cost of the project.
What we wanted “minimum”:
1) New travertine patio and pool deck, roughly 900-1000 sq ft (current patio just concrete, existing “cool deck” on pool was flaking and crumbling
2) New waterline tile and pebble type pool surface (current was 20+ year old plaster)
3) Expanded water feature (current “waterfall” not pretty, not in center, old fashioned)
What we “desired”:
1) Expanded patio and pool deck (bigger than the current footprint)
2) New travertine walkway to an outside basement stairwell
3) All patios/walkways/pool deck to be “level”…no steps or ledges at transitions, even to existing sidewalk, patio, basement stairwell
4) Eliminate the dated and boring “ cap tile ” that was a popular Phoenix area Shasta Pools invention built during the 1980s and 1990s
5) Expanded water feature that really makes the pool standout, remote controlled so that it didn’t have to be manually activated and deactivated
6) New Pool equipment
7) A landscaped “look” for the entire backyard that was yet undefined
We got 4 bids on different versions of the “minimum”. They differed in regards to travertine (at least one did not use it), amount of sq feet of patio decking (800-1100), size and type of water feature, differences in pool coping styles to deal with the “ cap tile “ issue mentioned above (we didn’t particularly like any of the solutions proposed). In any case, the bids ranged from $18K to $28K. The only “desired” feature in some of the bids was a slight increases in the deck/patio size.
A couple of the designers told us that it would be cheaper to have someone else do the patio portion, obviously pool contractors specialize in pools. The pool company would simply be hiring a subcontractor for the patio and then add an appropriate markup. We took this to heart and decided to break the project into two parts…patio and pool.
After some research, I decided that we would attempt the patio portion. About six months later, after some more research, I decided we could do the pool portion as well (but not the surfacing). I’ll try to document what we did…we started out gung-ho taking pictures of our progress; unfortunately that didn’t last and so there are some times when progress skips ahead.
Edited: SUMMARY OF COSTS and SNEAK PREVIEW
In some of the later posts in the thread, I have summarized the effort and cost (about $16,500) of this project. Here is a sneak preview.
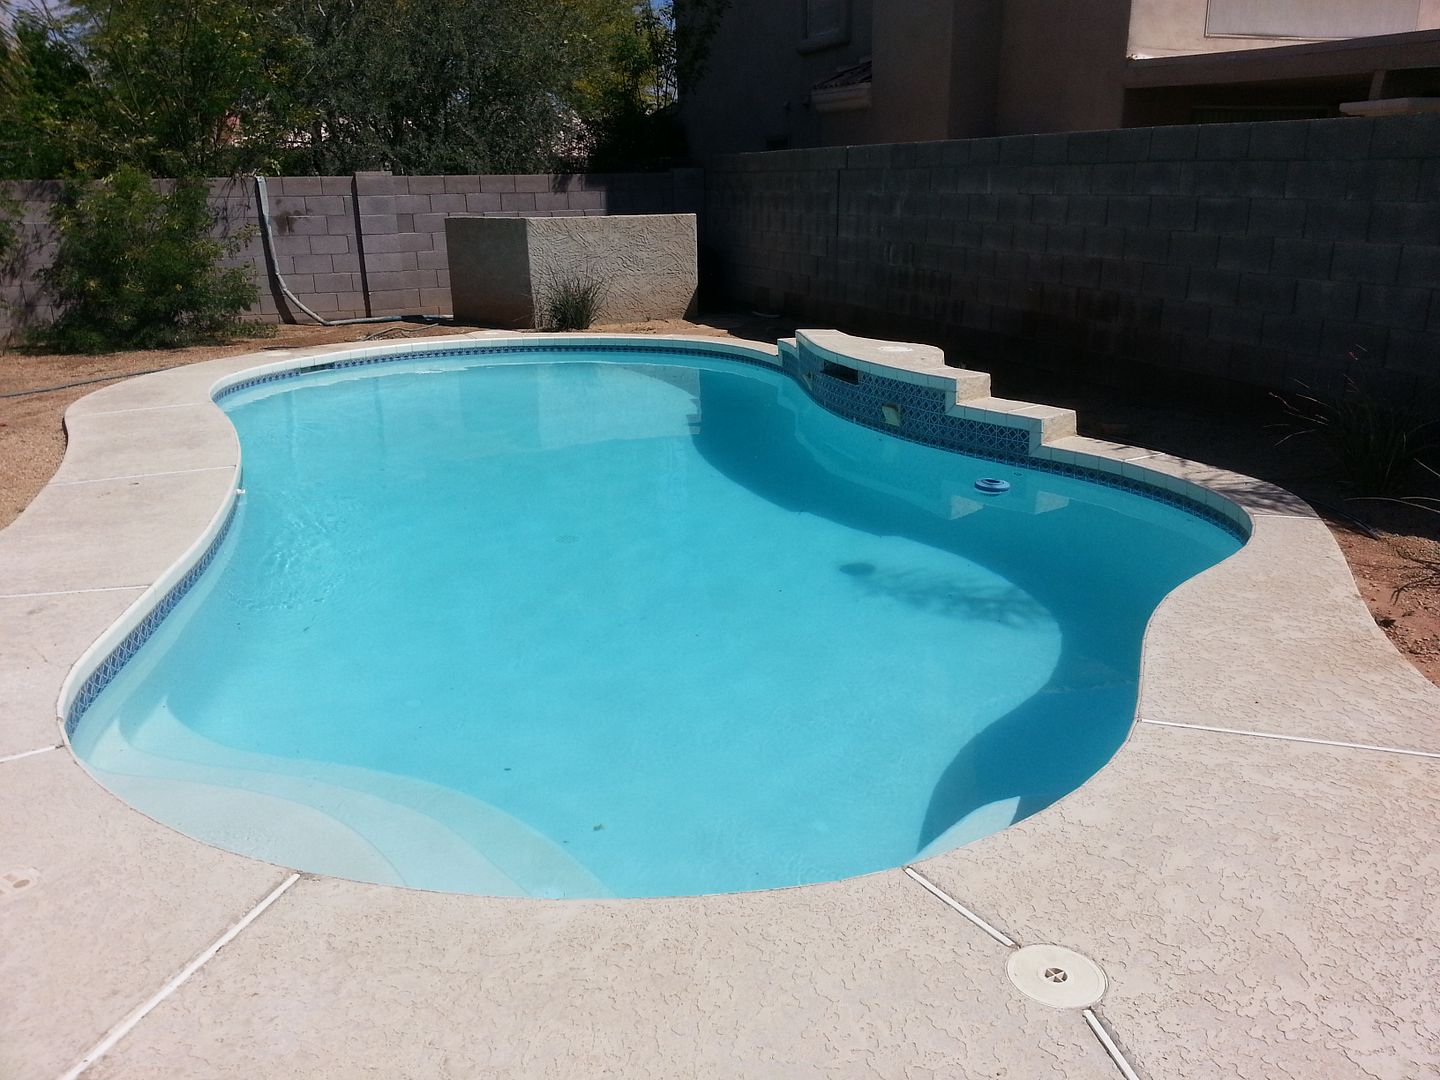
BEFORE
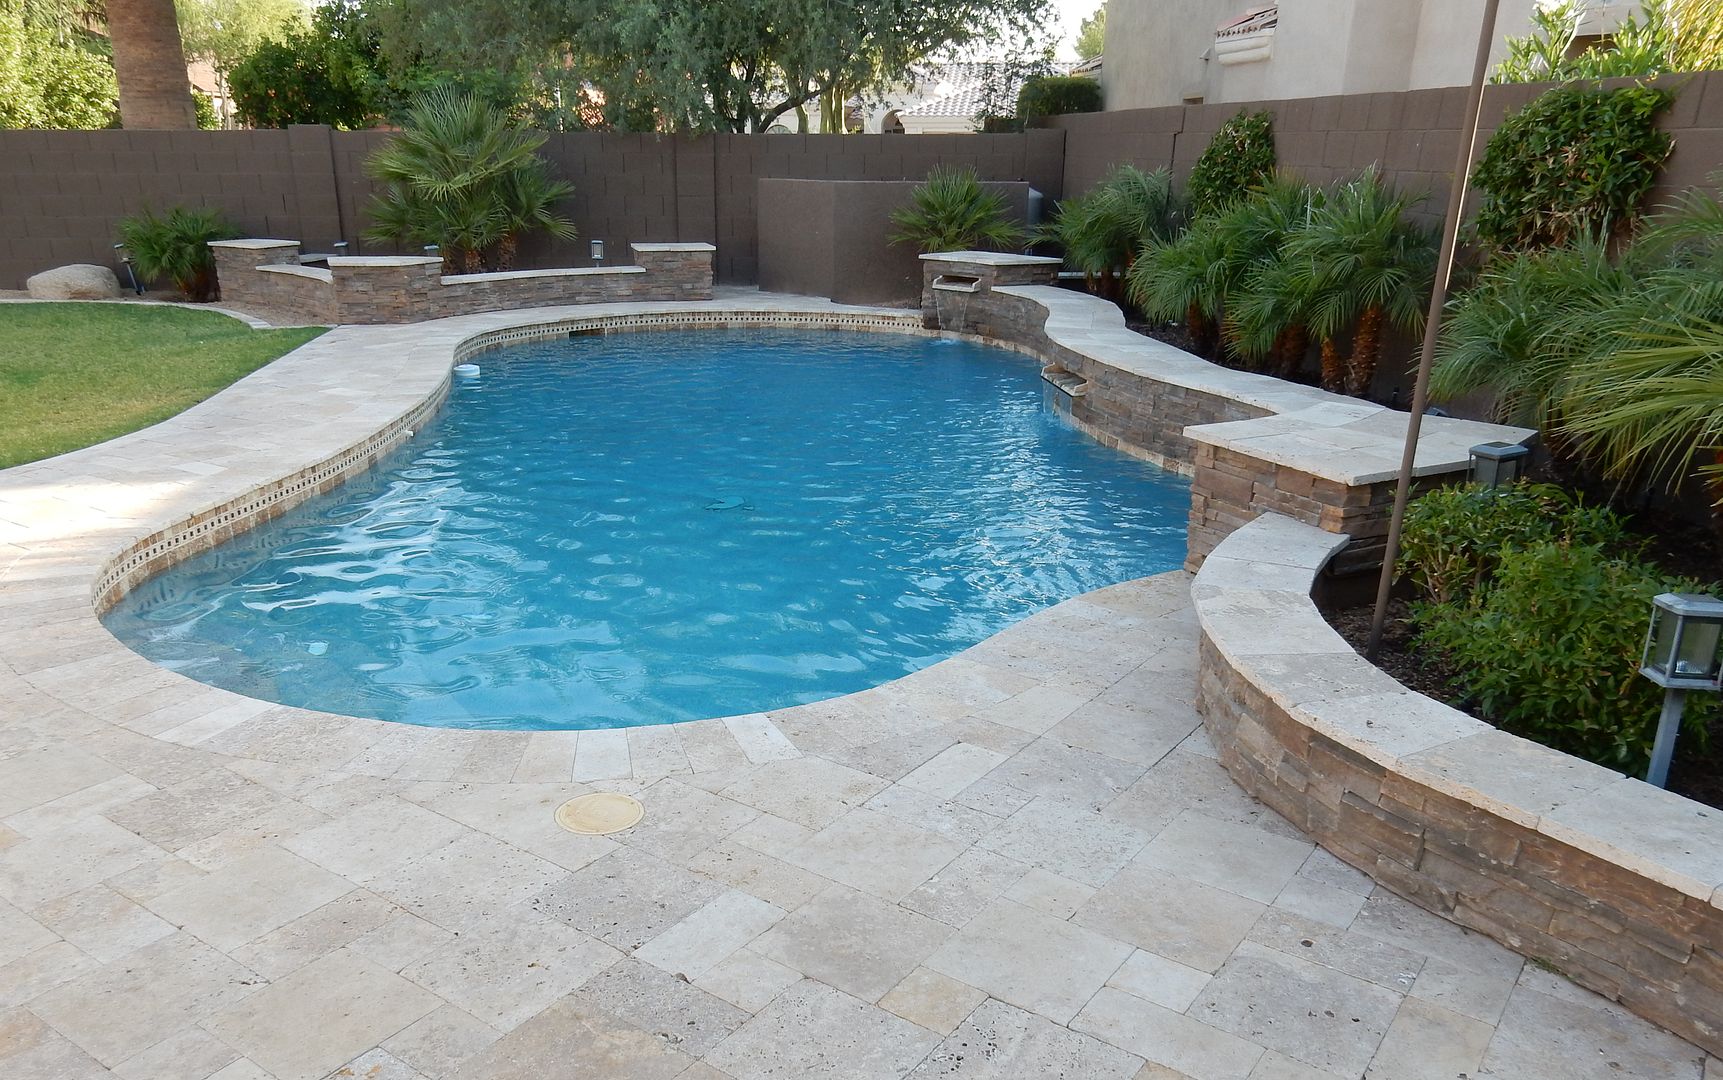
AFTER
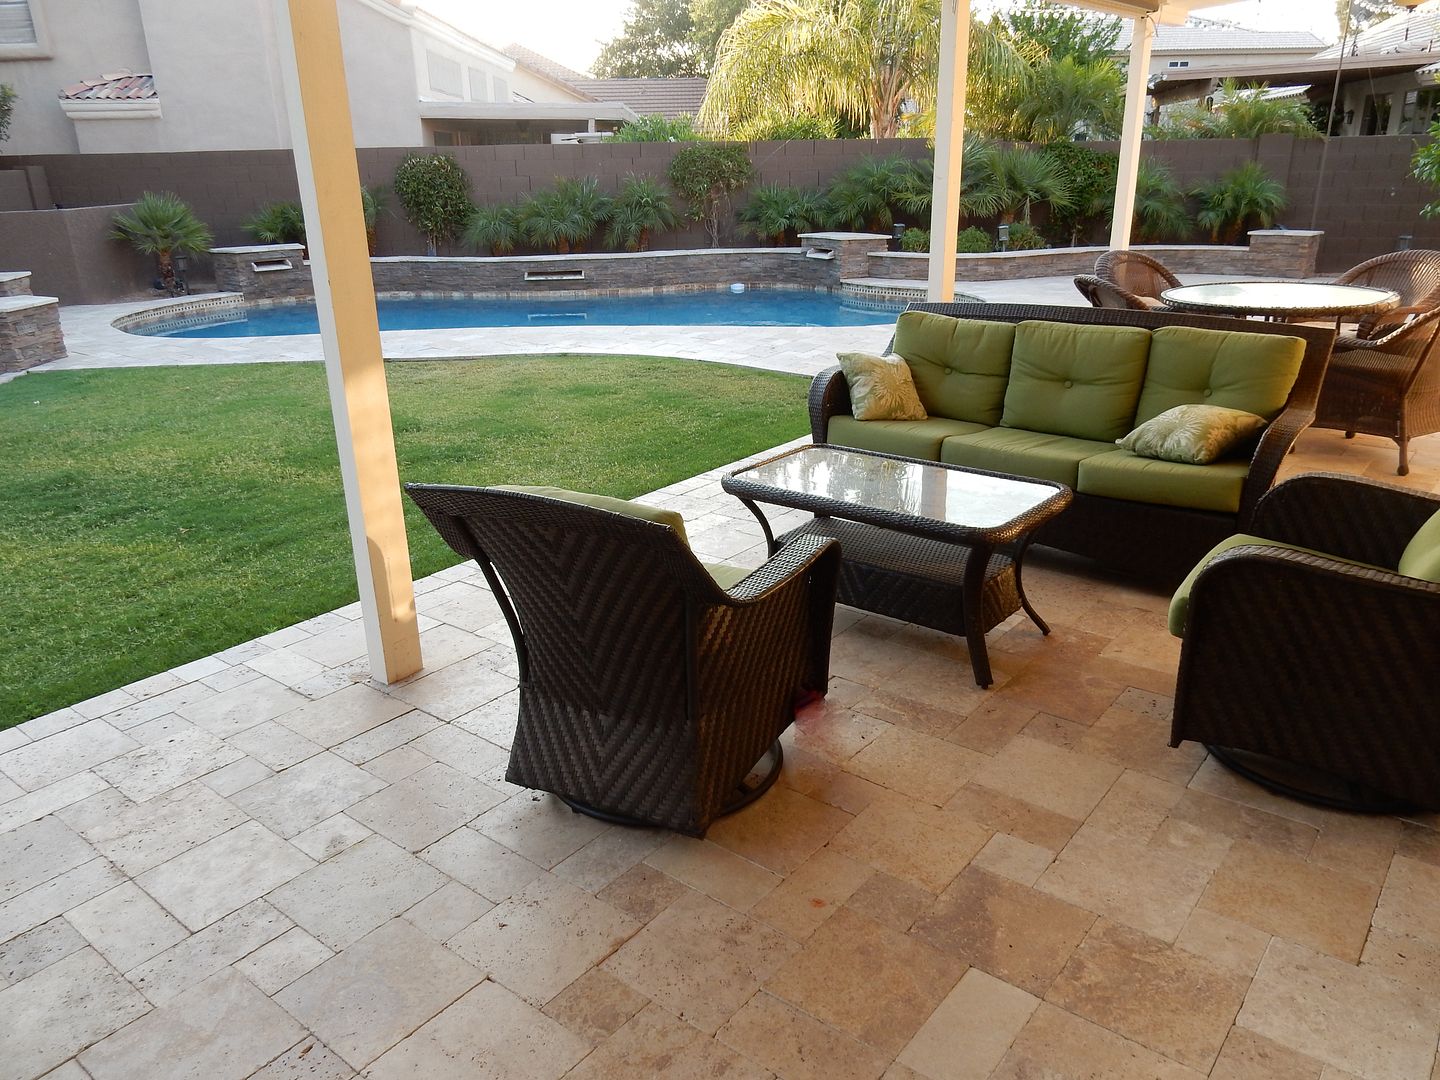
Another View
Hi, I was a serious lurker on this forum for a couple years…many thanks to posters on this forum and other forums which I referenced for this project. This is a DIY patio/pool remodel that my wife and I undertook a few years ago. We actually finished it almost two years ago July (2014, time flies when you redo your kitchen and have two kids getting married in that period), although finished is a subjective term as there is always more to do. This is late, but I am posting so that others who may attempt something similar might get some inspiration and/or decide to save themselves the trouble…it was a LOT of work.
It started out as a remodel which we got a number of bids for. One of our biggest issues with contracting out the project was that we had to temper our desires with the cost of the project.
What we wanted “minimum”:
1) New travertine patio and pool deck, roughly 900-1000 sq ft (current patio just concrete, existing “cool deck” on pool was flaking and crumbling
2) New waterline tile and pebble type pool surface (current was 20+ year old plaster)
3) Expanded water feature (current “waterfall” not pretty, not in center, old fashioned)
What we “desired”:
1) Expanded patio and pool deck (bigger than the current footprint)
2) New travertine walkway to an outside basement stairwell
3) All patios/walkways/pool deck to be “level”…no steps or ledges at transitions, even to existing sidewalk, patio, basement stairwell
4) Eliminate the dated and boring “ cap tile ” that was a popular Phoenix area Shasta Pools invention built during the 1980s and 1990s
5) Expanded water feature that really makes the pool standout, remote controlled so that it didn’t have to be manually activated and deactivated
6) New Pool equipment
7) A landscaped “look” for the entire backyard that was yet undefined
We got 4 bids on different versions of the “minimum”. They differed in regards to travertine (at least one did not use it), amount of sq feet of patio decking (800-1100), size and type of water feature, differences in pool coping styles to deal with the “ cap tile “ issue mentioned above (we didn’t particularly like any of the solutions proposed). In any case, the bids ranged from $18K to $28K. The only “desired” feature in some of the bids was a slight increases in the deck/patio size.
A couple of the designers told us that it would be cheaper to have someone else do the patio portion, obviously pool contractors specialize in pools. The pool company would simply be hiring a subcontractor for the patio and then add an appropriate markup. We took this to heart and decided to break the project into two parts…patio and pool.
After some research, I decided that we would attempt the patio portion. About six months later, after some more research, I decided we could do the pool portion as well (but not the surfacing). I’ll try to document what we did…we started out gung-ho taking pictures of our progress; unfortunately that didn’t last and so there are some times when progress skips ahead.
Edited: SUMMARY OF COSTS and SNEAK PREVIEW
In some of the later posts in the thread, I have summarized the effort and cost (about $16,500) of this project. Here is a sneak preview.
BEFORE

AFTER

Another View

Last edited:


