New Tucson Owner-Builder Adventure - Advice Welcome!

azdesertpool

0
Gold Supporter
Sep 11, 2015
86
Tucson, Arizona
Typical Owner Builder story here - My four kids (oldest is 10) plus wife had a list of must haves: spa + deep end + tanning ledge + no rough pebble. I added a water feature and travertine. Local PBs (18 months ago) said our budget had to grow (and without the water feature I wanted). While saving funds and talking with more PBs, I came across TFP and the owner-build seed was planted. Developed a list of potential subs, talked with some local OBs, and have moved forward (although I did stumble across a pool consultant who, for the cost and help he promises, seems like cheap insurance for the mistakes I will inevitably make). I have come across a number of great ideas on this site, many of which will sadly have to wait for pool 2.0 (ozdiver’s swimjets were tough to cut) but we are dealing with space constraints and hope that the pool can be completed before we melt through a second summer in this house. Our backyard is still bare dirt, waiting for the pool (phase 1) before any other landscaping/hardscaping/projects follow (phases 2 to n).

P1060490_zps6qi4lgoi.jpg


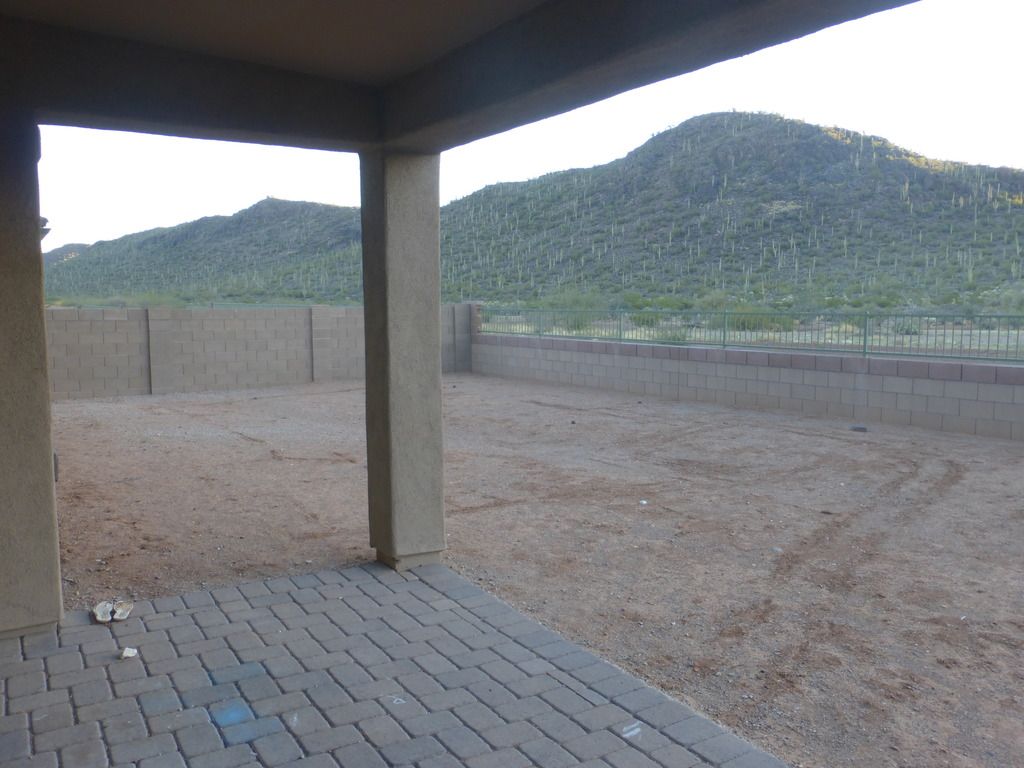
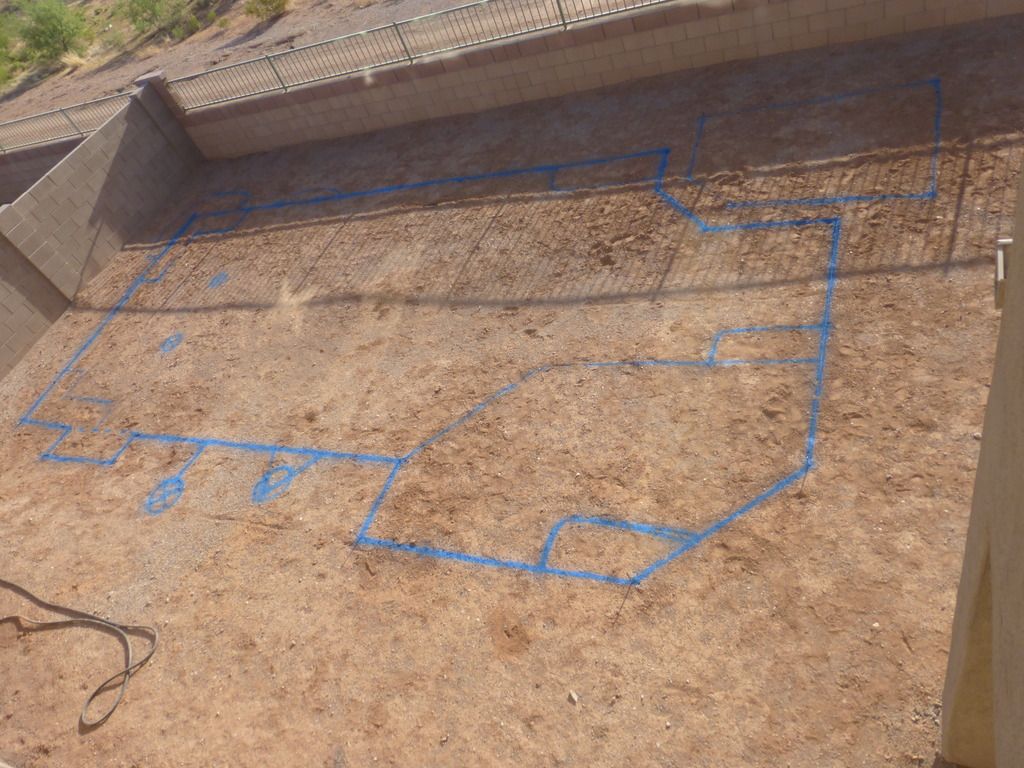
Pool will go in corner of the yard shown in this picture, and pretty much fill up the whole space from the side wall to the patio (you might notice my chicken scratches in the dirt that we used as an outline for PBs).

Attached (hopefully) is our current design. View attachment Pool Plan for permitting.pdf Roughly 16x32 rectangular, 3.5 ft deep to almost 8ft with 18” raised 6x8 spa, grotto plus additional rock to help spread out the water feature. Our subdivision is cursed with small yards (ours is only 30’ deep) and expansive soil, which limit where we can put the pool and how close to the house.

We submitted our plan for permits and are waiting on issuance, but since it is an Owner Build I am expecting the ability to make some changes along the way.
I know we need at least one more light in the pool (LEDs), and that both lights should ideally be placed facing away from the house. Any thoughts on plumbing, equipment or other changes to what’s listed in the plan? Are two skimmers preferable to one for this size pool, and are 1.5” returns sufficient?

Any advice, opinions, criticisms along the way from the esteemed knowledge base on TFP is greatly appreciated!

Pool specs:
32.7 x 18.8
3.5 depth to 7.8
523 sq ft; 103 ft peremiter
6x8 spa raised 18"
Intelliflo pump
3/4 whisperflo pump
420 cartridge filter
400k gas heater
 
Last edited:
I don't see a sanitation system listed? Or are you going to go with daily dosing of liquid chlorine?

Are you planning on using the spa like a hot tub in the winter? If so you might want plumbing separate from the pool water or put in a stand alone spa.

My only other concern is 3.5 is too shallow, IMO. That would just be about 3' of water, the other inches go up to the edge. In such a hot climate I'd go deeper all around to help avoid the water getting swampishly warm.

Thanks for the comments, Yippee. We are planning on liquid chlorine for now. The spa will most definitely be used as a hot tub during the winter, so I will have to make sure it is plumbed properly. I know my in-laws use valves at their equipment to pull water just from their spa, through the heater, and then back just to the spa; I assumed that was standard plumbing procedure for spas. Is there another/better way to plumb an inground spa?
I agree on the depth. I wanted 4' to be minimum, but all the professionals I have talked with claim our town requires the depth start no deeper than 3'6". I'll check to make sure the waterline depth can be 3'6", and not just the depth from the coping.

I'm hoping that in another two months my family and I are still as excited about this build as we are now.
 
What a pretty view from your back yard!! Are those things that look like sticks on the hillside cactus?

Sticks - :p Those are the saguaro cactus, which can grow up to 60 ft tall. Many are straight "sticks" for 40 or so years, until they start growing arms. We are only a few miles from Saguaro National Park, which straddles both sides of Tucson. I'm trying to fit one or two in our landscaping, but my kids (especially the younger ones) are worried about the "poke-ies" that grow on most of the native cactus.
 
Layout adventure this week: The layout guys came Tuesday afternoon. It was their 3rd or 4th pool of the day, and only geometric pool. I assumed the freeform pools would be harder to layout, with all the radii, but apparently geometric pools (at least ours) can be pain.
P1060637_zpsad1w72hv.jpg

I got home from work about 30 minutes after they started and not long after they realized the plans didn't accurately reflect our backyard geometry. To the eye, our back wall looks square to the house, but it isn't, which the layout guys didn't account for at first. They fixed the problem and started layout #2, and with me looking over their shoulder things were looking good (or so we thought).
We passed the layout inspection the next day.
The pool started looking a little small to me, which I assumed was just the "it looks small until it's dug" illusion. I measured it anyway and instead of 16 ft wide, the layout was only 14 ft wide. Whoops! No biggie, since we can fix the layout before the dig and it will still conform with the approved plans and approved layout inspection, right? Found out Thursday night that the excavators put us on their schedule for Friday morning. Luckily, the layout guy said he could come at 7:15 to fix the layout. Moving the stakes on one side of the pool over 2 ft couldn't take long, right? It ended up taking almost two hours to fix, because the back-wall-isn't-square-to-the-house problem kept throwing measurements off until someone realized they shouldn't try to make the rectangular pool square to both the house and the back wall when those two references aren't parallel. Adding to the problem was the fact the excavators lost almost an hour, and the owner was actually pulling the crew off the job to send them to another pool when we finally got the layout fixed. Who knew that just preparing to dig a hole could be such an ordeal?
 

Enjoying this content?

Support TFP with a donation.

Give Support
Dig Time:

The kids got a jump on the excavators last night. Just couldn't wait.
P1060654_zps8rimqlce.jpg


The excavators were expecting to finish the dig today, but got a late start. (By the way, to the layout guy's credit, he told the owner of the excavation company that he (the layout guy) would cover the lost hour for the excavation crew, and helped get the owner to put the crew back on the job). They got maybe half the pool dug today, hauling off 12 truck loads. With how much is left to go, I don't think they could have finished even with an earlier start this morning. They plan to finish up tomorrow, hopefully without any more delays or trouble.
P1060675_zpstvit0sdl.jpg


The kids have been excited about a pool for a while, but I think it has been sort of an abstract thing for them. Now its real. Hopefully we can all have some patience throughout the rest of the build.

Question for those who know - our design includes a natural rock grotto/waterfall in the back corner. There is only about 3 ft of clearance between the wall and the hole. Is that anywhere near enough room to maneuver rocks back behind the pool and build a grotto/waterfall?
 
The little digging the pool.............OH my how cute is that!!!!!!!!!!

WOW and good job on measuring and being there! Just think if you were not :shock:

So did they square it to the wall or house in the end?

Do me a favor please......find some cheap tennis balls and have them ready to put on the ends of the rebar when that time comes. The thought of one of the littles tripping and.........:( Better safe than sorry! Of course get some extra for them to play with LOL

Kim
 
Awww how cute, when I did my fist pool my little one was just 3 and a couple of days before the dig she was outside doing the same thing when I asked she said "I'm helping getting it started" she was so excited, they will just have the best summer ever!


Sent from my iPhone using Tapatalk
 
So did they square it to the wall or house in the end?

They squared it to the house. Most of the decking will be between the house and the pool, and I think it would be noticeable if the pool was not squared to the house. We'll be putting some plants between the pool and the back wall, so I think having that backside of the pool and the back wall non-parallel will be much less noticeable.

They finished the dig today, but took longer than they expected. The backhoe and dump trucks worked from 7-10:30am. A two man crew then stayed behind with shovels and an electric jackhammer for a "30-min cleanup" that stretched for almost 4 hours. It looks nice now, but I am sure it will look even nicer with plumbing, rebar, shotcrete, etc...
 
You did the correct call on squaring it to the house! NICE!

What plants will you be doing on the back side? Have you thought about having someone doing a mural on the wall?? THAT could be fun to design!

Kim
 
Haven't updated in a while. We apparently are on the slow-motion pool building track, so I have plenty of time to update. We hit various snags and scheduling problems due to the apparent hyper-demand for certain pool subs in Tucson right now. Our consultant, who is helping with sub scheduling, originally told us we would be swimming by mid-April. Not quite.

I was a little surprised the excavators didn't hit any rock even though we dug 8+ feet down and are right at the bottom of the slope off the rocky mountain behind us. However, our back yard is covered with these clay hunks that might as well be rocks.

P1060847_zpspad0wlh9.jpg


Almost as soon as the excavators left, I decided that the deep end "perch" was not quite deep enough. The excavators left it only 10-12 inches lower than the bench that it was right in front of. That might have been ok for a deeper bench, but not the standing perch I imagined. Plumber was scheduled for the following Tuesday, so I didn't have a lot of time but I spent a few minutes each night and morning chipping away at it. In the below picture you can see the perch in the back left corner. This was after I had already knocked it down a few inches.

IMG_20160402_151717201_HDR_zps73b6abkv.jpg


I ended up with more time than I expected - between an unforced scheduling snafu and the Plumber getting knocked out with Strep which set us back 10 days longer than we planned. I used the time for a couple of things including to take out more of the perch. The above picture shows it near the top of light-colored caliche-like clay layer. I eventually got it down to the bottom of the light-colored clay layer and was much happier with that depth.
 
You will LOVE your standing perches. We have two standing benches as we call them.
 

Enjoying this content?

Support TFP with a donation.

Give Support
Thread Status
Hello , This thread has been inactive for over 60 days. New postings here are unlikely to be seen or responded to by other members. For better visibility, consider Starting A New Thread.