Grass clippings on the solar cover drove me nuts. Dragging it in and out of the pool was a pain. My husband didn't want to stress the rails by hanging brackets off it. Drilling into the supports for a Solar Saddle was a no go. So I devised my own holder. I used 1" PVC set on 4' rebar hammered 1' into the soil. It's just sturdy enough to hold a wet solar cover (my pool is an 18' round) but not too sturdy that it will aid a kid trying to get into the pool. The "goalposts" swing freely on the rebar.
I made 5 "goalposts" to hold the cover. Cost was under $30 including primer and cement. Took about 1.5 hours from start to finish, but would have been less if my kids weren't interrupting me!

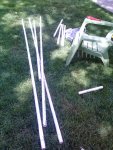
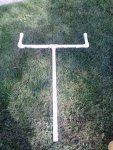
The single vertical pipe is 3' high, 1' pipe on each side of the tee and each upright arm was cut 6" then capped. This was the right size for my cover. After dry fitting and gluing:

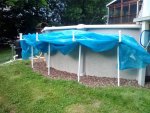
With cover on:

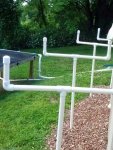
With cover off. The goalposts are easily removed. I have safety caps for the rebar when not covered by the posts or I can remove them.

I will have to see how well this holds up in the summer, but the cover was very easy to take off and put back on by one person and can be done from inside the pool as it sits just below the railing.
I made 5 "goalposts" to hold the cover. Cost was under $30 including primer and cement. Took about 1.5 hours from start to finish, but would have been less if my kids weren't interrupting me!

The single vertical pipe is 3' high, 1' pipe on each side of the tee and each upright arm was cut 6" then capped. This was the right size for my cover. After dry fitting and gluing:

With cover on:

With cover off. The goalposts are easily removed. I have safety caps for the rebar when not covered by the posts or I can remove them.

I will have to see how well this holds up in the summer, but the cover was very easy to take off and put back on by one person and can be done from inside the pool as it sits just below the railing.

