Correct. Except the SWG doesn't burn out. It just keeps producing gas with no flow. Then an explosion is possible. It's localized to the area, it's not going to level your house, but you have a lot of money invested in that small area.So for example if my filter blew you are staying that in my current scenerio the flow switch would get flow and the SWG would not but the system would continue to run and maybe burn out the swg. If the switch was just before the SWG and the filter blew the switch would get "no flow" and ? shut off the swg (ie protect). Is that the rationale?

Salt level 3600 last week and 4000 today! Causes?
- Thread starter william13
- Start date
You are using an out of date browser. It may not display this or other websites correctly.
You should upgrade or use an alternative browser.
You should upgrade or use an alternative browser.
- Oct 1, 2022
- 792
- Pool Size
- 20000
- Surface
- Plaster
- Chlorine
- Salt Water Generator
- SWG Type
- Hayward Aqua Rite (T-15)
So looks like I am not going to Vitamin C clean this weekend and will take a few days for Amazon to deliver the Valve. In the mean time I am going to relate some pool chemistry facts:
Today just tested
Chlorine 2.0
Alkalinity 120
Salt 4200* see below picture
pH 8.2
So as the story goes, last week I had my wife telephone pool company that pH of pool was too high and I needed it to be approx 7.2. The director came and reported "you need new filter" and nothing about pH.
I was concerned salt level was reading high on board "4000". Today I found a white substance in bottom of pool and I can only guess they threw in some salt yesterday when I was at work. Today I used my TFP kit and got between 42 and 4400. I read "heard" too high of salt can cause electronics to go so what is too high I am asking?
I really believe from this website i will be able to improve things a lot. I appreciate every ones help!
PS previously I claimed my old hose fit well. I stated that because the hose was positioned normally over the 1.5 inch pipe. However I tried to reattach that hose after removing it and cutting off the end and I discovered it did not fit at all. I suspect whomever attached it, heated and stretched it. I recieved another hose from Amazon today (1.5 inch) and of course it does not fit. So the 2 inch will do. (as everyone already told me)
Attachments

Last edited:
- Oct 1, 2022
- 792
- Pool Size
- 20000
- Surface
- Plaster
- Chlorine
- Salt Water Generator
- SWG Type
- Hayward Aqua Rite (T-15)
I am making a shopping list to re-organize my piping:
1: Valve Amazon.com
2. 2 inch T with 1/2 inch threaded female: Amazon.com
3. 2 inch pvc couplings Amazon.com
4. This is where I need a little pvc help. I want my 2 inch drain line to attach to 1.5 inch pipe with Valve #1 so I think I need this but I am not sure: https://www.amazon.com/s?k=2+inch+t...refix=,aps,127&ref=nb_sb_ss_recent_2_0_recent
Is this the right reducer for this purpose?
That looks like cal-hypo or shock as salt would start dissolving quickly. However then your FC should have been higher so just guessing. Why would they add salt?So looks like I am not going to Vitamin C clean this weekend and will take a few days for Amazon to deliver the Valve. In the mean time I am going to relate some pool chemistry facts:
Today just tested
Chlorine 2.0
Alkalinity 120
Salt 4200* see below picture
pH 8.2
So as the story goes, last week I had my wife telephone pool company that pH of pool was too high and I needed it to be approx 7.2. The director came and reported "you need new filter" and nothing about pH.
I was concerned salt level was reading high on board "4000". Today I found a white substance in bottom of pool and I can only guess they threw in some salt yesterday when I was at work. Today I used my TFP kit and got between 42 and 4400. I read "heard" too high of salt can cause electronics to go so what is too high I am asking?
I really believe from this website i will be able to improve things a lot. I appreciate every ones help!
PS previously I claimed my old hose fit well. I stated that because the hose was positioned normally over the 1.5 inch pipe. However I tried to reattach that hose after removing it and cutting off the end and I discovered it did not fit at all. I suspect whomever attached it, heated and stretched it. I recieved another hose from Amazon today (1.5 inch) and of course it does not fit. So the 2 inch will do. (as everyone already told me)
View attachment 558746
Back to your plumbing. Is your heater still connected to the pipe work with flow going through it? Flow going through a heater or a filter creates back pressure on the system. IMO you want your flow switch downstream of these types of restrictions along with your SWCG.
If your heater is not working and that is not on the near term list for purchases then just cut it out and put a piece of pvc pipe to connect to the 2 pipes. Then when you buy a heater it can be set up and pipe inlets and outlets cut to fit. Also add a heater bypass at that time.
Lake Placid
In The Industry
- May 27, 2021
- 748
- Pool Size
- 17000
- Surface
- Fiberglass
- Chlorine
- Salt Water Generator
- SWG Type
- Pentair Intellichlor IC-40
This is an application where you can use a 1-1/2 to 2 inch Neverlube valve. On one side of the valve the 1-1/2 inch pipe will slip into the collar, the other side just use a 2 inch union with the 2 inch pipe and it will fit over the collar on the valve, no need for a reducer. If you want to weld “by the book” from Jandy use grey cement on the fittings that involve the valve body. Any other pvc you can use standard pvc cement (I typically use Rain r Shine due to its faster setup times for service). Although in a pinch I have and have known plenty of guys that just use Rain r Shine on all the joints (including valve bodies) and haven’t had any issues. Last tip - use clear primer and you won’t have purple everywhere on your joints.4. This is where I need a little pvc help. I want my 2 inch drain line to attach to 1.5 inch pipe with Valve #1 so I think I need this but I am not sure: https://www.amazon.com/s?k=2+inch+t...refix=,aps,127&ref=nb_sb_ss_recent_2_0_recent
Edited to add: The reducer that’s shown at the top is not the correct fitting. It is for Drain Waste and Vent and should not be used for pressure applications. If you want to use the larger valve you would use a reducer bushing for 2 to 1-1/2 in pipe glued inside the collar of the valve.
Last edited:
- Oct 1, 2022
- 792
- Pool Size
- 20000
- Surface
- Plaster
- Chlorine
- Salt Water Generator
- SWG Type
- Hayward Aqua Rite (T-15)
It has been removed, and the pipes are anastomosedThat looks like cal-hypo or shock as salt would start dissolving quickly. However then your FC should have been higher so just guessing. Why would they add salt?
Back to your plumbing. Is your heater still connected to the pipe work with flow going through it? Flow going through a heater or a filter creates back pressure on the system. IMO you want your flow switch downstream of these types of restrictions along with your SWCG.
If your heater is not working and that is not on the near term list for purchases then just cut it out and put a piece of pvc pipe to connect to the 2 pipes. Then when you buy a heater it can be set up and pipe inlets and outlets cut to fit. Also add a heater bypass at that time.
For the non surgically inclined, that means spliced. Also, our learn for the day.and the pipes are anastomosed
")
The Taylor 9781 comparator block tests PH to 8.2. It comes in the K-1000 kit if you don't have the reagents already.
- Oct 1, 2022
- 792
- Pool Size
- 20000
- Surface
- Plaster
- Chlorine
- Salt Water Generator
- SWG Type
- Hayward Aqua Rite (T-15)
SorryFor the non surgically inclined, that means spliced. Also, our learn for the day.
- Oct 1, 2022
- 792
- Pool Size
- 20000
- Surface
- Plaster
- Chlorine
- Salt Water Generator
- SWG Type
- Hayward Aqua Rite (T-15)
Using the TFP pro salt kit which I believe goes there also.The Taylor 9781 comparator block tests PH to 8.2. It comes in the K-1000 kit if you don't have the reagents already.
- Oct 1, 2022
- 792
- Pool Size
- 20000
- Surface
- Plaster
- Chlorine
- Salt Water Generator
- SWG Type
- Hayward Aqua Rite (T-15)
I just have one more question since I have a chance here to make things go from a poor job to a good job. If I get 1 1/2 to 2 inch Neverlube and my pipes are 2 inches from pump to filter, won't I create a resistance as water goes from 2" to 1.5 inch (internal diameter of valve) to 2" again?This is an application where you can use a 1-1/2 to 2 inch Neverlube valve. On one side of the valve the 1-1/2 inch pipe will slip into the collar, the other side just use a 2 inch union with the 2 inch pipe and it will fit over the collar on the valve, no need for a reducer. If you want to weld “by the book” from Jandy use grey cement on the fittings that involve the valve body. Any other pvc you can use standard pvc cement (I typically use Rain r Shine due to its faster setup times for service). Although in a pinch I have and have known plenty of guys that just use Rain r Shine on all the joints (including valve bodies) and haven’t had any issues. Last tip - use clear primer and you won’t have purple everywhere on your joints.
Edited to add: The reducer that’s shown at the top is not the correct fitting. It is for Drain Waste and Vent and should not be used for pressure applications. If you want to use the larger valve you would use a reducer bushing for 2 to 1-1/2 in pipe glued inside the collar of the valve.
Not really.won't I create a resistance as water goes from 2" to 1.5 inch (internal diameter of valve) to 2" again?
The Internal Diameter of the valve is 1.900", which is the same as the Outside diameter of 1.5" PVC pipe.
The ID of 2" pipe is 2.047.
So, the difference is only 0.147"

Last edited:
- Oct 1, 2022
- 792
- Pool Size
- 20000
- Surface
- Plaster
- Chlorine
- Salt Water Generator
- SWG Type
- Hayward Aqua Rite (T-15)
Thank you: Found this supporting your response: https://lesl.a.bigcontent.io/v1/static/SA5250Not really.
The Internal Diameter of the valve is 1.900", which is the same as the Outside diameter of 1.5" PVC pipe.
The ID of 2" pipe is 2.047.
So, the difference is only 0.147"
View attachment 559013
Last edited:
- Oct 1, 2022
- 792
- Pool Size
- 20000
- Surface
- Plaster
- Chlorine
- Salt Water Generator
- SWG Type
- Hayward Aqua Rite (T-15)
I received the Jandy valve 48 hours ago after few weeks wait. On hand I have Oatley "regular clear" and "all purpose" which are not Weld 724 gray. My home depot does not have this cement on hand. If I order from Amazon I have to buy a whole quart just for one valve. Is anyone aware of where you an get smaller quantities? I hate to waste.This is an application where you can use a 1-1/2 to 2 inch Neverlube valve. On one side of the valve the 1-1/2 inch pipe will slip into the collar, the other side just use a 2 inch union with the 2 inch pipe and it will fit over the collar on the valve, no need for a reducer. If you want to weld “by the book” from Jandy use grey cement on the fittings that involve the valve body. Any other pvc you can use standard pvc cement (I typically use Rain r Shine due to its faster setup times for service). Although in a pinch I have and have known plenty of guys that just use Rain r Shine on all the joints (including valve bodies) and haven’t had any issues. Last tip - use clear primer and you won’t have purple everywhere on your joints.
Edited to add: The reducer that’s shown at the top is not the correct fitting. It is for Drain Waste and Vent and should not be used for pressure applications. If you want to use the larger valve you would use a reducer bushing for 2 to 1-1/2 in pipe glued inside the collar of the valve.
This is what I useI received the Jandy valve 48 hours ago after few weeks wait. On hand I have Oatley "regular clear" and "all purpose" which are not Weld 724 gray. My home depot does not have this cement on hand. If I order from Amazon I have to buy a whole quart just for one valve. Is anyone aware of where you an get smaller quantities? I hate to waste.
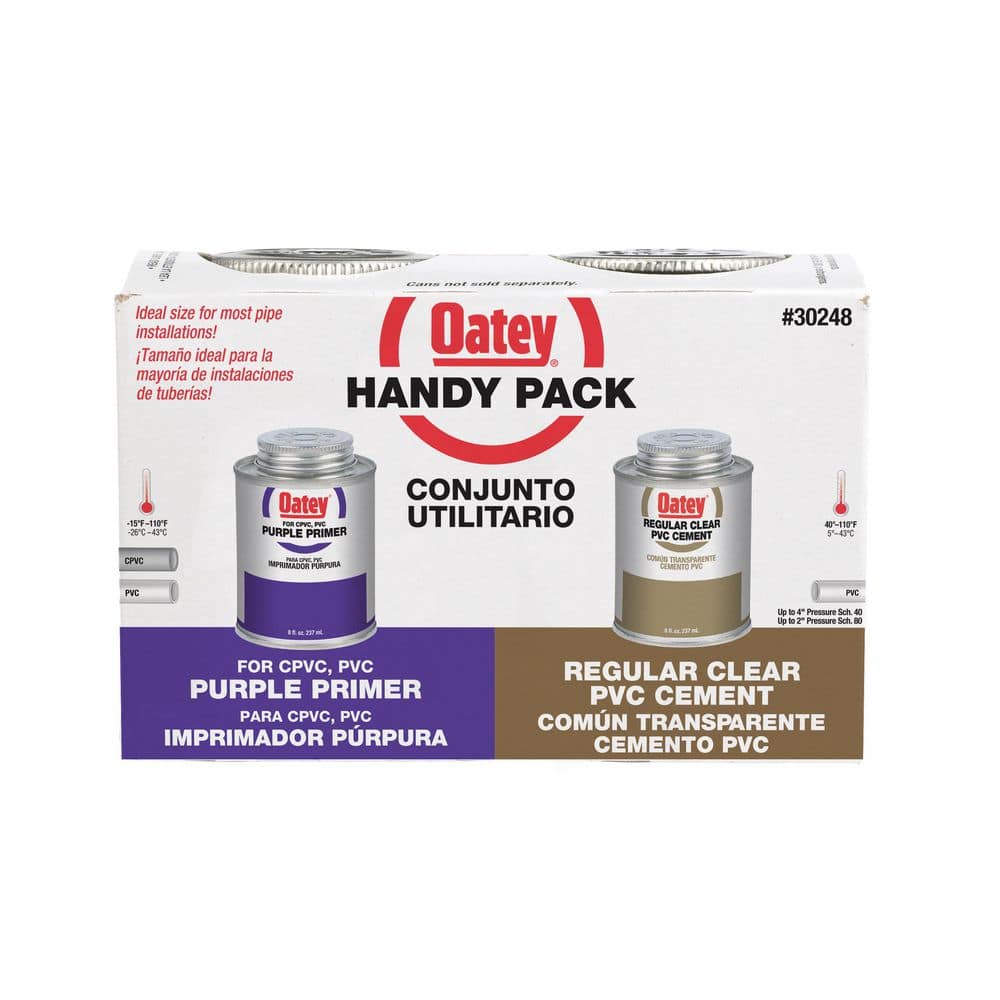
Oatey 8 oz. Purple CPVC and PVC Primer and Regular Clear PVC Cement Combo Pack 302483 - The Home Depot
The Oatey 8 oz. Purple Primer and PVC Regular Clear Cement Handy Pack gives you everything you need for a smooth installation and convenient storage, at the best value. Recommended for DWV, pressure pipe,
www.homedepot.com
- Oct 1, 2022
- 792
- Pool Size
- 20000
- Surface
- Plaster
- Chlorine
- Salt Water Generator
- SWG Type
- Hayward Aqua Rite (T-15)
This is what I already have but the product instructions mentioned use weld gray 724. James W also indicated that what you mentioned would be ok. BTW as I was preparing to insert in the Jandy today,(which I did not) I started to watch Youtubes for best practices. Noticed on youtube that the pump inlet should have a run of straight pipe a least 10 inches (diameter x 5) before a 90 degree. Mine has 2 inches before the 90. . I have not noticed problems but I have noticed small bubbles from my return. I thought it was from the chlorine generator. I think they placed the 90 close to pump because they may have not had other choices or just poor design.
Last edited:
Lake Placid
In The Industry
- May 27, 2021
- 748
- Pool Size
- 17000
- Surface
- Fiberglass
- Chlorine
- Salt Water Generator
- SWG Type
- Pentair Intellichlor IC-40
Use the glue you have it will be fine. With a self install you’re not going to be claiming a warranty issue with Jandy for the valve anyway and thus the cement you use isn’t going to be a factor. As far as the distance is concerned from the pump inlet you have to work with what you have. If you can adhere to best design practice do so, but in reality if you can’t it should work as proven by the previous install.
- Oct 1, 2022
- 792
- Pool Size
- 20000
- Surface
- Plaster
- Chlorine
- Salt Water Generator
- SWG Type
- Hayward Aqua Rite (T-15)
- Oct 1, 2022
- 792
- Pool Size
- 20000
- Surface
- Plaster
- Chlorine
- Salt Water Generator
- SWG Type
- Hayward Aqua Rite (T-15)
I am going to try to do a small project today.
Insert the flow switch and its T connector into the small area marked in red. When I measure how far the 2 inch piple can fit into the connector, it appears the pipe can insert a little over an inch. But when I insert a sample pipe to see how far it will insert, it only slips in 5/8 inch. I could pound it in I suppose but I have not tried because it will be tough to get off. The problem I need to solve is:
How much pipe do I cut from the red area? I know I at least should cut 5/8th inc x 2 or 1 and 1/4 inch. Will this make a good solid fitting or do I need to drive the pipe in deeper. The other problem I need to solve is the fact that the original pipe in the red circle is very close to the ground and it may be hard to coat the outside of the bottom with glue easily. Thoughts?
The other decisions I am making is to place the 3 port valve in the blue area (ie cut out the old flow valve which was put in wrong place) or simply plug that old flow valve with 3/4" plug and put Jandy multi-port in red zone.
Again the blue circle runs parallel to ground and a little harder access. The red area is slopped but maybe easier to install valve there. Thoughts?
PS again I can pound the pipe deeper into the T but then its hard to twist for the glue to spread. Would primer or glue make it slip on easier?
Attachments


Last edited:
Thread Status
Hello , This thread has been inactive for over 60 days. New postings here are unlikely to be seen or responded to by other members. For better visibility, consider Starting A New Thread.
Similar threads
- Replies
- 63
- Views
- 1K
- Replies
- 12
- Views
- 652
- Replies
- 10
- Views
- 208
- Replies
- 4
- Views
- 100